






















AI-Powered QR Code Generation with Framer Workshop: A No-Code Solution

Updated on Oct 16,2025

In today's digital landscape, QR codes have become ubiquitous, serving as a quick and efficient way to bridge the gap between the physical and online worlds. Imagine creating these essential tools without writing a single line of code. With Framer Workshop, this is now a reality. This article explores how to harness the power of AI within Framer Workshop to build a QR code generator, revolutionizing your workflow and unlocking endless possibilities for your projects. Stay ahead in the world of design and functionality by effortlessly creating limitless components, ready to be published and connected to CMS. Let's dive in!

Key Points

Discover how to leverage AI with Framer Workshop to generate functional components effortlessly.

Learn to create a QR code generator without any coding using simple prompts.

Understand the benefits of property controls and CMS connectivity within generated components.

Explore the process of integrating a QR code component into a landing page for enhanced user experience.

Gain insights into the capabilities and limitations of Framer Workshop for generating complex components.

Introduction to AI-Powered QR Code Generation

What is Framer Workshop?

Framer Workshop is a cutting-edge feature within Framer that allows users to create functional components using AI.
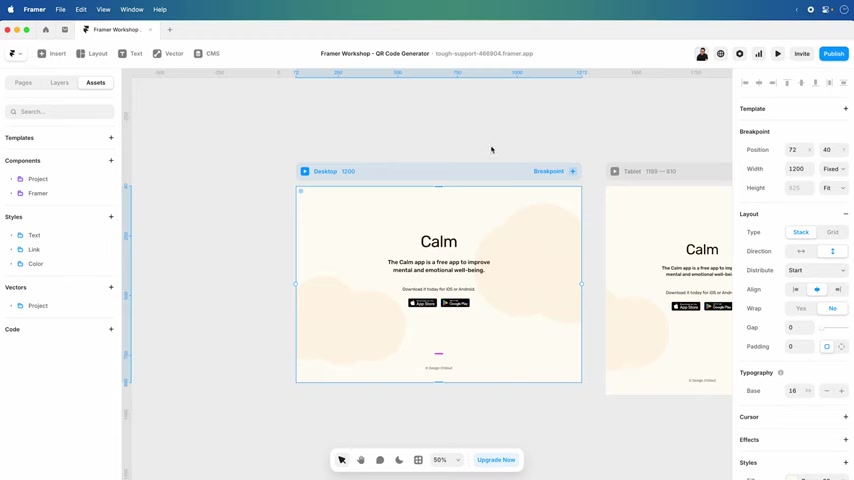
By simply describing the desired component through a Prompt, Framer Workshop generates the necessary code, eliminating the need for manual coding. This no-code approach democratizes the development process, making it accessible to designers and individuals with limited programming experience. This is the first step in effortless QR code generation. With Framer Workshop, the possibilities are truly limitless, enabling users to bring their creative visions to life with unparalleled speed and efficiency.

The Power of AI in Component Creation

The integration of AI into Framer Workshop marks a paradigm shift in how components are created and utilized.
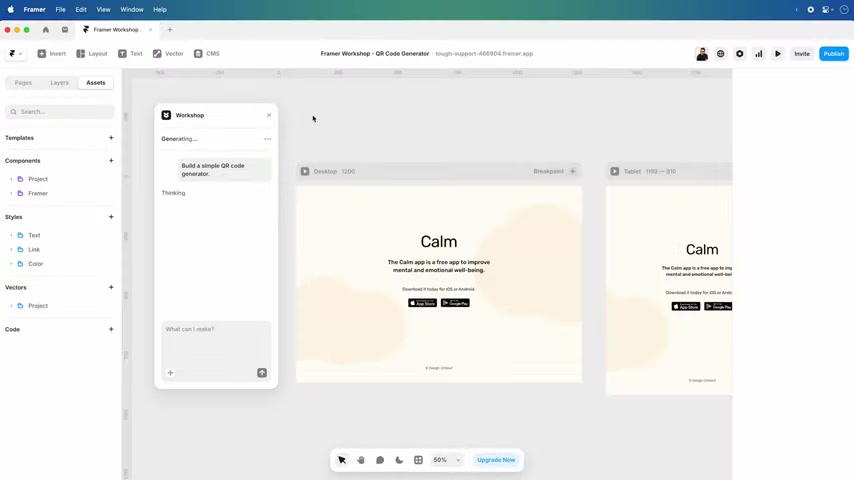
Instead of painstakingly writing code from scratch, users can now rely on AI to generate functional components based on simple prompts. This not only saves time and effort but also unlocks new avenues for creativity and innovation. The AI-powered component creation process is remarkably intuitive. Users simply describe the desired component, and the AI intelligently generates the code. This includes defining properties, setting up interactions, and implementing the desired functionality.

Benefits of No-Code Component Generation

The no-code approach offered by Framer Workshop provides numerous benefits, making it an attractive option for both designers and developers. These are:

  • Increased Efficiency: Rapidly generate components without writing code.
  • Accessibility: Enables non-programmers to create functional elements.
  • Flexibility: Generate unlimited components tailored to specific needs.
  • Ready to Publish: Components come with property controls and CMS connectivity.

The ability to quickly generate components without coding opens up a world of possibilities for designers and developers, allowing them to focus on the creative aspects of their projects. The components generated are fully functional, ready to be integrated into existing projects or used as building blocks for new ones. This accelerated workflow allows you to rapidly prototype, iterate, and deploy designs, getting your projects to market faster.

Advanced Customization and Integration

Connecting to CMS for Dynamic Content

To make the QR Code Generator even more powerful, consider connecting it to a Content Management System (CMS). This allows you to dynamically update the content of the QR code without having to manually regenerate it each time. Connecting to a CMS requires some additional setup, but it’s well worth the effort for projects that require frequent content updates.

Once the component is connected to a CMS, you can easily update the URL or other content associated with the QR code by simply modifying the corresponding entry in the CMS. This makes it easy to keep the QR code up-to-date, even as the content of the landing page changes.

Adding Custom Property Controls

Framer Workshop components come with built-in property controls, but you can extend these controls to add even more customization options. Adding custom property controls allows you to tailor the component to meet the specific needs of the project. To add custom property controls, edit the component in Framer Workshop and add the desired controls. These controls can include options for changing the size, color, or other properties of the QR code. Once the custom property controls are added, they can be accessed via the properties panel in Framer. This makes it easy to customize the component without having to edit the code directly.

Step-by-Step Guide to Creating a QR Code Generator

Step 1: Set Up Your Framer Project

First, open Framer and create a new project. Choose a suitable template or start with a blank canvas. Organize your project to streamline the integration of the QR code generator component. A well-organized project simplifies the development process and ensures easy navigation.

Step 2: Launch Framer Workshop

Press CMD+K on Mac or CTRL+K on Windows to launch the command palette. Select Workshop from the options. Choose your preferred AI model (Claude or GPT). This action opens the Framer Workshop, ready for you to create the QR code generator component.

Step 3: Input the Prompt

In the Workshop prompt field, enter “Build a simple QR code generator.” Review and choose a reference image if needed. Submit the prompt and allow the AI to generate the component. This step triggers the AI to create a functional QR code generator based on your simple instruction.

Step 4: Customize Your QR Code Component

Once the component is generated, customize it to fit your project's design and functional needs. Modify the size, colors, and other properties using the properties panel. Ensure the component integrates smoothly into your design. Customization is crucial to ensure the QR code generator aligns with your brand and style.

Step 5: Integrate the QR Code into Your Landing Page

Copy the customized component from the assets panel. Paste it into the desired location on your landing page. Adjust the position and alignment to match your design. Proper integration enhances the user experience.

Step 6: Add a Pop-Over Effect

Place the QR code component within an overlay to create a pop-over effect. Set the overlay to appear on hover. This interactivity makes the QR code more noticeable and user-friendly.

Step 7: Test the QR Code Functionality

Use a QR code scanner app on a smartphone or tablet to test the generated code. Verify that it redirects to the correct URL. Thorough testing ensures a seamless user experience.

Framer Pricing Plans

Free Plan

Ideal for small projects or personal use, the Free plan offers basic functionalities. This plan is excellent for experimenting with Framer and understanding its core features. The Free plan is a great way to get started and explore the capabilities of Framer without any financial commitment.

Mini Plan

The Mini plan is designed for freelancers and small teams. It provides additional features and increased capabilities compared to the Free plan. Perfect for more complex projects, the Mini plan offers a balance between cost and functionality.

Pro Plan

The Pro plan is tailored for larger teams and professional use. It offers all the features of the Mini plan, along with advanced options and priority support. This plan is ideal for businesses that require robust features and dedicated support to manage their design and development workflows effectively.

Enterprise Plan

The Enterprise plan is for large organizations with specific needs. It provides custom solutions and dedicated support to meet unique requirements. With the Enterprise plan, you get personalized service and specialized features tailored to your business needs.

Evaluating Framer Workshop: Pros and Cons

👍 Pros

AI-Powered Generation: Allows non-programmers to create functional components.

Rapid Prototyping: Quick creation and testing of interactive prototypes.

CMS Connectivity: Seamless integration with content management systems for dynamic updates.

Time Savings: Reduces development time and effort.

Accessibility: Makes web development accessible to a wider audience.

Real-time collaboration.

Multiple AI models.

👎 Cons

Complexity Limitations: Struggles with highly complex and specialized components.

Refinement Needed: AI-generated outputs may require additional customization.

Dependency on AI: Quality depends on the AI's understanding and data training.

Refinement may take additional time.

Can be difficult to integrate dynamic data.

Key Features of Framer Workshop

AI-Powered Component Generation

Create functional components using AI prompts, eliminating the need for coding. Simply describe the component you need, and Framer Workshop generates the code for you. This saves time and makes component creation accessible to non-programmers.

No-Code Development

Develop functional elements without writing a single line of code, simplifying the creation process. This empowers designers and individuals with limited programming knowledge to build interactive and dynamic components.

Property Controls

Customize components with built-in property controls, allowing easy adjustments to size, color, and other attributes. These controls provide flexibility in adapting the component to fit different design requirements without needing to edit code.

CMS Connectivity

Connect components to a CMS for dynamic content updates, ensuring your designs stay current. Linking your components to a CMS allows for real-time updates and content management, ensuring your designs remain up-to-date and relevant.

AI Model Options

Choose between Claude and GPT models to suit different project needs, allowing flexibility in AI-driven development. Select the AI model that best aligns with your project’s goals, whether it's Claude for creative, innovative tasks or GPT for quick, efficient results.

Real-Time Collaboration

Work with team members in real time on projects with live collaboration tools. This allows seamless teamwork and streamlined workflow from start to finish.

Version Control

Revert to older versions of a project with ease using integrated version control. You can keep designs and components organized for quick access.

Dynamic Data

You can import live data from your favorite content management systems or APIs for up-to-date projects.

Common Use Cases for Framer Workshop

Rapid Prototyping

Quickly create and test interactive prototypes without coding, allowing rapid iteration and feedback. This saves time and speeds up the design process by creating prototypes that closely resemble the final product.

Landing Page Design

Design and deploy stunning landing pages with integrated components and CMS connectivity. These components ensure that all landing pages are mobile and user friendly. With customizable templates to choose from, designing landing pages is faster and easier than ever.

Web App Development

Build web applications with AI-generated components and functional elements, simplifying the development process. This opens up new possibilities for creating complex and dynamic web applications.

E-Commerce Websites

Launch beautiful e-commerce sites using templates and integrated payment systems. These online stores create an ideal shopping experience for customers.

Interactive Tutorials

You can design tutorials that people won’t forget with fun animations, videos, and Quizzes. Use this to engage your customers and ensure they understand all of your products.

AI Generated Content

Write blog posts, descriptions, and headlines in seconds and with the help of the integrated AI system.

FAQ

What is Framer Workshop?
Framer Workshop is a feature within Framer that allows users to create functional components using AI prompts, eliminating the need for manual coding. This no-code approach democratizes the development process, making it accessible to designers and individuals with limited programming experience.
How do I launch Framer Workshop?
Launch Framer Workshop by pressing CMD+K on Mac or CTRL+K on Windows. Select Workshop from the options that appear in the command palette.
Can I customize the components generated by Framer Workshop?
Yes, the components generated by Framer Workshop come with property controls that allow you to customize their size, color, and other attributes. You can also add custom property controls to tailor the components to your specific needs.
Is it possible to connect Framer Workshop components to a CMS?
Yes, Framer Workshop components can be connected to a CMS for dynamic content updates. This allows you to easily update the content of your components without having to manually regenerate them each time.
Which AI models are available in Framer Workshop?
Framer Workshop offers a choice between Claude and GPT models. Claude is ideal for creative and innovative tasks, while GPT is better suited for quick and efficient results.
Is Framer good for coding?
Even without using code, you can still create something special with the built in AI features of Framer. Framer also allows code editing directly to increase the amount of customization available.
Which tools integrate with Framer?
There are dozens of different software options that you can integrate into your projects, including: Google Maps, Lottie, Stripe, Github, and more!

Related Questions

How does Framer Workshop compare to other no-code development platforms?
Framer Workshop distinguishes itself through its seamless integration of AI, offering a no-code environment that democratizes the development process for designers and non-programmers. It stands out by enabling users to create functional components simply by describing them, which bypasses the need for any coding. While other platforms may offer drag-and-drop interfaces and pre-built elements, Framer Workshop’s AI-driven approach offers a blend of creative freedom and efficiency, especially useful for rapidly prototyping and deploying unique designs.
What are the limitations of using AI for component generation in Framer Workshop?
Despite its many advantages, AI-powered component generation in Framer Workshop does have limitations. For highly complex and specialized components, the AI might not fully capture the nuanced requirements, potentially leading to outputs that require additional refinement by a developer. Additionally, the AI's understanding of design and functionality is only as good as the data it has been trained on. This could lead to challenges in producing components that align perfectly with cutting-edge design trends or very specific project needs. Users should be prepared to iterate and customize the AI-generated components to achieve the desired results.
How can I optimize my prompts to get the best results from Framer Workshop?
To maximize the effectiveness of Framer Workshop, craft your prompts with clarity and detail. Be specific about the functionality, design attributes, and any expected interactions of the component. Include relevant keywords and constraints to guide the AI in the right direction. For instance, instead of a vague request like 'create a button,' specify 'build a large, blue, rectangular button that says 'Click Here' and redirects to https://example.com.' Iterating on prompts and analyzing the AI's output will help you refine your approach and achieve better results over time. Using reference images can also help you produce the desired output.

What is the best way to make the QR code?
It is good to experiment with different QR code creation tools and strategies in order to get the best looking and working QR code for your product. With the help of an AI program like Framer or other graphic design software, generating a QR code can be easy and allow for many different levels of customization.

Most people like














