































Table of Contents
- Key Points
- Setting Up Your Local AI Chatbot Environment
- Building Your Python Chatbot with Langchain and Ollama
- Step-by-Step Instructions: Getting Your AI Chatbot Up and Running
- Pricing
- Advantages and Disadvantages of a Local AI Chatbot
- Frequently Asked Questions
- Related Questions



Setting Up Your Local AI Chatbot Environment
Downloading and Installing Ollama: The Foundation of Local LLMs
The first step in creating your local AI Chatbot is setting up the environment. We begin by downloading and installing Ollama, a tool designed to easily run open-source LLMs on your local machine.
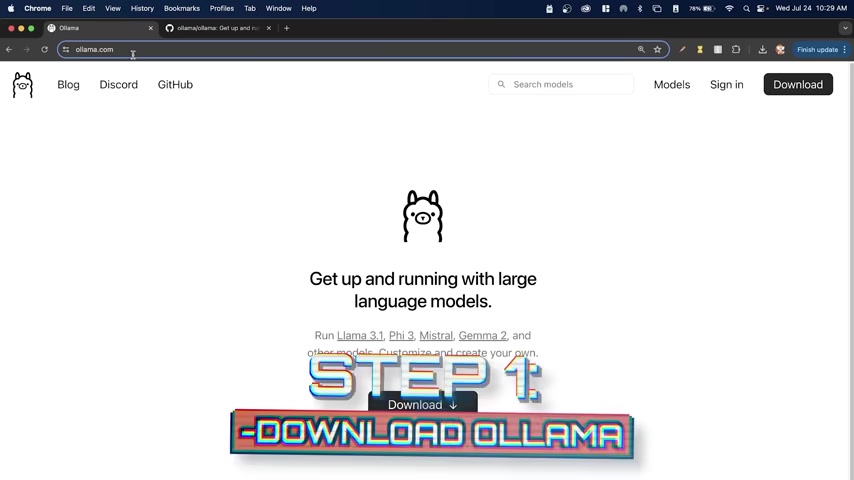
Ollama simplifies the process of managing and running LLMs, such as Llama 3, Mistral, and Gemma. Instead of relying on cloud-based services, Ollama lets you keep your AI processing local, which can be essential for privacy and data security. To get started, simply navigate to the Ollama website and download the version appropriate for your operating system. The site is: ollama.com.
After downloading, install Ollama by following the prompts. This process will install the necessary components to run LLMs locally. Once installed, you can verify the installation by opening your terminal or command Prompt and typing 'ollama'. This command should display the available Ollama commands, confirming that the installation was successful and that Ollama is running on your system.
Ensuring Proper Ollama Installation: Command Line Verification
After installing Ollama, it’s crucial to verify that it's working correctly. This ensures that your system recognizes the Ollama commands and can execute them without issues.
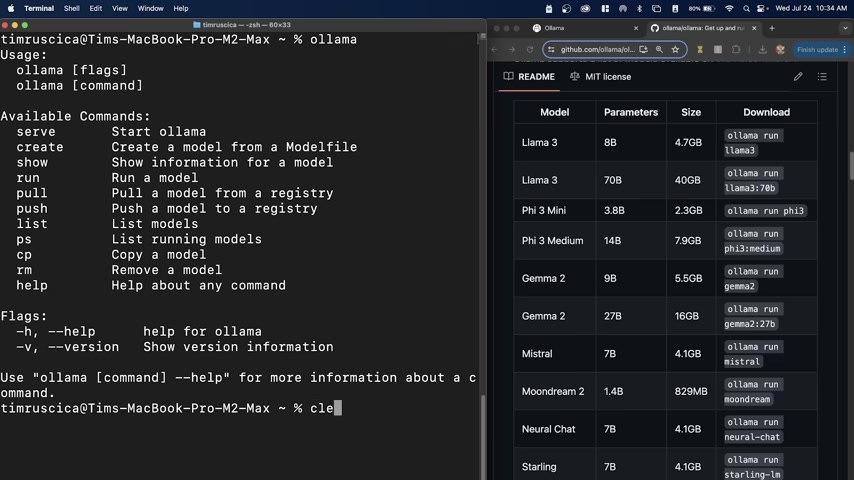
Open your terminal or command prompt and type the command 'ollama'. If Ollama is properly installed, the terminal will display a list of available commands and options, including:
ollama serveollama createollama runollama showollama pullollama pushollama listollama psollama cpollama rmollama help
Seeing these commands confirms that Ollama is running correctly and accessible from your command line. If you encounter an error or the commands are not recognized, revisit the installation steps to ensure no steps were missed. This verification is vital before proceeding, as any issues with the Ollama installation can hinder further development of the chatbot.
Downloading and Running LLMs with Ollama: The Foundation for Your Chatbot
Ollama is more than just a tool; it's your gateway to running powerful AI models locally. After verifying the installation, the next step is to download and run an LLM that will power your chatbot.
To begin, you'll need to choose an LLM that suits your needs. Ollama supports many models, each with different sizes and capabilities. Some popular options include Llama 3, Mistral, and Gemma, among others. You can find a comprehensive list on the Ollama GitHub page, linked from the ollama.com website. The list provides parameters, sizes and suggested hardware for running the models.
To download an LLM, use the 'ollama pull' command followed by the model name. For example, to download Llama 3, you would type:
ollama pull llama3
This command downloads the necessary files to your computer. Once downloaded, run the model using the 'ollama run' command, like this:
ollama run llama3
This command starts the LLM, allowing you to interact with it directly from the terminal. Try typing 'Hello, world!' to see how the model responds. If everything works correctly, you're ready to integrate the LLM into your Python chatbot project.
Understanding LLM Size and Hardware Requirements for Local Execution
When choosing an LLM to run locally, it’s essential to consider its size and the hardware requirements of your machine.
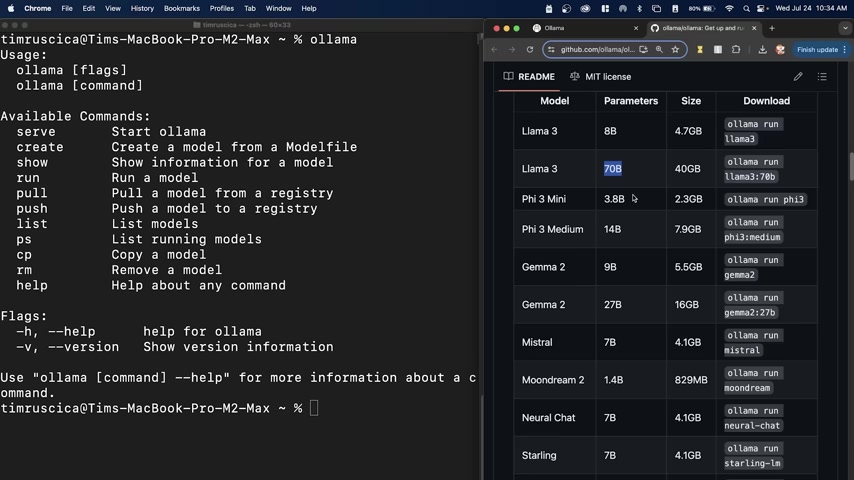
The size of an LLM, typically measured in the number of parameters, directly affects its performance and resource usage. Models with more parameters generally offer better accuracy and more coherent responses but require more processing power and memory.
For example, Llama 3 comes in several sizes:
- 8B Parameters: Good for general use
- 70B Parameters: Requires at least 8 GB of RAM. More advanced for intricate tasks
To run the 7B models, you'll need at least 8GB of RAM available. For larger models, like the 13B parameter models, you'll need at least 16GB of RAM. Running the 33B parameter models requires an even more substantial 32 GB of RAM or more. Be realistic with what your hardware can handle. These considerations help you choose a model that balances performance with your hardware capabilities, ensuring a smooth and efficient local chatbot experience.
Python Environment Setup: Virtual Environments and Package Installation
With Ollama set up and an LLM downloaded, it’s time to prepare your Python environment. Creating a virtual environment is crucial for isolating your project’s dependencies and avoiding conflicts with other Python projects on your system.
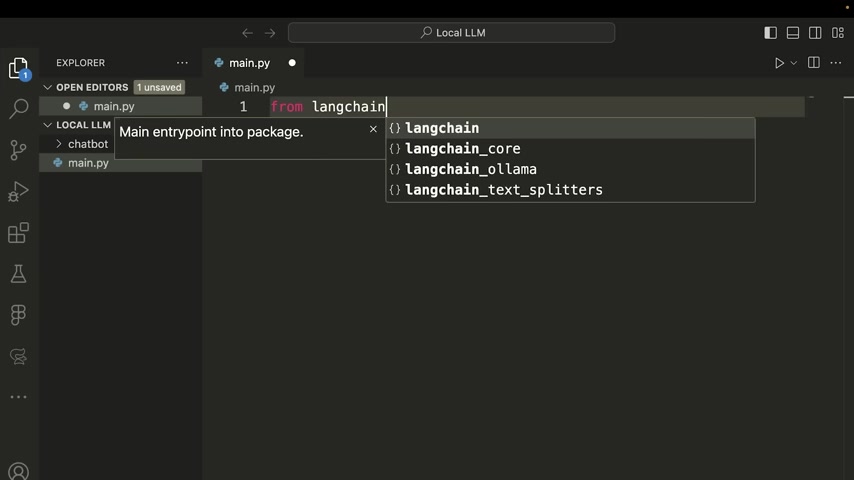
To create a virtual environment, navigate to your project directory in the terminal and use the following command:
python3 -m venv chatbot
Replace 'chatbot' with your desired environment name. This command creates a new directory containing the Python interpreter and package management tools. To activate the virtual environment, use the following command:
source chatbot/bin/activate (macOS/Linux)
.\chatbot\Scripts\activate.bat (Command Prompt - Windows)
.\chatbot\Scripts\Activate.ps1 (PowerShell - Windows)
Once activated, your terminal prompt will change to indicate that you are working within the virtual environment. You can now install the necessary Python packages using pip, the Python package installer. Specifically install LangChain and LangChain-Ollama modules with the following:
pip install langchain langchain-ollama ollama
These packages enable you to interact with LLMs via Ollama, simplifying the process of building your AI chatbot.
Building Your Python Chatbot with Langchain and Ollama
Crafting the Python Script: Initialization and Dependency Management
To build your Python AI chatbot, start by creating a new Python file (e.g., 'main.py') within your project directory. This file will contain the code that defines the chatbot's behavior and interactions.
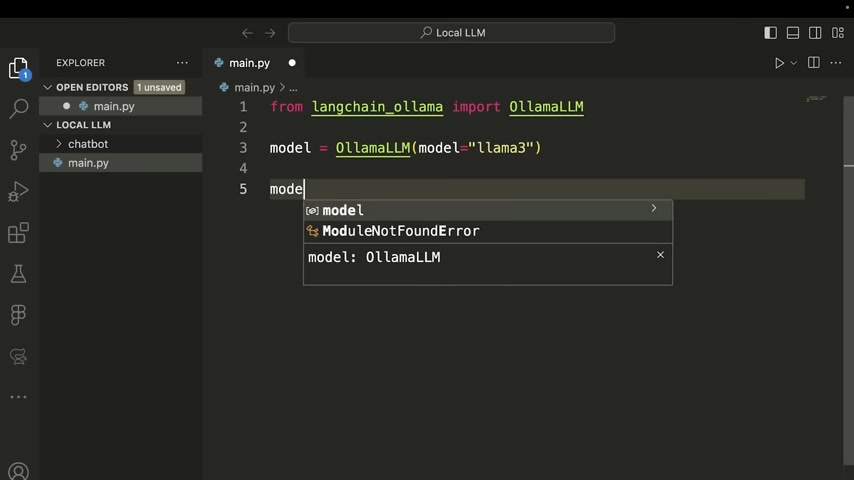
Begin by importing the necessary modules from Langchain and Langchain-Ollama. These modules provide the tools for connecting to LLMs, managing prompts, and creating conversational chains. Add these dependencies to your script:
from langchain_ollama import Ollama
from langchain_core.prompts import ChatPromptTemplate
This initialization ensures that your script has access to the functions and classes needed to interact with Ollama and manage conversational prompts.
Initializing the LLM and Defining the Chat Prompt Template
After importing the necessary modules, initialize the LLM that you want to use for your chatbot. This involves creating an instance of the Ollama class and specifying the name of the model you downloaded earlier. You'll also define a chat prompt template that will structure the input you send to the LLM. This template helps provide context and instructions, improving the quality and coherence of the model's responses.
Start by initializing the LLM:
model = Ollama(model="llama3")This line creates an instance of the Ollama model, specifying that you want to use Llama 3 for your chatbot.
Next, define the chat prompt template:
template = """
Answer the question below.

Here is the conversation history: {context}
Question: {question}
Answer:
"""
This template tells the model to answer a question, providing it with any relevant conversation history and the specific question being asked.
Creating the Conversational Chain with Langchain
Langchain allows you to chain together different components, such as prompts and models, to create complex conversational flows. To create a conversational chain, combine the prompt template and the LLM model using the pipe operator (|). This operator passes the output of one component to the next, creating a seamless flow of information.
chain = prompt | modelThis line creates a chain that passes the structured prompt to the Llama 3 model. The model then generates a response based on the information in the prompt, making the interaction more contextual and coherent.
Implementing the Conversation Loop and Storing History
To create a functional chatbot, implement a conversation loop that collects input from the user, passes it to the LLM, and displays the model's response. This loop should also store the conversation history to provide context for future interactions. Here's how you can structure the core conversation logic:
def handle_conversation():
    context = ""
    print("Welcome to the AI Chatbot! Type 'exit' to quit.")

    while True:
        user_input = input("You: ")

        if user_input.lower() == "exit":
            break

        prompt_value = {"context": context, "question": user_input}
        result = chain.invoke(prompt_value)

        print(f"Bot: {result}")
        context += f"
User: {user_input}
AI: {result}"
This Python code handles a continuous conversation loop with the AI Chatbot, utilizing a chain to process user inputs and generate appropriate responses while also ensuring the conversation history is maintained. By storing the conversations context, future questions or requests will be answered with consideration for earlier discussions.
To finalize your chat bot, run handle_conversation().





Most people like




























Report
Please select a reason for reporting
- 13 Reasons to Switch from Snapchat to Text Messaging
- 7 Powerful Speech to Text Apps to Boost Productivity
- 10 Best Speech to Text Tools for Effortless Transcription
- 13 Free Tools to Easily Transcribe Audio to Text
- 15 Surprising Ways Google's Speech-to-Text Boosts Productivity
- 7 Best Free Online Audio to Text Transcription Tools
- 9 Tips to Transcribe Speech to Text Faster and Better
- 13 Best Speech to Text Software for Windows 10 in 2023
- 7 Tips for Choosing the Best Transcriber for Audio to Text
- 11 Reasons Why Dragon Speech-to-Text Apps are Game-Changers
- 6 Secrets to Enhance Your Speech to Text Transcription
- 6 Brilliant Ways to Boost Productivity with Talk-to-Text on Your MacBook
- 6 Ways Transcription Software Converts Audio to Text
- 8 Tips to Transcribe Speech to Text Like a Pro
- 6 Reasons IBM Watson Speech to Text is a Game-Changer
- 14 Powerful Ways Talk-to-Text Improves Your Workflow
- 12 Top Windows Speech-to-Text Software for Efficient Transcription
- 12 Game-Changing Benefits of Apple's Speech to Text Technology
- 9 Powerful Use Cases for AWS Speech to Text Technology
- 10 Easy Steps to Transcribe YouTube Videos to Text
- transcription audio en texte
- online audio transcription
- free audio file transcription
- free ai audio transcription
- audio transcription service
- audio transcription online free
- audio transcription free online
- audio to transcription software
- audio and transcript
- ai audio transcription free
- voice recording to text converter
- translate voice recording to text
- record voice to text
- audio recording to text converter
- voice recording and transcription
- chatgpt voice to text
- gmail voice to text
- speech to text reader
- speech to text ai free
- speech to talk
- Create Engaging Animated Explainer Videos with a Free AI Tool
- Stop Multi-Subscribing: Benchmark Top AI Visual Models in One Canvas
- Best Seedance 2.5 API Provider: Every Price on the Market, Checked at Source
- AI OnlyFans: How to Generate $30,000/Month (Legally)
- Transform Your Script into an Engaging Video with AI Video Maker!
- AI Marketing Automation: A Comprehensive Guide for Small Businesses
- Midjourney Alternative for Anime Art Creators: Why PixAI May Be Better for Character Workflows
- 10 Things Most People Get Wrong About AI Image Search
- AI Girlfriend Apps: Top Choices Redefining Relationships 2025
- How to Reduce Quoting Errors in Salesforce with AI-Assisted Quote Creation
- AI Resume Builders: EnhanceCV, ResumeNerd AI, & Teal Compared
- ResumeAI: Crafting ATS-Optimized Resumes with AI
- AI in Resume Writing: A New Era for Job Seekers
- AI Resume Tools: Streamline Your Job Search and Land Your Dream Role
- AI Resume Optimization: The Right Way to Land Interviews
- Crafting a Killer Resume with AI: A Step-by-Step Guide
- Crafting a Winning Resume: AI Tools and Expert Tips
- AI Job Search: Level Up Your Career with AI Automation
- Empower Your Career Journey: Dynamic Resumes with AI
- AI Resume Builder: Create Professional Resumes Effortlessly

Copyright ©2026 toolify