































Table of Contents
- Key Points
- Creating the Clone Offset Effect
- Enhancing Your Clone Offset Effect
- Evaluating the Clone Offset Effect
- FAQ
- Related Questions


Creating the Clone Offset Effect
Understanding the Clone Offset Effect
The clone offset effect is a dynamic visual technique that isolates a subject in a video and adds effects to the background while also creating duplicate versions of the subject with altered positioning. This creates an engaging, surreal, and visually captivating result.
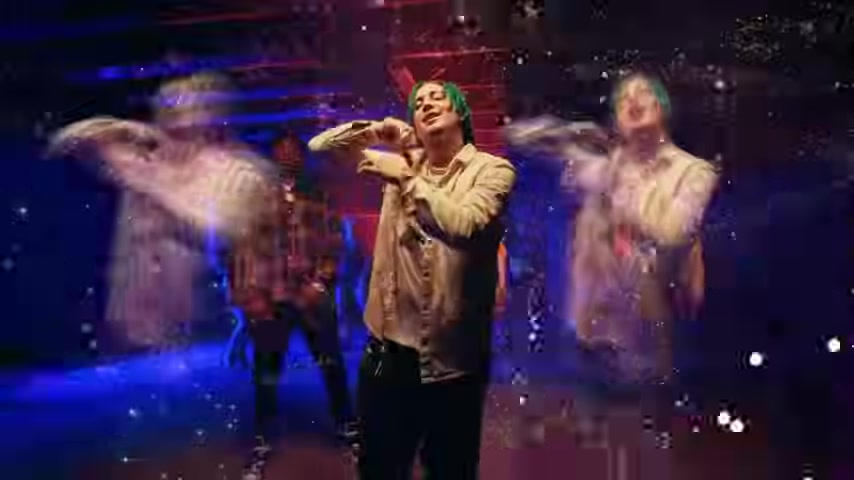
This Tutorial will inspire you by the music video with Lary Over and Fredo Bang in 2021, this popular effect adds visual interest and draws the viewer’s eye to key moments, making it perfect for Music videos, promotional content, and any video that requires a creative edge.
The beauty of this effect lies in its flexibility. You can use it subtly to enhance a performance or go all-out to create a wild, distorted reality. With DaVinci Resolve, you have the power to control every aspect of this effect, making it uniquely yours.
Key Elements of the Clone Offset Effect:
- Subject Isolation
- Background Enhancement
- Clone Duplication
- Creative Offset
Step-by-Step Guide to the Clone Offset Effect in DaVinci Resolve
Let's dive into the step-by-step instructions on how to do the clone offset effect with DaVinci Resolve. This tutorial will make your imagination a reality. To start, you'll need DaVinci Resolve installed on your computer. Once you're set up, follow these steps:
Step 1: Duplicate the Clip
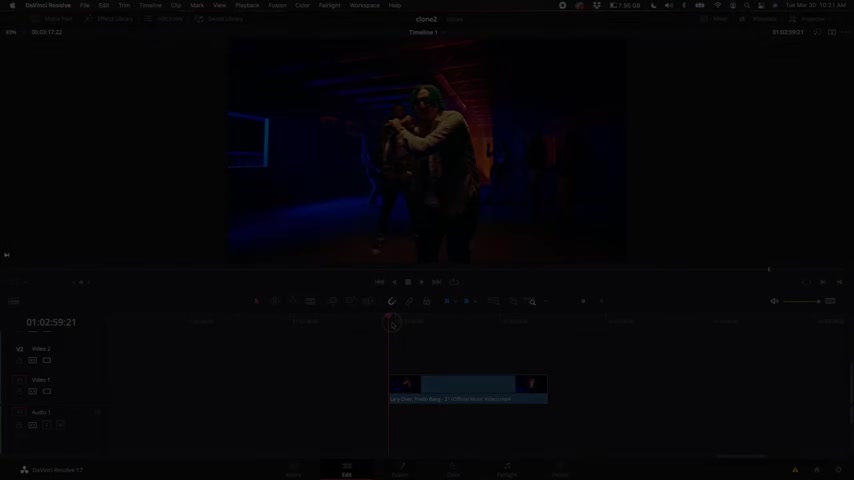
- Import your footage into DaVinci Resolve.
- In the Edit tab, select the clip you want to work with.
- Hold down Alt (or Option on Mac) and click on the clip. Drag it upwards to duplicate it onto a new video track. This creates two identical versions of the clip, one on top of the other.
Duplicating the clip creates two copies of the video that can be altered independently, paving the path to unique effects.
Step 2: Isolate the Subject with Magic Mask
- Select the top clip (the duplicate) on the timeline.
- Navigate to the Color tab.
- Create a new node: Press Alt + S (or Option + S on Mac). Alternatively, right-click and choose "Add Node > Corrector".
- Go to the Magic Mask palette (usually found at the bottom of the screen).
- Click the eyedropper tool within the Magic Mask palette.
- Click and drag a small line across the subject you want to isolate. DaVinci Resolve will automatically start analyzing the subject.
DaVinci Resolve's Magic Mask excels at precisely isolating subjects, simplifying intricate tasks into intuitive steps.
Step 3: Tracking the Subject
- In the Magic Mask palette, under the "Quality" tab, select "Better" for a more accurate selection.
- Use the Track Forward and Track Backward buttons to track the subject throughout the entire clip. If you start in the middle of the clip you should track forwards and backwards.
- Enable Toggle Mask Overlay to see what parts of your subject is being selected so you can make adjustments as needed.
Mastering the Magic Mask involves strategic quality adjustments and thorough tracking for impeccable isolation.
Step 4: Fine-Tuning the Mask
- Use the Shrink or Grow sliders to refine the mask's edges.
- Adjust the Blur Radius to smooth the mask's edges and reduce harshness.
- Enable the Alpha Output: Right-click on the node and select Add Alpha Output. Connect the blue square from the node to the alpha output to create a transparent background.
Step 5: Back to the Edit Tab
- Head back to the Edit tab.
- If your computer is running slow, render the top clip in place. Right click the top clip and select Render in Place. Select Quicktime format, H.264 codec, and render.
Step 6: Add Transitions to Background Clip
- Select the clip below on the timeline. This is now the background.
- Use the blade tool (press B) to cut the background clip a few times to where the music drops.
- Then push A on your keyboard to bring the cursor back.
- Navigate to Effects Library and Video Transitions.
- Search for Pan Left and drag the transition between cuts on the background track. You can also use Drop Warp transition on top of another background track.
Using transitions can add an extra flair and appeal to your background, making it stand out with a cool effect.
Step 7: Add an Overlay Effect
- Drag firework stock footage clip to the V3 track
- Click on the new V3 clip, navigate to the top right to the Inspector tab. Scroll down until you see Composite Mode under the Composite Section. Click to change the composite mode to screen so the clip shines through the back.
- You can fade in the clip by dragging the top left portion of the clip so it fades in a little more dramatically.
Experiment with overlays to create unique aesthetic choices, such as a fireworks show, enhancing the visual narrative and atmosphere.
Step 8: Clone Subject
- Click on your top most clip that's our isolated subject again and select the alt/option button while dragging up the isolated clip to V4 to duplicate it up again.
- Click to select the clip and go to the Inspector tab.
- Check the keyframe on both Position X and Y in the Transform section. You can also adjust it from the Composition Section if you'd like. You can drag the number left and right to your desired position.
And there you have it. Creating this clone effect to create multiple of you is a cool effect. It's one that has a lot of flexibility and room to make it your own.
The combination of effects adds a new layer of depth to the isolated performance, enriching the composition.








Most people like




































Report
Please select a reason for reporting
- 13 Reasons to Switch from Snapchat to Text Messaging
- 7 Powerful Speech to Text Apps to Boost Productivity
- 10 Best Speech to Text Tools for Effortless Transcription
- 13 Free Tools to Easily Transcribe Audio to Text
- 15 Surprising Ways Google's Speech-to-Text Boosts Productivity
- 7 Best Free Online Audio to Text Transcription Tools
- 9 Tips to Transcribe Speech to Text Faster and Better
- 13 Best Speech to Text Software for Windows 10 in 2023
- 7 Tips for Choosing the Best Transcriber for Audio to Text
- 11 Reasons Why Dragon Speech-to-Text Apps are Game-Changers
- 6 Secrets to Enhance Your Speech to Text Transcription
- 6 Brilliant Ways to Boost Productivity with Talk-to-Text on Your MacBook
- 6 Ways Transcription Software Converts Audio to Text
- 8 Tips to Transcribe Speech to Text Like a Pro
- 6 Reasons IBM Watson Speech to Text is a Game-Changer
- 14 Powerful Ways Talk-to-Text Improves Your Workflow
- 12 Top Windows Speech-to-Text Software for Efficient Transcription
- 12 Game-Changing Benefits of Apple's Speech to Text Technology
- 9 Powerful Use Cases for AWS Speech to Text Technology
- 10 Easy Steps to Transcribe YouTube Videos to Text
- transcription audio en texte
- online audio transcription
- free audio file transcription
- free ai audio transcription
- audio transcription service
- audio transcription online free
- audio transcription free online
- audio to transcription software
- audio and transcript
- ai audio transcription free
- voice recording to text converter
- translate voice recording to text
- record voice to text
- audio recording to text converter
- voice recording and transcription
- chatgpt voice to text
- gmail voice to text
- speech to text reader
- speech to text ai free
- speech to talk
- How SEO and Marketing Dashboards Empower Agencies to Drive Results
- How to Use AI Tools to Find Internal Linking Opportunities Across a Business Website
- Discover Your Perfect Haircut with AI Hairstyle Apps
- Free Reputation Calculator Tools: How They're Adapting to Score AI Visibility, Not Just Rankings
- Design Professional Flyers for Free on Your Phone
- Best Free Flyer Maker Apps for Android: Design Like a Pro
- How to Know If Your Business Is Ready for an AI Customer Service Agent
- Revolutionizing Storytelling: From Novels to Screenplays with AI
- Create Engaging Animated Explainer Videos with a Free AI Tool
- Stop Multi-Subscribing: Benchmark Top AI Visual Models in One Canvas
- My Brand New Logo: AI-Powered Logo Design for Startups
- Create Stunning Logos with Free AI Logo Generator!
- AI Logo Maker: Design a Stunning Logo in Minutes
- Elevate Your Zoom Experience with Enhanced Name Tags by Warmly
- Top 5 AI Logo Makers in 2025: Design a Stunning Brand
- Creative Fabrica's AI Tools: Flow, Studio, and Font Generator
- Create Stunning Logos with Canva's Free AI Logo Generator
- Create Professional and Memorable Logos with LogoMaker.ai
- Design Your Own Font: A Step-by-Step Guide with Vectornator Pro
- AI Font Generator: Revolutionizing Typeface Design with AI

Copyright ©2026 toolify