































Table of Contents
- Key Points
- Setting Up Git and Cursor AI
- Integrating Cursor AI and GitHub
- Step-by-Step Guide: Installing Git and Connecting to Cursor AI
- Cursor AI Pricing
- Advantages and Disadvantages
- Key features
- How to make the best use
- Frequently Asked Questions
- Related Questions


Setting Up Git and Cursor AI
Downloading and Installing Git
Before connecting GitHub with Cursor AI, ensure Git is installed on your system. Git is a distributed version control system that tracks changes to files, allowing for collaboration and code management. Here's how to download and install it:
-
Open Your Web Browser: Launch your preferred web browser.
-
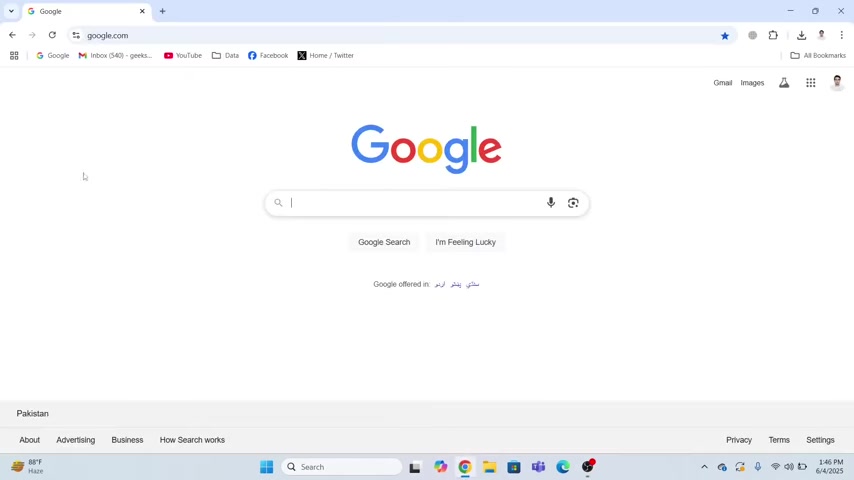
Navigate to Git Downloads: Type 'download git' into a Search Engine like Google.
-
Select Windows Version: Since this guide focuses on Windows, click the Windows link. If you are using MacOS or Linux, select the corresponding option.
-
Download Git for Windows: On the downloads page, select the 64-bit Git for Windows setup. This will initiate the download of the Git installer executable file (
.exe). -
Open the Executable: Once the download completes, locate the
.exefile, and double-click it to start the installation process.
Git is a critical tool for developers, and installing it is a crucial first step. Having Git correctly installed allows you to move to the next step of connecting Cursor AI with GitHub.
Configuring Git During Installation
The Git installation process involves several configuration steps. Make sure to configure these properly for the best experience:
-
License Agreement: Read the GNU General Public License and click 'Next'.
-
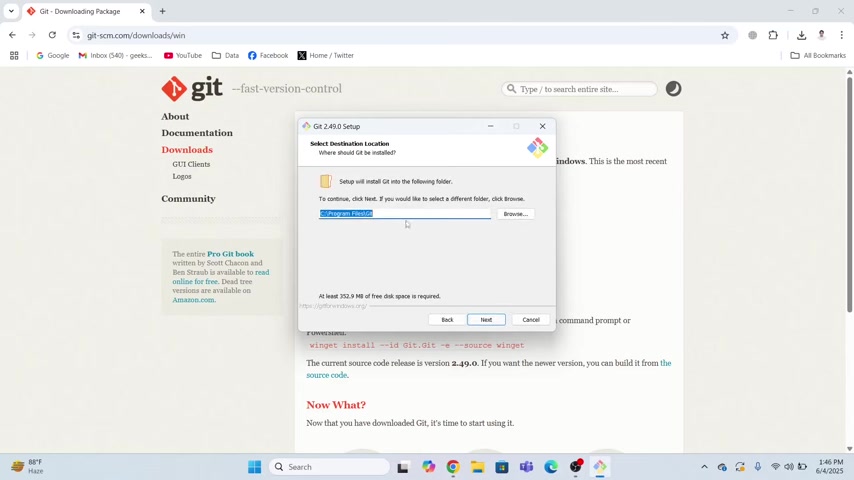
Installation Location: Choose the installation location or leave it as default (C:\Program Files\Git). Click 'Next'.
-
Component Selection: Select the components you want to install. The defaults are typically suitable for most users. Ensure 'Git Bash Here' is selected for command-line access. Click 'Next'.
-
Start Menu Folder: Choose a Start Menu folder or leave it as default. Click 'Next'.
-
Choosing the Default Editor: This step is crucial for Cursor AI integration. Select 'Select other editor as Git’s default editor'. Click ‘Browse’ and navigate to the Cursor AI executable. This ensures Git uses Cursor AI for commit messages and other text editing tasks.
-
Adjusting the PATH Environment: Choose 'Git from the command line and also from 3rd-party software'. This allows Git to be recognized by other tools.
-
Choosing the SSH Executable: Select 'Use bundled OpenSSH'.
-
Choosing HTTPS Transport Backend: Select 'Use the OpenSSL library'.
-
Configuring Line Ending Conversions: Choose 'Checkout Windows-style, commit Unix-style line endings'.
-
Configuring the Terminal Emulator: Choose 'Use MinTTY (MSYS2 default terminal)'.
-
Extra Options: Enable 'Enable file system caching' and 'Enable Git credential manager'.
-
Install: Click 'Install' to begin the installation.
By choosing Cursor AI as Git's default editor, you integrate the AI code editor into your version control workflow seamlessly.
Integrating Cursor AI and GitHub
Cloning a GitHub Repository in Cursor AI
Now that Git is configured, let's connect Cursor AI with your GitHub account. Cloning a repository involves bringing a copy of the remote repository to your local system.
-
Open Cursor AI: Launch the Cursor AI code editor.
-
Open Command Palette: Press
Ctrl+Shift+P(orCmd+Shift+Pon Mac) to open the Command Palette.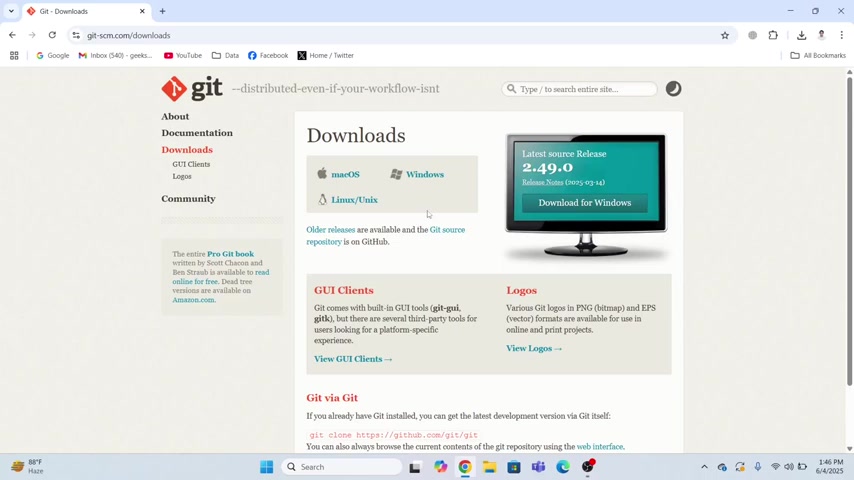
-
Type Clone: Type
cloneinto the Command Palette. -
Select Git Clone: Choose
Git: Clonefrom the options. -
Clone from GitHub: Select
Clone from GitHub. Cursor AI will Prompt you to sign in to your GitHub account. -
Allow Access: Authorize the extension to sign in using GitHub. A pop-up will appear asking you to copy a code and continue to GitHub.
-
GitHub Authentication: You will be redirected to GitHub in your web browser. Provide your GitHub username or email address and password to sign in.
-
Device Activation: You may be prompted for a device activation code. The code will be shown in cursor. Authorize Cursor AI. This step might require you to enter a one-time code displayed in Cursor AI to authenticate.
-
Authorize Cursor AI: Click 'Authorize Visual Studio Code', which is used by Cursor AI, to grant the necessary permissions.
-
Select Repository: After successful authentication, Cursor AI will display a list of your GitHub repositories. Choose the repository you want to clone.
-
Destination Folder: Choose a local folder to save the cloned repository. Confirm the cloning process.
Once the repository is cloned, Cursor AI will automatically open the project, allowing you to explore the code and start making changes. This integration provides a streamlined experience for managing GitHub repositories directly within Cursor AI.
Committing and Pushing Changes to GitHub from Cursor AI
After making changes to your code, committing and pushing those changes to GitHub is crucial for version control and collaboration. Here’s how to do it seamlessly from within Cursor AI:
- Make Changes: Modify your code in Cursor AI.
- Access Source Control: Click on the Source Control icon in the Activity Bar (usually located on the left side of the editor). This will open the Source Control view, where you can see all the changes you’ve made.
- Stage Changes: Stage the changes you want to commit. This prepares them for inclusion in the next commit. By clicking the + icon next to each changed file or by staging all changes at once.
- Write a Commit Message: Type a descriptive message. The commit message should clearly explain the purpose and nature of the changes.
- Commit and Push: Click the Commit button (often with a checkmark icon) and select 'Commit & Push'. This will commit your changes locally and then push them to the remote GitHub repository.
By committing and pushing your changes regularly, you keep your remote repository up-to-date and ensure your collaborators can access the latest version of your code.









Most people like



























Report
Please select a reason for reporting
- 13 Reasons to Switch from Snapchat to Text Messaging
- 7 Powerful Speech to Text Apps to Boost Productivity
- 10 Best Speech to Text Tools for Effortless Transcription
- 13 Free Tools to Easily Transcribe Audio to Text
- 15 Surprising Ways Google's Speech-to-Text Boosts Productivity
- 7 Best Free Online Audio to Text Transcription Tools
- 9 Tips to Transcribe Speech to Text Faster and Better
- 13 Best Speech to Text Software for Windows 10 in 2023
- 7 Tips for Choosing the Best Transcriber for Audio to Text
- 11 Reasons Why Dragon Speech-to-Text Apps are Game-Changers
- 6 Secrets to Enhance Your Speech to Text Transcription
- 6 Brilliant Ways to Boost Productivity with Talk-to-Text on Your MacBook
- 6 Ways Transcription Software Converts Audio to Text
- 8 Tips to Transcribe Speech to Text Like a Pro
- 6 Reasons IBM Watson Speech to Text is a Game-Changer
- 14 Powerful Ways Talk-to-Text Improves Your Workflow
- 12 Top Windows Speech-to-Text Software for Efficient Transcription
- 12 Game-Changing Benefits of Apple's Speech to Text Technology
- 9 Powerful Use Cases for AWS Speech to Text Technology
- 10 Easy Steps to Transcribe YouTube Videos to Text
- transcription audio en texte
- online audio transcription
- free audio file transcription
- free ai audio transcription
- audio transcription service
- audio transcription online free
- audio transcription free online
- audio to transcription software
- audio and transcript
- ai audio transcription free
- voice recording to text converter
- translate voice recording to text
- record voice to text
- audio recording to text converter
- voice recording and transcription
- chatgpt voice to text
- gmail voice to text
- speech to text reader
- speech to text ai free
- speech to talk
- Create Engaging Animated Explainer Videos with a Free AI Tool
- Stop Multi-Subscribing: Benchmark Top AI Visual Models in One Canvas
- Best Seedance 2.5 API Provider: Every Price on the Market, Checked at Source
- AI OnlyFans: How to Generate $30,000/Month (Legally)
- Transform Your Script into an Engaging Video with AI Video Maker!
- AI Marketing Automation: A Comprehensive Guide for Small Businesses
- Midjourney Alternative for Anime Art Creators: Why PixAI May Be Better for Character Workflows
- 10 Things Most People Get Wrong About AI Image Search
- AI Girlfriend Apps: Top Choices Redefining Relationships 2025
- How to Reduce Quoting Errors in Salesforce with AI-Assisted Quote Creation
- AI Resume Builders: EnhanceCV, ResumeNerd AI, & Teal Compared
- ResumeAI: Crafting ATS-Optimized Resumes with AI
- AI in Resume Writing: A New Era for Job Seekers
- AI Resume Tools: Streamline Your Job Search and Land Your Dream Role
- AI Resume Optimization: The Right Way to Land Interviews
- Crafting a Killer Resume with AI: A Step-by-Step Guide
- Crafting a Winning Resume: AI Tools and Expert Tips
- AI Job Search: Level Up Your Career with AI Automation
- Empower Your Career Journey: Dynamic Resumes with AI
- AI Resume Builder: Create Professional Resumes Effortlessly

Copyright ©2026 toolify