































Table of Contents
- Key Points
- Understanding the Basics of Wave Line Effects in Illustrator
- Creating Wave Line Effects in Adobe Illustrator: Step-by-Step Guide
- Practical Applications: How to use wave line
- Adobe Illustrator Pricing Plans
- Understanding Adobe Illustrator: Pros and Cons
- Adobe Illustrator Core Features
- Different Use Cases
- Frequently Asked Questions
- Related Questions


Understanding the Basics of Wave Line Effects in Illustrator
What is the Wave Line Effect?
The wave line effect involves creating a series of lines that flow in a Wave-like pattern, adding a sense of movement and visual interest to a design. It is commonly used in posters, backgrounds, and other graphic elements to create a dynamic and engaging visual experience. Mastering this effect allows designers to add depth and complexity to their work, making it stand out.
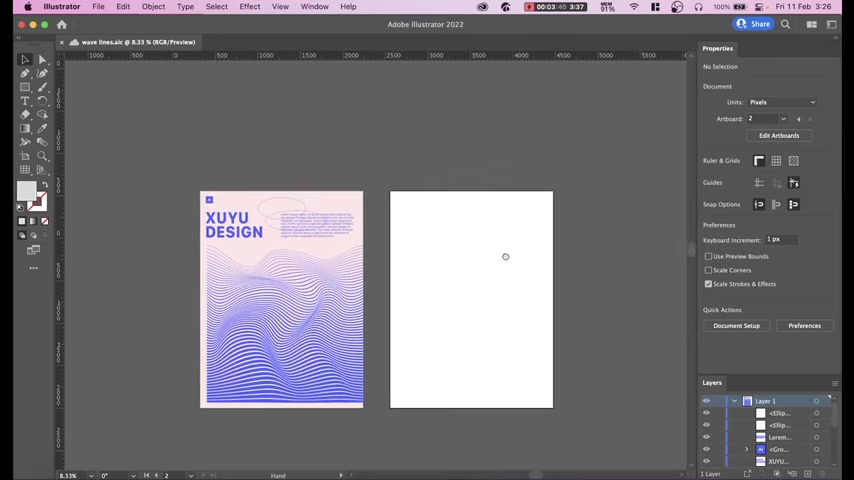
Key Elements of the Wave Line Effect:
- Lines: The fundamental building blocks, which can be straight, curved, or a combination of both.
- Wave Pattern: The undulating form created by the lines, giving the effect its name.
- Depth: The illusion of depth created by varying the spacing and thickness of the lines.
- Motion: The sense of movement and flow that makes the design visually appealing.
Understanding these elements will help you create more effective and captivating wave line effects in your designs.
Adobe Illustrator: A Designer's Best Friend
Adobe Illustrator is the industry-standard vector graphics software, perfect for creating scalable and high-quality designs. Its versatility and robust features make it ideal for generating complex effects like the wave line. The software's precise control over lines, shapes, and anchor points ensures that every design element can be fine-tuned to perfection.
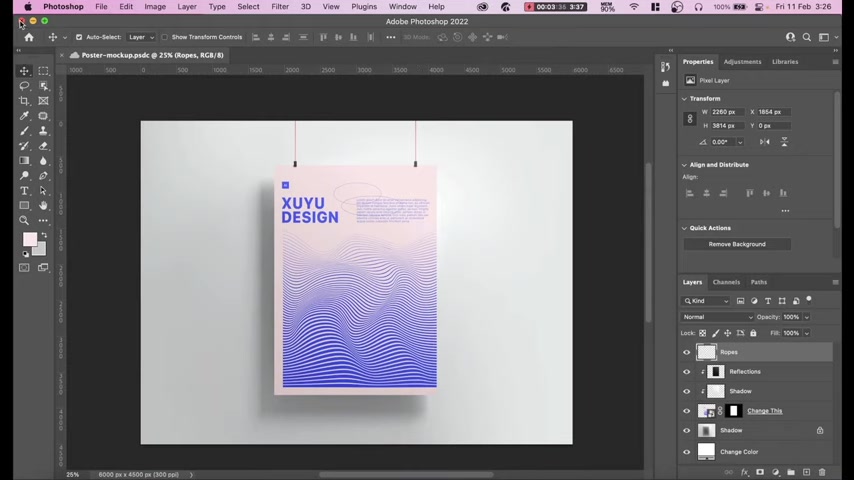
Whether you are working on a logo, a poster, or a website graphic, Adobe Illustrator provides the tools you need to bring your vision to life.
Key features of Adobe Illustrator include:
- Vector Graphics: Create scalable designs that maintain their quality regardless of size.
- Precise Control: Fine-tune every detail of your design with precise control over lines, shapes, and anchor points.
- Versatile Tools: Access a wide range of tools for creating complex effects and designs.
- Compatibility: Seamlessly integrate with other Adobe Creative Suite applications.
With Adobe Illustrator, the possibilities for creating stunning visual content are endless.
Creating Wave Line Effects in Adobe Illustrator: Step-by-Step Guide
Setting Up Your Document
Before diving into the wave line effect, it’s essential to set up your document correctly. This involves defining the artboard size, color mode, and other settings to optimize your design for its intended use.
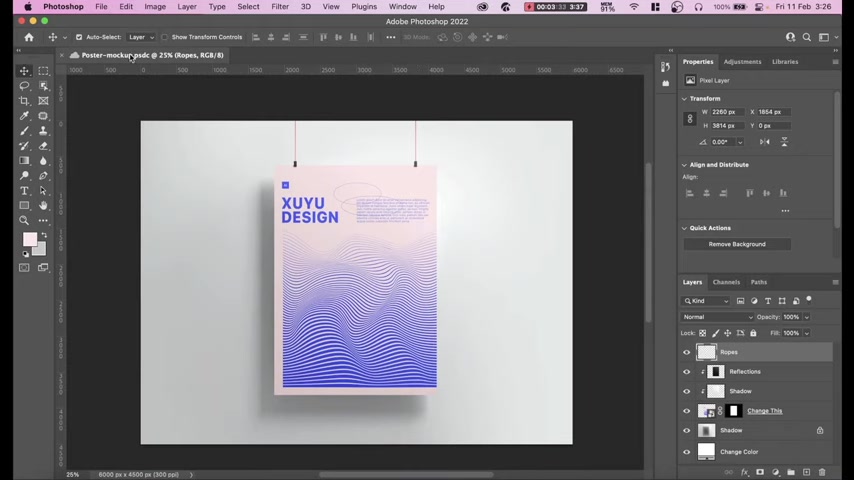
Steps:
- Create a New Document: Open Adobe Illustrator and select 'File' > 'New'.
- Define Artboard Size: Set the width and Height of your artboard. Common sizes include 1920x1080 pixels for web graphics and A4 for print designs.
- Choose Color Mode: Select 'RGB' for web designs and 'CMYK' for print designs.
- Set Resolution: A resolution of 300 dpi is recommended for print, while 72 dpi is sufficient for web.
- Save Your Document: Save your file as an Adobe Illustrator (.ai) file.
By properly setting up your document, you ensure that your design will look its best, whether it's displayed on a screen or printed on paper.
Creating the Basic Lines
The foundation of the wave line effect is creating the initial lines. These lines will be the basis for the undulating pattern, so it’s important to get them right. Adobe Illustrator provides several tools for creating lines, including the Line Segment tool and the Pen tool.
Steps:
- Select the Line Segment Tool: Choose the Line Segment tool from the toolbar.
- Draw a Line: Click and drag on the artboard to create a straight line. Hold down the Shift key to constrain the line to a horizontal or vertical orientation.
- Adjust Line Properties: In the Properties panel, adjust the stroke weight, color, and other line properties to your liking.
- Duplicate the Line: Duplicate the line by pressing Ctrl+C (Cmd+C on Mac) and then Ctrl+V (Cmd+V on Mac). Move the duplicated line to a different position on the artboard.
Alternatively, you can use the Pen tool to create more complex and curved lines. The key is to create two distinct lines that will serve as the starting and ending points for the wave effect.
Using the Blend Tool for Multiple Lines
The Blend tool is crucial for generating multiple lines between your initial two lines. This feature automatically creates intermediate steps, resulting in a smooth transition between the start and end lines.
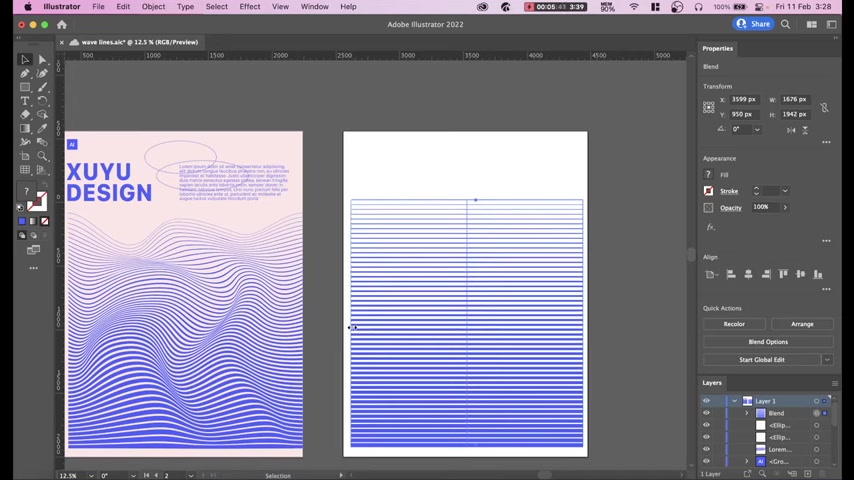
Steps:
- Select Both Lines: Use the Selection tool to select both your start and end lines.
- Access the Blend Tool: Go to 'Object' > 'Blend' > 'Blend Options'.
- Set Blend Options: In the Blend Options dialog, set the 'Spacing' to 'Specified Steps' and enter the desired number of intermediate lines (e.g., 50).
- Create the Blend: Go to 'Object' > 'Blend' > 'Make'. This will generate the specified number of lines between your start and end lines.
Adjusting the number of steps allows you to control the density of the wave pattern. Experiment with different values to achieve the desired look.
Applying the Envelope Distort
The Envelope Distort feature is where the magic happens. This allows you to warp and distort the blended lines into a wave-like pattern. The Mesh option provides the most flexibility for creating complex curves and undulations.
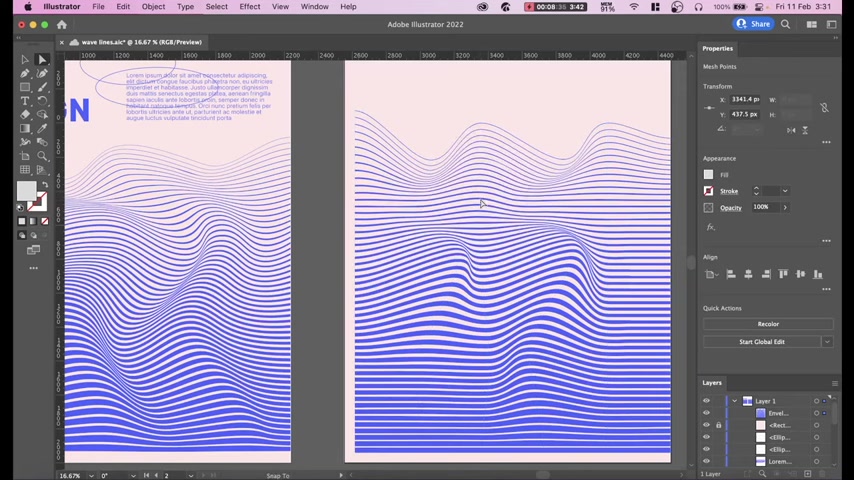
Steps:
- Select the Blended Lines: Use the Selection tool to select the blended lines.
- Apply Envelope Distort: Go to 'Object' > 'Envelope Distort' > 'Make with Mesh'.
- Set Mesh Options: In the Envelope Mesh dialog, set the 'Rows' and 'Columns' to control the complexity of the distortion. A higher number of rows and columns allows for more intricate wave Patterns.
- Adjust Anchor Points: Use the Direct Selection tool (A) to select and move the anchor points on the mesh. Manipulating these points will Shape the wave pattern.
Take your time to adjust the anchor points and refine the wave pattern until you achieve the desired effect. This step is crucial for creating a visually appealing and dynamic design.
Refining the Wave Pattern
Once you've applied the Envelope Distort, you might want to further refine the wave pattern. This involves fine-tuning the anchor points, adjusting the line properties, and experimenting with different distortion techniques to create a truly unique and eye-catching effect.
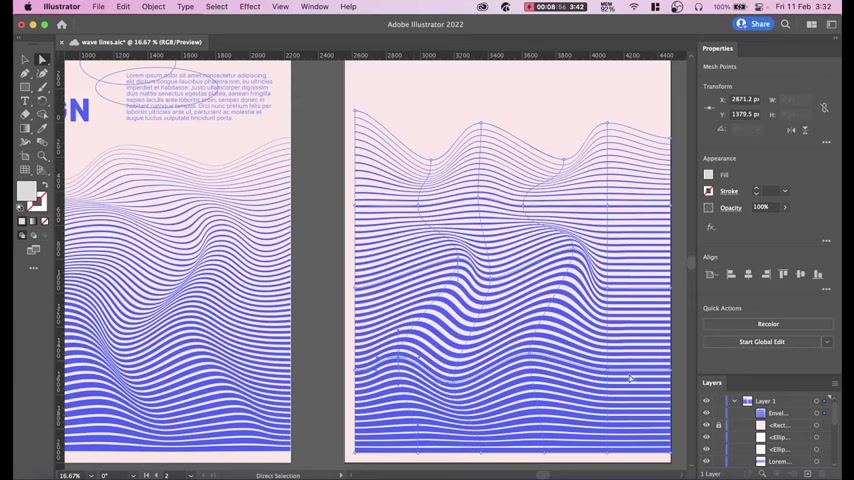
Steps:
- Use the Direct Selection Tool: Use the Direct Selection tool (A) to select individual anchor points on the mesh.
- Adjust Anchor Points: Move the anchor points to reshape the wave pattern. Use the handles on the anchor points to control the curvature of the lines.
- Experiment with Line Properties: Adjust the stroke weight, color, and opacity of the lines to add depth and visual interest.
- Add Additional Effects: Explore other effects in Adobe Illustrator, such as the Roughen effect or the Twist effect, to further enhance the wave pattern.
Remember to continuously zoom in and out to ensure that the wave pattern looks good at different scales. Attention to detail is key for achieving a professional and polished final product.
Fine-Tuning Typography for your Poster Design
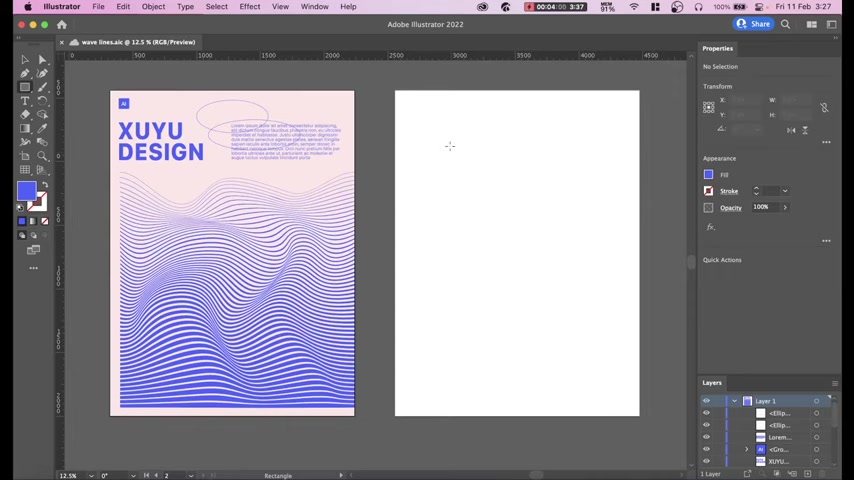
This step is where you get to try more typographical choices, adding text to the design. Change the title's Font style, text size, and line position. You can also try adding extra textual details, like subheadings or dates, to balance out the overall composition.
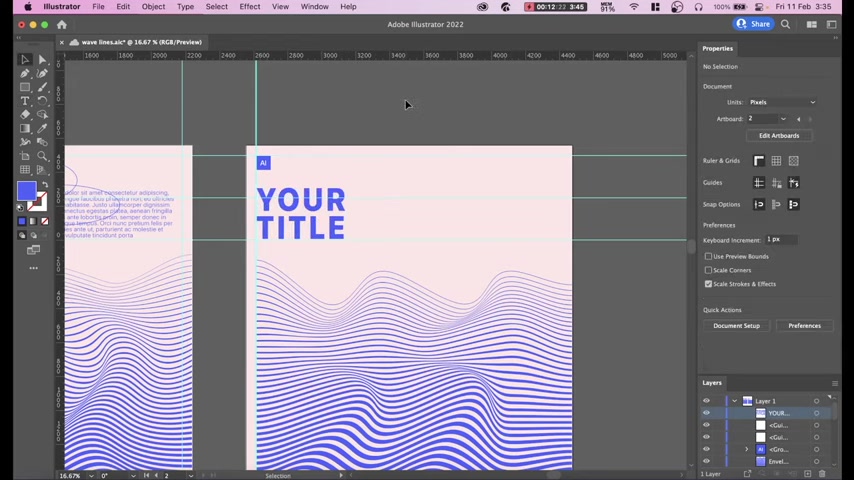
Make sure all of these elements Align with the lines you created earlier in the design for consistency.
Cleaning Up the Design for Export
Before exporting your final design, it’s important to clean it up and optimize it for its intended use. This involves removing any unnecessary elements, expanding the appearance of the wave effect, and saving the file in the appropriate format.
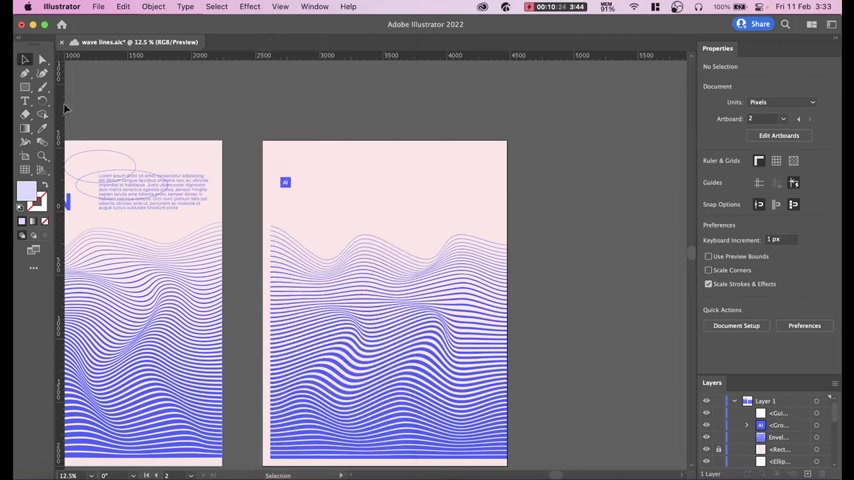
Steps:
- Remove Unnecessary Elements: Delete any guides, construction lines, or other elements that are not part of the final design.
- Expand Appearance: Go to 'Object' > 'Expand Appearance' to convert the wave effect into individual paths. This ensures that the design will render correctly on different devices and software.
- Save in the Appropriate Format: Save your file as an Adobe Illustrator (.ai) file for future editing, and export it as a high-resolution JPEG or PNG for web use, or as a PDF for print.
By following these steps, you can ensure that your final design is polished, professional, and optimized for its intended use.
Different Use Cases
Poster Design
Wave line effects can be used to create eye-catching posters.
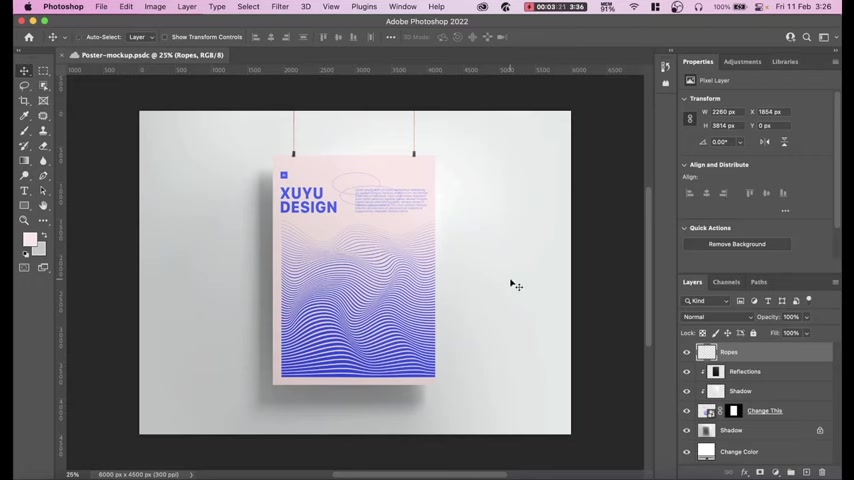
They add a sense of movement and make the design visually attractive. Perfect for grabbing attention.
Web Design
Wave lines make web headers really attractive, creating depth and dynamisim. They make the site more appealing to visitors








Most people like


































Report
Please select a reason for reporting
- 13 Reasons to Switch from Snapchat to Text Messaging
- 7 Powerful Speech to Text Apps to Boost Productivity
- 10 Best Speech to Text Tools for Effortless Transcription
- 13 Free Tools to Easily Transcribe Audio to Text
- 15 Surprising Ways Google's Speech-to-Text Boosts Productivity
- 7 Best Free Online Audio to Text Transcription Tools
- 9 Tips to Transcribe Speech to Text Faster and Better
- 13 Best Speech to Text Software for Windows 10 in 2023
- 7 Tips for Choosing the Best Transcriber for Audio to Text
- 11 Reasons Why Dragon Speech-to-Text Apps are Game-Changers
- 6 Secrets to Enhance Your Speech to Text Transcription
- 6 Brilliant Ways to Boost Productivity with Talk-to-Text on Your MacBook
- 6 Ways Transcription Software Converts Audio to Text
- 8 Tips to Transcribe Speech to Text Like a Pro
- 6 Reasons IBM Watson Speech to Text is a Game-Changer
- 14 Powerful Ways Talk-to-Text Improves Your Workflow
- 12 Top Windows Speech-to-Text Software for Efficient Transcription
- 12 Game-Changing Benefits of Apple's Speech to Text Technology
- 9 Powerful Use Cases for AWS Speech to Text Technology
- 10 Easy Steps to Transcribe YouTube Videos to Text
- transcription audio en texte
- online audio transcription
- free audio file transcription
- free ai audio transcription
- audio transcription service
- audio transcription online free
- audio transcription free online
- audio to transcription software
- audio and transcript
- ai audio transcription free
- voice recording to text converter
- translate voice recording to text
- record voice to text
- audio recording to text converter
- voice recording and transcription
- chatgpt voice to text
- gmail voice to text
- speech to text reader
- speech to text ai free
- speech to talk
- How SEO and Marketing Dashboards Empower Agencies to Drive Results
- How to Use AI Tools to Find Internal Linking Opportunities Across a Business Website
- Discover Your Perfect Haircut with AI Hairstyle Apps
- Free Reputation Calculator Tools: How They're Adapting to Score AI Visibility, Not Just Rankings
- Design Professional Flyers for Free on Your Phone
- Best Free Flyer Maker Apps for Android: Design Like a Pro
- How to Know If Your Business Is Ready for an AI Customer Service Agent
- Revolutionizing Storytelling: From Novels to Screenplays with AI
- Create Engaging Animated Explainer Videos with a Free AI Tool
- Stop Multi-Subscribing: Benchmark Top AI Visual Models in One Canvas
- ASOMobile Helps Teams Benchmark App Store Screenshots Against Competitors
- How to Match LMS Software With Your Organization's Training Plan
- Revolutionizing Email Marketing Agency with AI
- How to Convert BTC to HNT
- Unleashing the Power of AI: Cognizant's Roadmap for Transformation
- Frame to Video Review: A Practical Look at Turning Two Still Frames Into Motion
- NVIDIA NIM: Revolutionizing Supply Chain Data Analysis with AI
- Top AI Tools That Help Brands Stand Out Offline (Not Just Online)
- Top 5 Cold Email Software: Maximize Your Outreach in 2025
- Magic School AI: Revolutionizing Quiz & Assessment Generation

Copyright ©2026 toolify