























Create Your Own AI Assistant with HTML, CSS, & JavaScript

Updated on May 25,2025








Table of Contents
- Key Points
- Getting Started: Building the Foundation
- Adding Functionality with JavaScript
- How to Use
- Advantages and Disadvantages of Creating Your Own AI Assistant
- FAQ
- Related Questions


Getting Started: Building the Foundation
Setting Up Your Development Environment
Before diving into the code, it’s crucial to have your development environment properly configured. This involves choosing a code editor and ensuring you have a basic understanding of how to create and manage HTML, CSS, and JavaScript files.
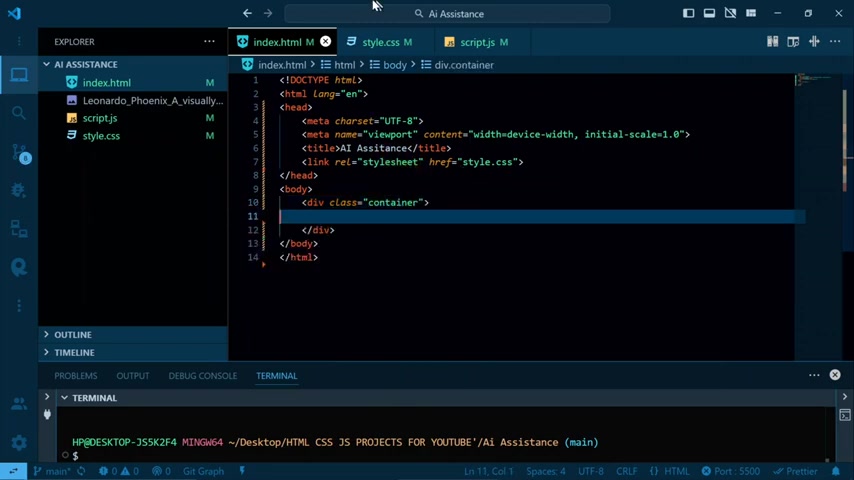
Visual Studio Code is an excellent option for a code editor.
Here’s a breakdown of the steps:
- Choose a Code Editor: Select a code editor that suits your coding style. VS Code is user-friendly, offers excellent features, and supports various extensions.
- Create Project Files: Create three basic files:
index.html,style.css, andscript.js. These will hold the structure, styling, and functionality of your AI assistant. - Basic HTML Structure: The
index.htmlfile will contain the main HTML boilerplate, including the<head>and<body>tags. This forms the basic layout of your assistant’s interface. - Link CSS and JavaScript: Make sure to link your CSS (
style.css) and JavaScript (script.js) files within the<head>tag of yourindex.htmlto ensure proper styling and functionality.
Crafting the HTML Structure: Setting the Stage
The index.html file forms the core of your AI assistant's structure. It includes the necessary HTML tags to create the user interface. Let's start by creating the basic boilerplate. Boilerplate includes the <!DOCTYPE html>, <html>, <head>, and <body> tags. This provides the foundation for the content, styling, and scripting of your AI assistant. You'll also need to establish the title of the page and link the stylesheet.
-
Set the Title: Within the
<head>tag, set the title of your AI assistant using the<title>tag. For instance:<title>AI Assistant</title>.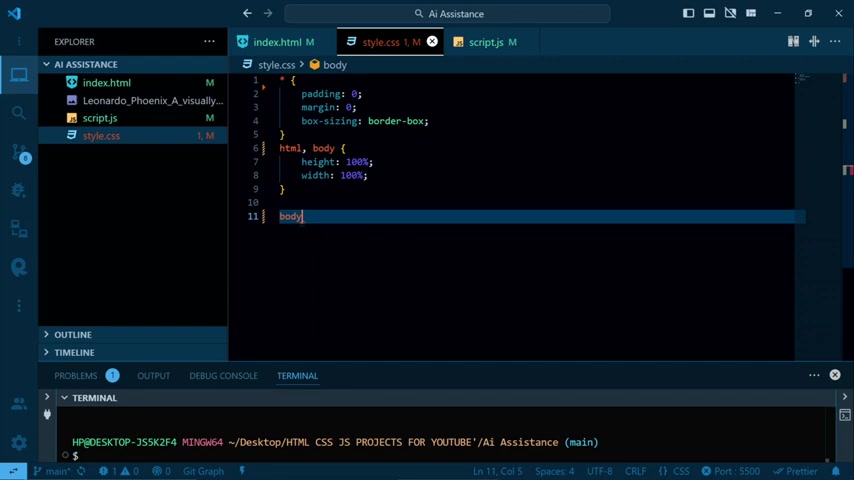
-
Link the CSS: Still within the
<head>, link your stylesheet using the<link>tag:<link rel="stylesheet" href="style.css">. This ensures your styles are applied. -
Create a Container: Inside the
<body>tag, create a<div>with the class "container". This will hold all the elements of your AI assistant and provide a central point for styling and layout. -
Add Content: Place an
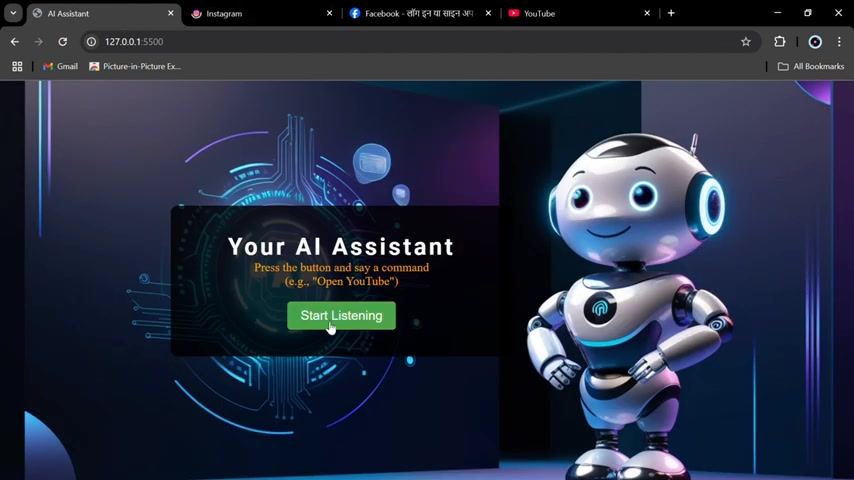
<h1>heading, a<p>paragraph, and a<button>element inside the container. The heading will display the title, the Paragraph will provide instructions, and the button will initiate voice recognition.
Styling Your Assistant with CSS
Cascading Style Sheets (CSS) provide the aesthetics of your AI assistant. You use CSS to control layout, colors, fonts, and the overall appearance. Linking CSS correctly is crucial, since a syntax error could cause some serious issues down the road.
-
Body Styles: First, target the
<body>tag in yourstyle.cssfile and apply styles such as setting the background image, width, and Height.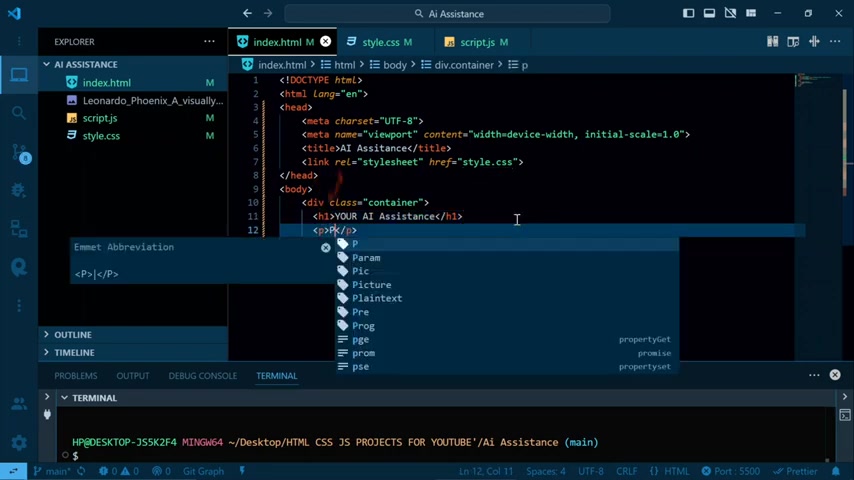
-
Container Styling: Next, style the "container" class to set its layout properties, such as width, margin, padding, and border. Here’s an example:
.container { width: 80%; margin: 20px auto; padding: 20px; border: 1px solid #ccc; } -
Heading and Paragraph Styles: Style the
<h1>and<p>tags to set their Font sizes, colors, and alignment. Consider adding a gradient background, box shadows, and rounded corners for a modern, visually appealing look. -
Button Styles: Customize the appearance of the button using CSS to ensure it is clearly visible and inviting. Add styles for the background color, text color, padding, border, and Cursor.
.listen-button {
background-color: #4CAF50;
color: white;
padding: 10px 20px;
border: none;
cursor: pointer;
}
Adding Functionality with JavaScript
Initializing Speech Recognition
JavaScript brings your AI assistant to life by enabling voice command recognition. The SpeechRecognition API allows you to capture audio input from the user and convert it into text.
-
Accessing SpeechRecognition: First, check if the SpeechRecognition API is supported by the user's browser. You can do this by checking if
window.SpeechRecognitionorwindow.webkitSpeechRecognitionis defined. Create new SpeechRecognition object. This will be used to manage voice recognition. -
Handling Unsupported Browsers: If the API is not supported, display an error message to the user. For example:
if (!('SpeechRecognition' in window || 'webkitSpeechRecognition' in window)) { alert('Speech Recognition not supported in this browser.'); } -
Setting up the recognition object: You can set parameters like
interimResultsandlang.
Capturing User Speech: Starting the Recognition
When the user clicks the "listen" button, initiate voice recognition. This involves starting the SpeechRecognition object and capturing the user's audio input.
-
Get the Button Element: Get the reference to your listen button using
document.querySelector('.listen-button');. -
Add Event Listener: Attach an event listener to the button to trigger voice recognition when clicked. For example:
listenButton.addEventListener('click', function() { recognition.start(); }); -
Start Recognition: Within the event listener, call
recognition.start()to begin voice recognition. This will Prompt the user to speak. -
Handle Speech Results: Implement the
onresultevent handler to capture the recognized speech. This handler is triggered when the SpeechRecognition object returns a result.recognition.onresult = function(event) { const transcript = event.results[0][0].transcript; console.log('You said: ' + transcript); };
Reacting to Commands: Connecting Voice to Actions
The final step is to connect the recognized voice commands to specific actions. This involves parsing the transcript, identifying keywords, and performing corresponding actions.
-
Parse the Transcript: Extract the transcript from the
onresultevent and convert it to lowercase for easier matching. For example:const transcript = event.results[0][0].transcript.toLowerCase(); -
Implement Commands: Define a set of functions or commands that can be triggered by voice input. For instance, create functions to open websites, search the web, or control other functionalities.
-
Connect to Commands: Implement an if/else or switch statement to match the transcript to the defined commands. For example:
if (transcript.includes('open youtube')) { window.open('https://www.youtube.com', '_blank'); } else if (transcript.includes('open facebook')) { window.open('https://www.facebook.com', '_blank'); } -
Additional actions: Add functions that search Google, and open Instagram or WhatsApp if you like.





Most people like
































Report
Please select a reason for reporting
- 13 Reasons to Switch from Snapchat to Text Messaging
- 7 Powerful Speech to Text Apps to Boost Productivity
- 10 Best Speech to Text Tools for Effortless Transcription
- 13 Free Tools to Easily Transcribe Audio to Text
- 15 Surprising Ways Google's Speech-to-Text Boosts Productivity
- 7 Best Free Online Audio to Text Transcription Tools
- 9 Tips to Transcribe Speech to Text Faster and Better
- 13 Best Speech to Text Software for Windows 10 in 2023
- 7 Tips for Choosing the Best Transcriber for Audio to Text
- 11 Reasons Why Dragon Speech-to-Text Apps are Game-Changers
- 6 Secrets to Enhance Your Speech to Text Transcription
- 6 Brilliant Ways to Boost Productivity with Talk-to-Text on Your MacBook
- 6 Ways Transcription Software Converts Audio to Text
- 8 Tips to Transcribe Speech to Text Like a Pro
- 6 Reasons IBM Watson Speech to Text is a Game-Changer
- 14 Powerful Ways Talk-to-Text Improves Your Workflow
- 12 Top Windows Speech-to-Text Software for Efficient Transcription
- 12 Game-Changing Benefits of Apple's Speech to Text Technology
- 9 Powerful Use Cases for AWS Speech to Text Technology
- 10 Easy Steps to Transcribe YouTube Videos to Text
- transcription audio en texte
- online audio transcription
- free audio file transcription
- free ai audio transcription
- audio transcription service
- audio transcription online free
- audio transcription free online
- audio to transcription software
- audio and transcript
- ai audio transcription free
- voice recording to text converter
- translate voice recording to text
- record voice to text
- audio recording to text converter
- voice recording and transcription
- chatgpt voice to text
- gmail voice to text
- speech to text reader
- speech to text ai free
- speech to talk
- Design Professional Flyers for Free on Your Phone
- Best Free Flyer Maker Apps for Android: Design Like a Pro
- How to Know If Your Business Is Ready for an AI Customer Service Agent
- Revolutionizing Storytelling: From Novels to Screenplays with AI
- Create Engaging Animated Explainer Videos with a Free AI Tool
- Stop Multi-Subscribing: Benchmark Top AI Visual Models in One Canvas
- Best Seedance 2.5 API Provider: Every Price on the Market, Checked at Source
- AI OnlyFans: How to Generate $30,000/Month (Legally)
- Transform Your Script into an Engaging Video with AI Video Maker!
- AI Marketing Automation: A Comprehensive Guide for Small Businesses
- Design Professional Flyers for Free on Your Phone
- Best Free Flyer Maker Apps for Android: Design Like a Pro
- Unleash Creativity: AI Coloring Pages with ColoringBook.ai
- Generate Stunning AI Photos with Google Gemini: A Guide
- Boost Your Etsy Sales with Stunning Digital Invitations!
- Revolutionize Your Etsy Listing with AI Text Generator
- Create Coloring Pages with AI: A Bing AI Tutorial
- Photo Lab App: Transform Your Photos with Stunning AI Effects
- Effortless Design: Rewriting Text with Microsoft Designer's AI
- Create & Sell Kids' Coloring Books with AI - KDP Guide

Copyright ©2026 toolify