































Table of Contents
- Key Points
- Building a Voice-Controlled AI Assistant
- Customizing Your AI Assistant
- How to use Your AI voice assistant
- Building a Custom Voice-Controlled AI Assistant: Weighing the Pros and Cons
- FAQ
- Related Questions


Building a Voice-Controlled AI Assistant
Core Code Structure and Functions
Once the environment is set up, you can proceed to write the Python code that will power your AI assistant. This involves creating functions for voice recognition, text processing, and synthesized speech. Creating each functionality is detailed as follows:
-
Import Necessary Libraries:
- Begin by importing the required libraries into your Python script
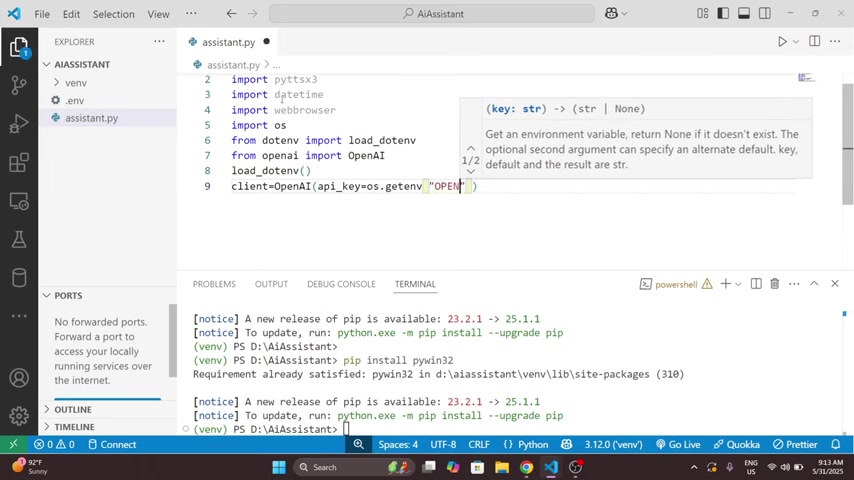
. This will give you access to the functionalities you need for your AI assistant:
import speech_recognition as sr
import pyttsx3
import datetime
import webbrowser
import os
from dotenv import load_dotenv
from openai import OpenAI
- Begin by importing the required libraries into your Python script
-
Set Up the Text-to-Speech Engine:
- Initialize the pyttsx3 engine for converting text to speech :
engine = pyttsx3.init()This initializes the text-to-speech engine, which will be used to convert text responses into audible speech.
- Initialize the pyttsx3 engine for converting text to speech :
-
Create a Speak Function:
- Define a function to handle the text-to-speech conversion :
def speak(text):
print(f"Assistant: {text}")
engine.say(text)
engine.runAndWait()
This
speakfunction takes a text string as input and uses pyttsx3 to convert it into speech. The text is also printed to the console for debugging and monitoring purposes.
- Define a function to handle the text-to-speech conversion :
-
Define a Listen Function:
- Craft a function that captures audio from the microphone and converts it into text. This is done with the help of the
SpeechRecognitionlibrary :def listen(): recognizer = sr.Recognizer() with sr.Microphone() as source: print("Listening...") recognizer.adjust_for_ambient_noise(source) audio = recognizer.listen(source)
try: command = recognizer.recognize_google(audio) print(f"You said: {command}") except sr.UnknownValueError: speak("Sorry, I didn't catch that") return "" except sr.RequestError as e: speak("Speech service is not working") return ""
return command.lower()
The `listen` function sets up a speech recognizer and microphone, listens for audio input, and uses Google’s speech recognition service to transcribe the audio into text. Any exceptions, such as an unknown voice or service unavailability, are caught and handled appropriately. - Craft a function that captures audio from the microphone and converts it into text. This is done with the help of the
-
Chat with ChatGPT Function:
- Integrate with the OpenAI API to fetch a response from ChatGPT. You'll need to define a function that takes a question as input and returns the AI's answer, like so :
def chat_with_gpt(question):
load_dotenv()
client = OpenAI(
api_key=os.getenv('OPENAI_API_KEY'),
)
try: response = client.chat.completions.create( model="gpt-3.5-turbo", messages=[{ "role": "user", "content": question, }], ) answer = response.choices[0].message.content return answer except Exception as e: print(f"ChatGpt Error {e}") return "I couldn't get a response from ChatGpt"
This function calls the OpenAI API, sending the user's question and receiving a response from the ChatGPT model. It manages exceptions and retrieves the relevant text from the API’s response. This is where the power of ChatGPT comes into play, enabling your assistant to provide intelligent and contextual replies. - Integrate with the OpenAI API to fetch a response from ChatGPT. You'll need to define a function that takes a question as input and returns the AI's answer, like so :
-
Run Assistant Function : This the Main function and starting point of our application.
def run_assistant(): speak("Hello! I'm your AI assistant, What can I do for you?") while True: command = listen() if "time" in command: now = datetime.datetime.now().strftime("%H:%M %p") speak(f"The time is: {now}") elif "open youtube" in command: speak("Opening YouTube") webbrowser.open("https://www.youtube.com") elif "open google" in command: speak("Opening google") webbrowser.open("https://www.google.com") elif "stop" in command or "exit" in command: speak("Good Bye Friend!") break elif command: answer = chat_with_gpt(command) speak(answer) -
Running The Program :
if __name__ == '__main__':
 run_assistant()
By running this code the project starts listening to our commands.
How to use Your AI voice assistant
Key Aspects
Here’s how your user can experience your new voice assistant
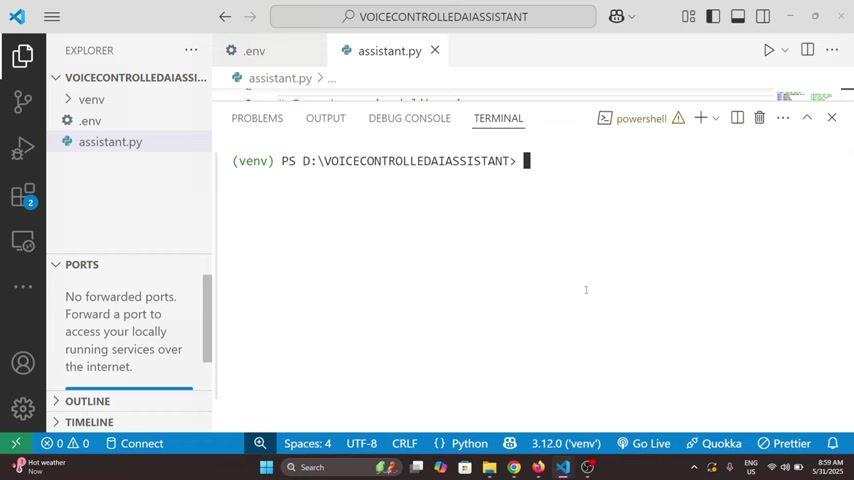
:
-
Start a new voice assistant. You can create new folders for all your files, and rename it to easily remember what it is.
-
Begin the program. Then, you can type python assistent.py to start the program.
-
Engage in conversation By giving the right command, the assistant can follow commands such as, looking something up, making jokes and more.
Useful Markdown Tables For Improved Structure and Readability
Tables can organize information neatly and increase readability. Here's how one could be implemented for comparing different Voice Assistants:
Comparison of Voice Assistants
| Feature | Custom AI Assistant | Alexa | Google Assistant |
|---|---|---|---|
| Customization | High | Medium | Medium |
| Privacy | High | Medium | Medium |
| Task Automation | Limited | High | High |
| Integration | Limited | Extensive | Extensive |
| Development Effort | High | N/A | N/A |








Most people like




































Report
Please select a reason for reporting
- 13 Reasons to Switch from Snapchat to Text Messaging
- 7 Powerful Speech to Text Apps to Boost Productivity
- 10 Best Speech to Text Tools for Effortless Transcription
- 13 Free Tools to Easily Transcribe Audio to Text
- 15 Surprising Ways Google's Speech-to-Text Boosts Productivity
- 7 Best Free Online Audio to Text Transcription Tools
- 9 Tips to Transcribe Speech to Text Faster and Better
- 13 Best Speech to Text Software for Windows 10 in 2023
- 7 Tips for Choosing the Best Transcriber for Audio to Text
- 11 Reasons Why Dragon Speech-to-Text Apps are Game-Changers
- 6 Secrets to Enhance Your Speech to Text Transcription
- 6 Brilliant Ways to Boost Productivity with Talk-to-Text on Your MacBook
- 6 Ways Transcription Software Converts Audio to Text
- 8 Tips to Transcribe Speech to Text Like a Pro
- 6 Reasons IBM Watson Speech to Text is a Game-Changer
- 14 Powerful Ways Talk-to-Text Improves Your Workflow
- 12 Top Windows Speech-to-Text Software for Efficient Transcription
- 12 Game-Changing Benefits of Apple's Speech to Text Technology
- 9 Powerful Use Cases for AWS Speech to Text Technology
- 10 Easy Steps to Transcribe YouTube Videos to Text
- transcription audio en texte
- online audio transcription
- free audio file transcription
- free ai audio transcription
- audio transcription service
- audio transcription online free
- audio transcription free online
- audio to transcription software
- audio and transcript
- ai audio transcription free
- voice recording to text converter
- translate voice recording to text
- record voice to text
- audio recording to text converter
- voice recording and transcription
- chatgpt voice to text
- gmail voice to text
- speech to text reader
- speech to text ai free
- speech to talk
- How SEO and Marketing Dashboards Empower Agencies to Drive Results
- How to Use AI Tools to Find Internal Linking Opportunities Across a Business Website
- Discover Your Perfect Haircut with AI Hairstyle Apps
- Free Reputation Calculator Tools: How They're Adapting to Score AI Visibility, Not Just Rankings
- Design Professional Flyers for Free on Your Phone
- Best Free Flyer Maker Apps for Android: Design Like a Pro
- How to Know If Your Business Is Ready for an AI Customer Service Agent
- Revolutionizing Storytelling: From Novels to Screenplays with AI
- Create Engaging Animated Explainer Videos with a Free AI Tool
- Stop Multi-Subscribing: Benchmark Top AI Visual Models in One Canvas
- 5 Data Problems That Stall AI Projects in Financial Compliance
- Master Storyboard Drawing: Expert Tips for Non-artists
- The Future of Smart Glasses: Explained & Assembling Guide
- DeepL Translator: The AI-Powered Translation Tool
- AI Video Upscaling: Top Tools Compared for Enhanced Quality
- Bridging the Gap: How One Indie Developer Solved the "Art Asset Nightmare" Using AI Style Transfer
- How I Direct Consistent AI Clips: A Hands-On Guide to Multi-Model Generation
- My Honest Review of VideoAI: The Ultimate Character Voice Generator I've Been Using Lately
- Why do so many AI tools underdeliver for online stores?
- My Brand New Logo: AI-Powered Logo Design for Startups

Copyright ©2026 toolify