































Table of Contents
- Key Points
- Getting Started with Your Dynamic Translator
- Coding the Dynamic Translator
- Steps to Use the Dynamic Translator
- Advantages and Disadvantages
- Frequently Asked Questions
- Related Questions


Getting Started with Your Dynamic Translator
What is a Dynamic Translator?
A dynamic translator is a tool that automatically translates text from one language to another. Unlike static translation tools that require pre-defined translations, a dynamic translator leverages APIs and libraries to translate text in real-time. This makes it incredibly useful for various applications, including language learning, real-time communication, and international business. Building a dynamic translator using Python allows you to customize the tool according to your specific needs and integrate it into larger systems seamlessly. The googletrans library, which will be used, offers a Simplified way to interface with Google Translate, providing a wide range of language support. The benefits include:
Creating the Project File
Start by setting up your Python environment. Make sure you have Python installed on your system. Next, create a new file named TranslatorAI.py. This file will contain all the code for your dynamic translator. Proper project setup is crucial for organized development and easy maintenance.
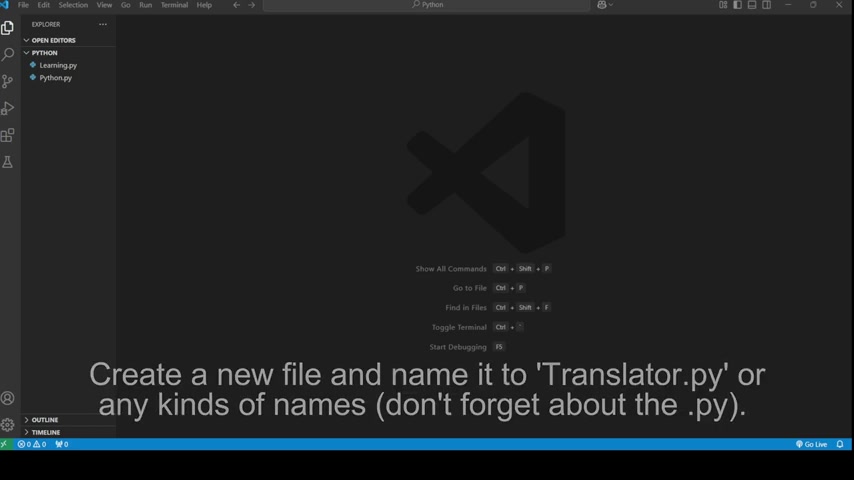
To create a new file in Visual Studio Code, you can simply right-click in the Explorer pane and select 'New File'. Name the file appropriately and ensure it has the .py extension to be recognized as a Python file. This step is essential as it lays the foundation for the rest of the project, providing a dedicated space for all translator-related code.
Installing the Required Libraries
To build a dynamic translator, you need a library that interfaces with translation services. The googletrans library is an excellent choice. To install it, open your terminal or command Prompt and run the following command:
pip install googletrans==4.0.0-rc1This command uses pip, the Python Package installer, to download and install the googletrans library along with its dependencies.
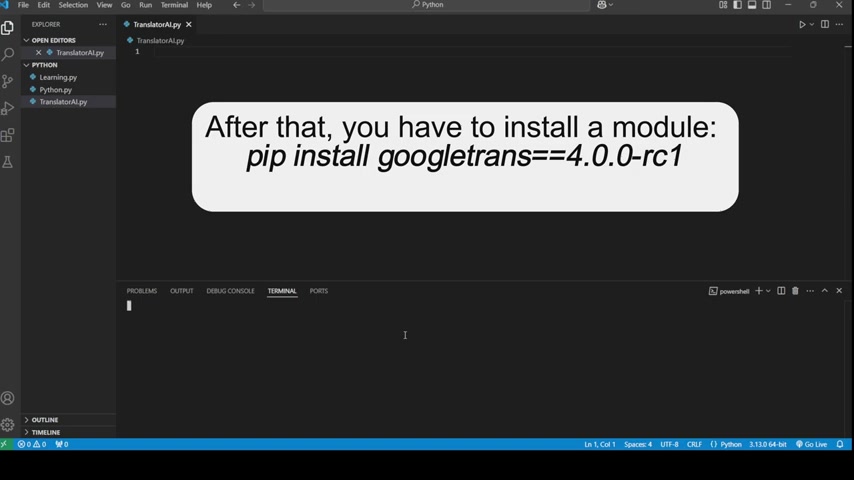
Make sure that your pip is updated to the latest version to avoid compatibility issues. The googletrans library simplifies the process of translating text between different languages using Google Translate. Note: Always use the version specified to ensure compatibility with the code provided and the functionality described in this article. Outdated or newer versions might have different APIs, leading to unexpected errors.
Coding the Dynamic Translator
Importing the Necessary Modules
Now that you have the googletrans library installed, you can start coding your translator. Open the TranslatorAI.py file and add the following line of code to import the necessary modules:
from googletrans import Translator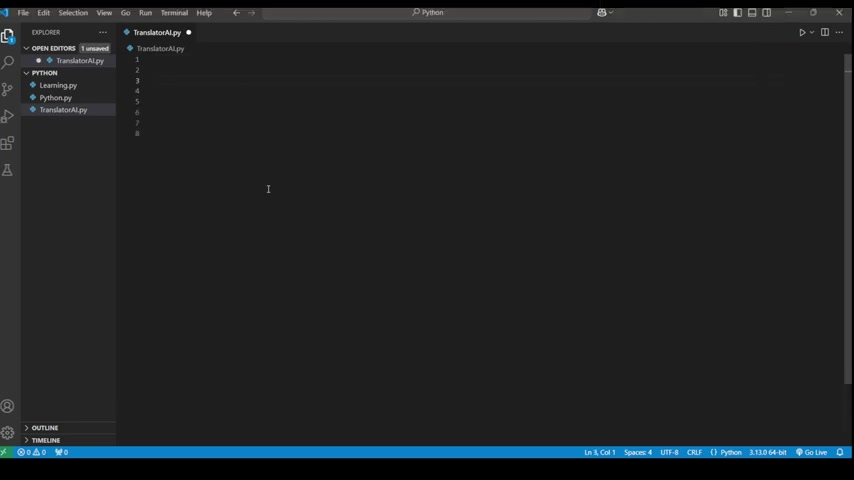
This line imports the Translator object from the googletrans library, which helps in translating text between different languages using Google Translate. Ensure that the import statement is correctly placed at the beginning of your script to make the Translator class available for use throughout your code.
Next, initialize the translator:
translator = Translator()This initializes a translator object that you can use to call translation functions. The Translator class is the main interface to the googletrans library, providing methods to translate text, detect languages, and more. By initializing this object, you create an instance that you can use to perform translation tasks.
After initializing the translator object, define a function that will handle translating the user's input:
def translate_sentence():
    sentence = input("Enter the sentence you want to translate: ")
    source_lang = input("Enter the source language code (e.g., 'en' for English, 'es' for Spanish, etc.): ")
    target_lang = input("Enter the target language code (e.g., 'en' for English, 'es' for Spanish, etc.): ")

    translation = translator.translate(sentence, src=source_lang, dest=target_lang)
    print(f"Translation from {source_lang} to {target_lang}: {translation.text}")
This defines a function that will handle translating the user's input. The function first prompts the user to enter the sentence they want to translate. Then, it asks for the source and target language codes. Finally, it uses the translator object to translate the sentence and prints the translated text. This is the function where the core translation logic resides. Let’s break it down:
sentence = input("Enter the sentence you want to translate: "): Prompts the user to enter the text to be translated.source_lang = input("Enter the source language code (e.g., 'en' for English, 'es' for Spanish, etc.): "): Asks the user to input the language code of the original text.target_lang = input("Enter the target language code (e.g., 'en' for English, 'es' for Spanish, etc.): "): Prompts the user to enter the desired language code for the translation.translation = translator.translate(sentence, src=source_lang, dest=target_lang): Sends the sentence and language codes to Google Translate and retrieves the translation in the target language.print(f"Translation from {source_lang} to {target_lang}: {translation.text}"): This prints the translated text to the screen, showing the source and target languages.
To make the translator more interactive, you can add a main function that presents the user with options to translate a sentence or exit the program:
def main():
    print("Welcome to the Dynamic Translation System ---")
    while True:
        print("
Options:")
        print("1. Translate a sentence")
        print("2. Exit")

        choice = input("Enter your choice (1 or 2): ").strip()

        if choice == '1':
            translate_sentence()
        elif choice == '2':
            print("Exiting the translation system.")
            break
        else:
            print("Invalid choice. Please try again.
")

if __name__ == "__main__":
    main()
This is the main part of the program, where the user can interact with the system. The program presents the user with options to translate a sentence or exit. Depending on the user's choice, it either calls the translate_sentence() function or exits the program.
Let’s break down what’s happening here:
print("Welcome to the Dynamic Translation System ---"): Displays a welcome message to the user.while True:: Creates an infinite loop to keep the program running until the user chooses to exit.print(" Options:"): Prints the available options to the user.choice = input("Enter your choice (1 or 2): ").strip(): Reads the user's choice and removes any leading or trailing whitespace.if choice == '1': If the user chooses option 1, the program will call thetranslate_sentence()function to translate a sentence.elif choice == '2': If the user chooses option 2, the program will exit.else: If the user enters an invalid choice, the program will display an error message and ask the user to try again.if __name__ == "__main__":: This ensures that themain()function is called when the script is executed.
To run the program, save the file and execute it from your terminal:
python TranslatorAI.pyThis command tells Python to execute the code in the TranslatorAI.py file, starting the dynamic translation system.







Most people like































Report
Please select a reason for reporting
- 13 Reasons to Switch from Snapchat to Text Messaging
- 7 Powerful Speech to Text Apps to Boost Productivity
- 10 Best Speech to Text Tools for Effortless Transcription
- 13 Free Tools to Easily Transcribe Audio to Text
- 15 Surprising Ways Google's Speech-to-Text Boosts Productivity
- 7 Best Free Online Audio to Text Transcription Tools
- 9 Tips to Transcribe Speech to Text Faster and Better
- 13 Best Speech to Text Software for Windows 10 in 2023
- 7 Tips for Choosing the Best Transcriber for Audio to Text
- 11 Reasons Why Dragon Speech-to-Text Apps are Game-Changers
- 6 Secrets to Enhance Your Speech to Text Transcription
- 6 Brilliant Ways to Boost Productivity with Talk-to-Text on Your MacBook
- 6 Ways Transcription Software Converts Audio to Text
- 8 Tips to Transcribe Speech to Text Like a Pro
- 6 Reasons IBM Watson Speech to Text is a Game-Changer
- 14 Powerful Ways Talk-to-Text Improves Your Workflow
- 12 Top Windows Speech-to-Text Software for Efficient Transcription
- 12 Game-Changing Benefits of Apple's Speech to Text Technology
- 9 Powerful Use Cases for AWS Speech to Text Technology
- 10 Easy Steps to Transcribe YouTube Videos to Text
- transcription audio en texte
- online audio transcription
- free audio file transcription
- free ai audio transcription
- audio transcription service
- audio transcription online free
- audio transcription free online
- audio to transcription software
- audio and transcript
- ai audio transcription free
- voice recording to text converter
- translate voice recording to text
- record voice to text
- audio recording to text converter
- voice recording and transcription
- chatgpt voice to text
- gmail voice to text
- speech to text reader
- speech to text ai free
- speech to talk
- Discover Your Perfect Haircut with AI Hairstyle Apps
- Free Reputation Calculator Tools: How They're Adapting to Score AI Visibility, Not Just Rankings
- Design Professional Flyers for Free on Your Phone
- Best Free Flyer Maker Apps for Android: Design Like a Pro
- How to Know If Your Business Is Ready for an AI Customer Service Agent
- Revolutionizing Storytelling: From Novels to Screenplays with AI
- Create Engaging Animated Explainer Videos with a Free AI Tool
- Stop Multi-Subscribing: Benchmark Top AI Visual Models in One Canvas
- Best Seedance 2.5 API Provider: Every Price on the Market, Checked at Source
- AI OnlyFans: How to Generate $30,000/Month (Legally)
- Top 7 AI Platforms Offering the Ultimate Voice Library for Content Creators in 2026
- 4 Top Browser Editors to Add Sound Effect and Elevate Your Video Projects
- A Brief History of AI: From Da Vinci to Modern Machine Learning
- Discover Your Perfect Haircut with AI Hairstyle Apps
- Free Reputation Calculator Tools: How They're Adapting to Score AI Visibility, Not Just Rankings
- Design Professional Flyers for Free on Your Phone
- Best Free Flyer Maker Apps for Android: Design Like a Pro
- Unleash Creativity: AI Coloring Pages with ColoringBook.ai
- Generate Stunning AI Photos with Google Gemini: A Guide
- Boost Your Etsy Sales with Stunning Digital Invitations!

Copyright ©2026 toolify