


Hey there! I'm pretty seasoned when it comes to antidetect browsers, having explored quite a few myself. But antidetect cloud phones? Now, that’s a fresh and exciting twist. Today, I’m all set to share some insights on GeeLark, a cool mobile-based antidetect solution.
Download and install
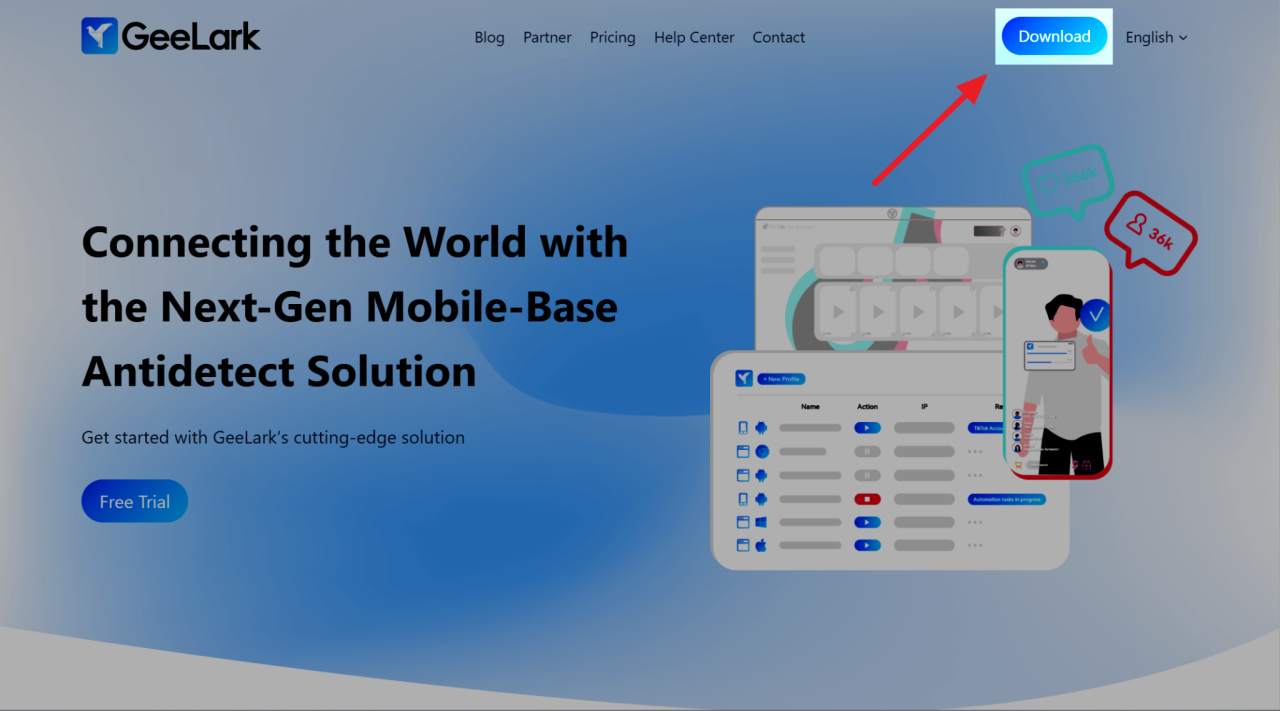
First things first, hop over to GeeLark’s website and hit that Download button to get the app. It’s available for Windows and Mac.
Getting started
Once you've signed up and logged into your GeeLark account, you'll find everything pretty straightforward. The interface is a breeze to navigate - with the menu bar on the left and the action area on the right.

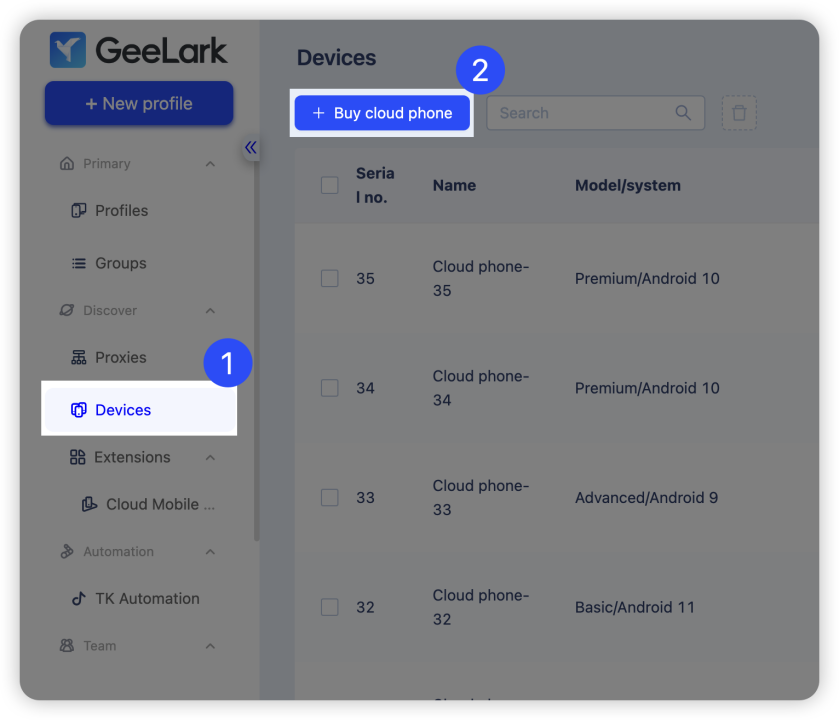
Buying antidetect cloud phones
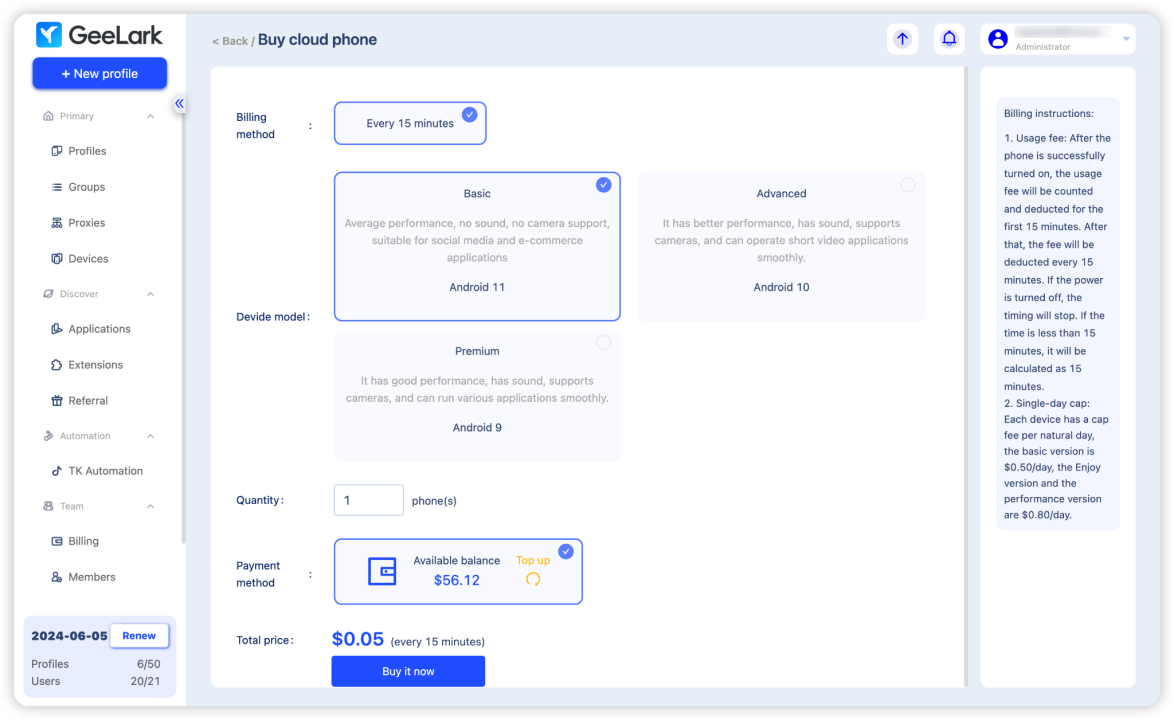
I was really drawn to the antidetect cloud phone feature, so that's the first thing I'm diving into! Here's how you start: just hit "Buy cloud phone" in the Devices section.
GeeLark offers three kinds of cloud phones: Basic, Advanced, and Premium. The Basic one doesn't have sound; Advanced is great for running short video apps smoothly; and Premium? Well, it's perfect for all sorts of apps. If you're into using TikTok along with other social media platforms like Facebook and Instagram, I'd say Premium is the way to go.
Cloud phone pricing
GeeLark’s cloud phone charges:
- Basic: $0.05 (for every 15 minutes)
- Advanced&Premium: $0.08 (for every 15 minutes)
- Usage charges: After properly turning on the phone (opening the phone profile), you will be charged for the first 15 minutes. Following that, you will be charged every 15 minutes. The charge calculation will finish once the phone is turned off (the phone profile is closed). Usage of less than 15 minutes will be charged as 15 minutes.
Compared to those monthly-charge cloud phones, I’m all in for GeeLark’s pay-by-the-minute cloud phones. It’s simple: why pay for a whole month when you only need a few minutes of use?
Plus, you won’t have to stress about being charged for hours of non-use. You only pay when you use it. And get this: there’s a daily cap on how much you’re charged - $0.5 for Basic, and $0.8 for Advanced and Premium. So, if you’re using a Basic cloud phone for 20 hours a day, you’ll only pay a maximum of $0.5 per day.
Here, let's take a look at the price comparison between Basic and Premium:
|
|
Basic |
Premium |
|
Usage charges |
$0.05 (for every 15 minutes) |
$0.08 (for every 15 minutes) |
|
Max. charge for 24 hours |
$0.5/phone |
$0.8/phone |
|
Max. charge for 30 days |
$15/phone |
$24/phone |
For a little experiment, I grabbed 3 cloud phones from GeeLark: 2 Performance and 1 Basic. Stick around to find out how to get started with them.
Creating a phone profile
After getting your new cloud phone, the fun part begins—setting up your phone profile! Just hit “New profile” in the top left corner and choose “New cloud phone profile”. Feel free to get creative with the Name, Group, Tags, and Remark fields. Just a heads up, currently only Android OS is available.
Oh, and you'll need a proxy to get your profile all set. GeeLark doesn't provide proxies, so you'll want to snag one from a proxy service. Then, fill in the proxy details, like type, host, port, username, and password, into the Proxy settings section.
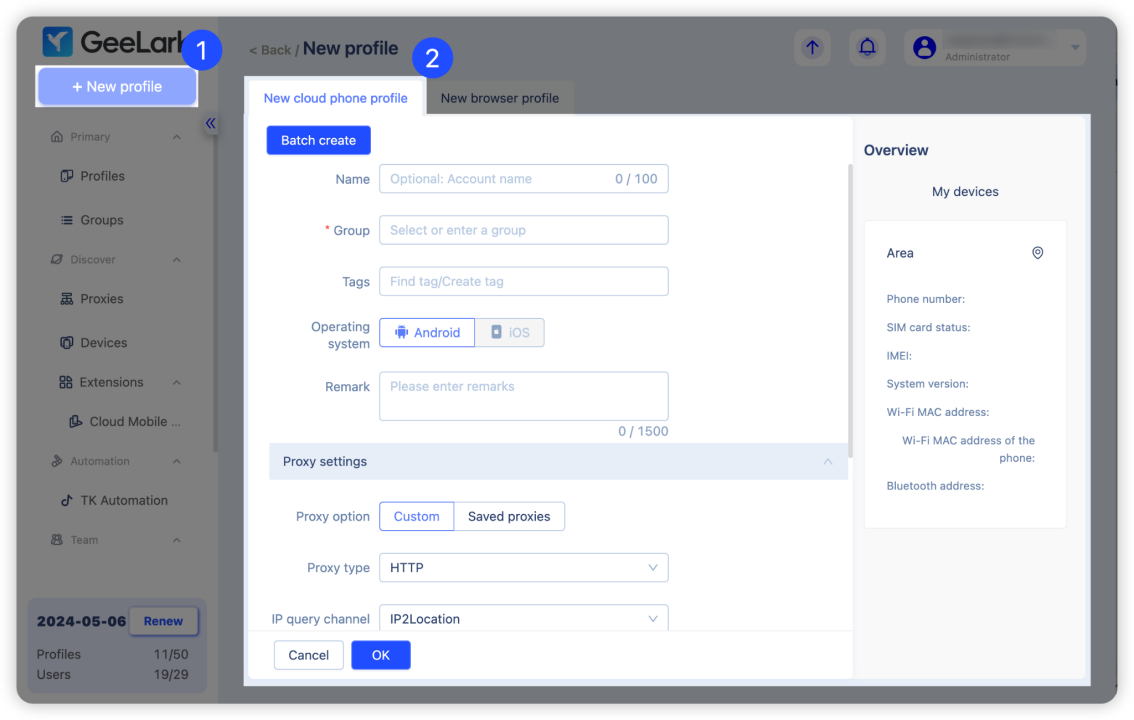
Choosing a cloud phone
Now, pick a cloud phone you'd like to run this profile on. If you spot “0 units in stock,” no stress—it just means you haven't bought any of these cloud phones yet.
Since I’ve already got three cloud phones, I’ll simply choose one of them.
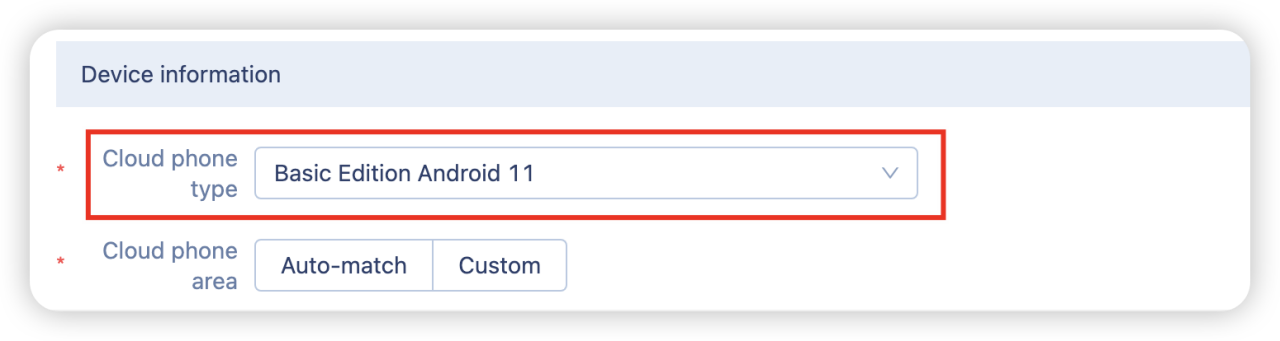
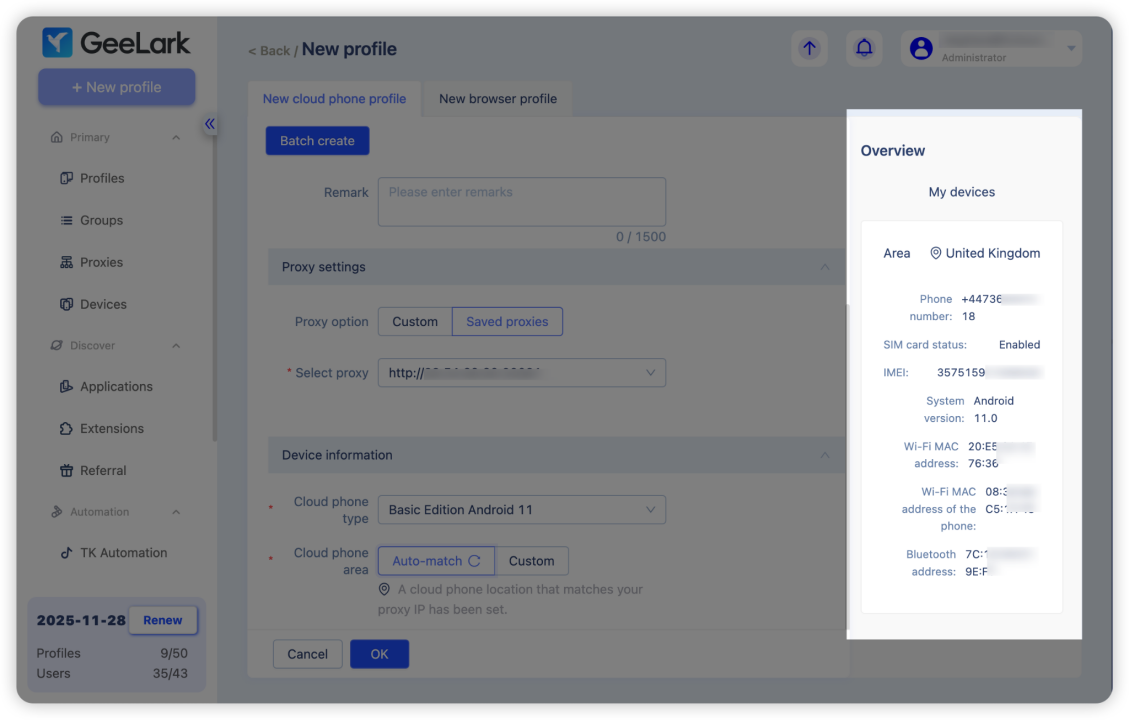
When it comes to selecting a cloud phone area, go with Auto-match. It’s super handy—it automatically picks a cloud phone location that matches your proxy IP location. For instance, I set up a US proxy in the previous step, so the Auto-match will place my cloud phone in the US.

Once you’ve got all these settings in place, you can check out your cloud phone details, like location, IP address, and SIM card status, in the “My equipment” section on the right.
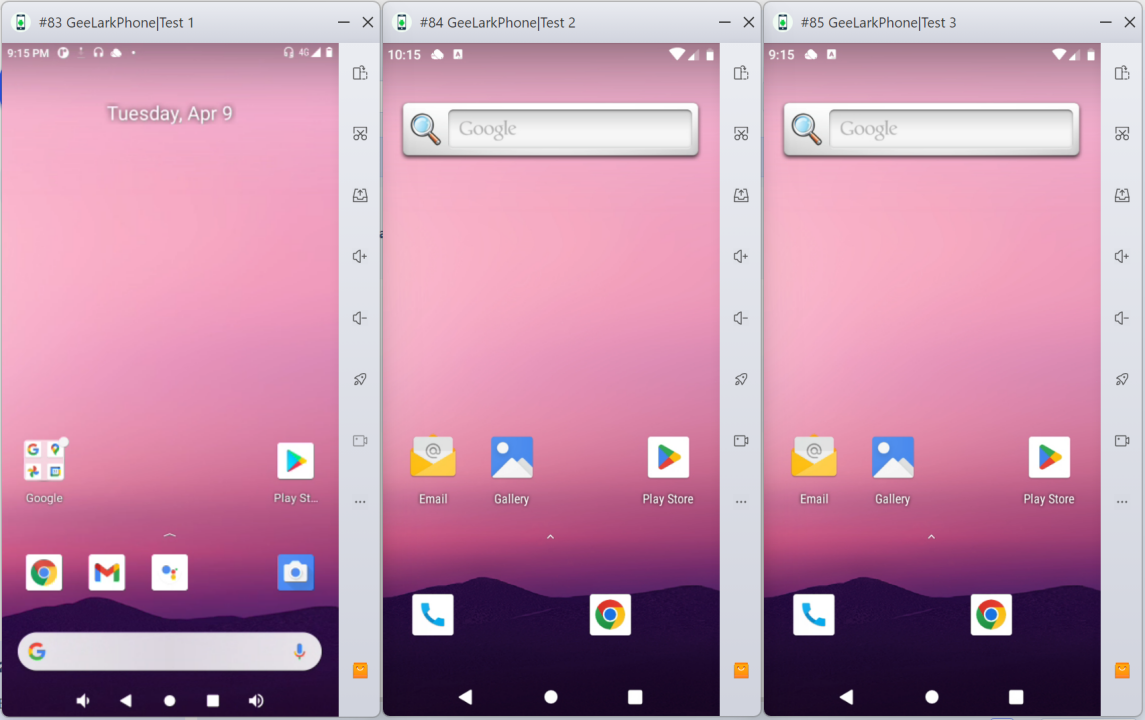
Click “OK” when you’re done setting up your phone profile. I ended up creating 3 profiles, each linked to one of the cloud phones I purchased.
Starting the cloud phone profile
To start your phone profile, simply select the profiles you want to use and click “Start”.

My three phone profiles got going one after another in just 10 seconds. I’m really happy with how quick they started up!
Major features of the antidetect cloud phone
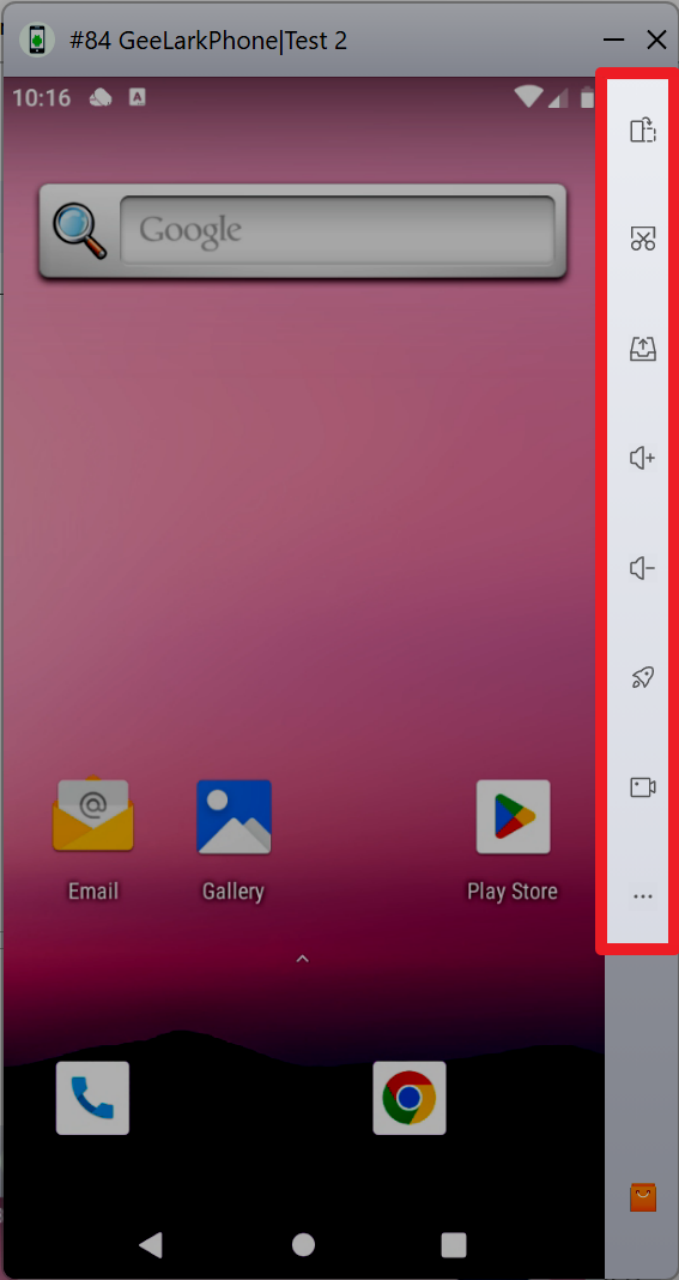
Essential features
Just like any Android phone, the cloud phone lets you do all the basic stuff - rotate images, take screenshots, adjust the volume, and speed up the phone by closing sessions.
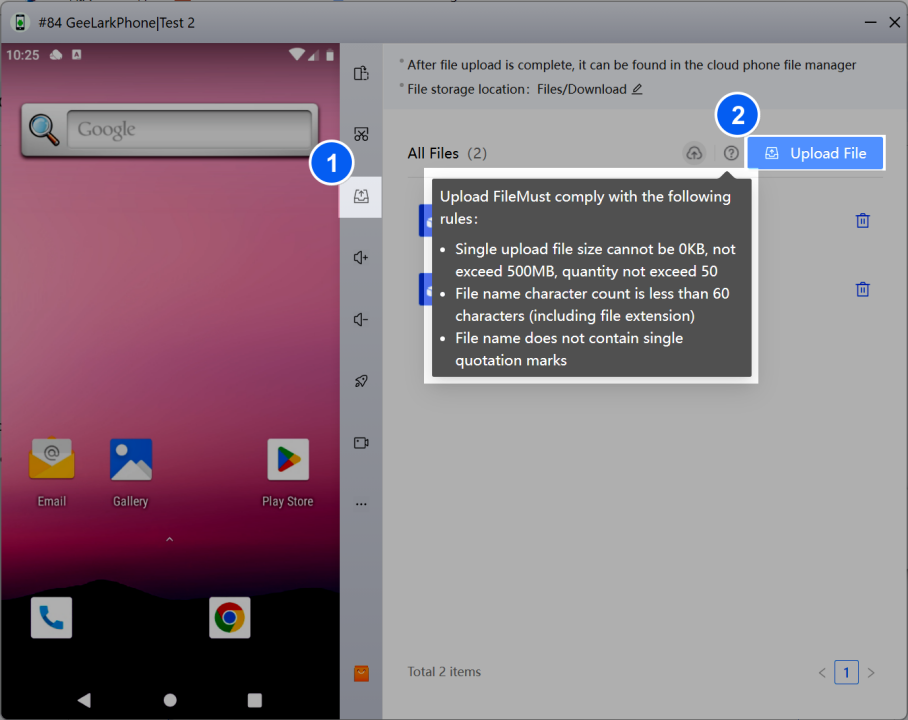
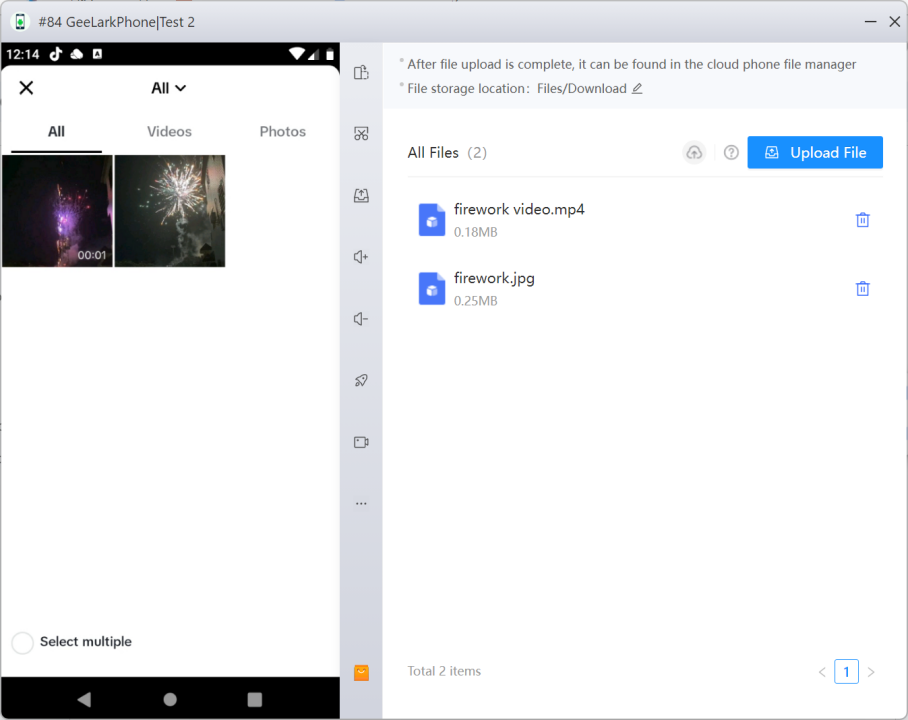
Plus, you can upload files to the phone, like those awesome images and videos you’ll want for your TikTok account, straight from your computer. Just remember, there’s a cap on how much and how big you can upload, so choose your creatives wisely.
It doesn't stop there! You can reset the device to factory settings, run profile spoofing tests, tweak the sharpness, dive into TikTok automation, or restart the cloud phone whenever you need. And I promise, I’ll get back to talking about that TikTok automation bit soon.

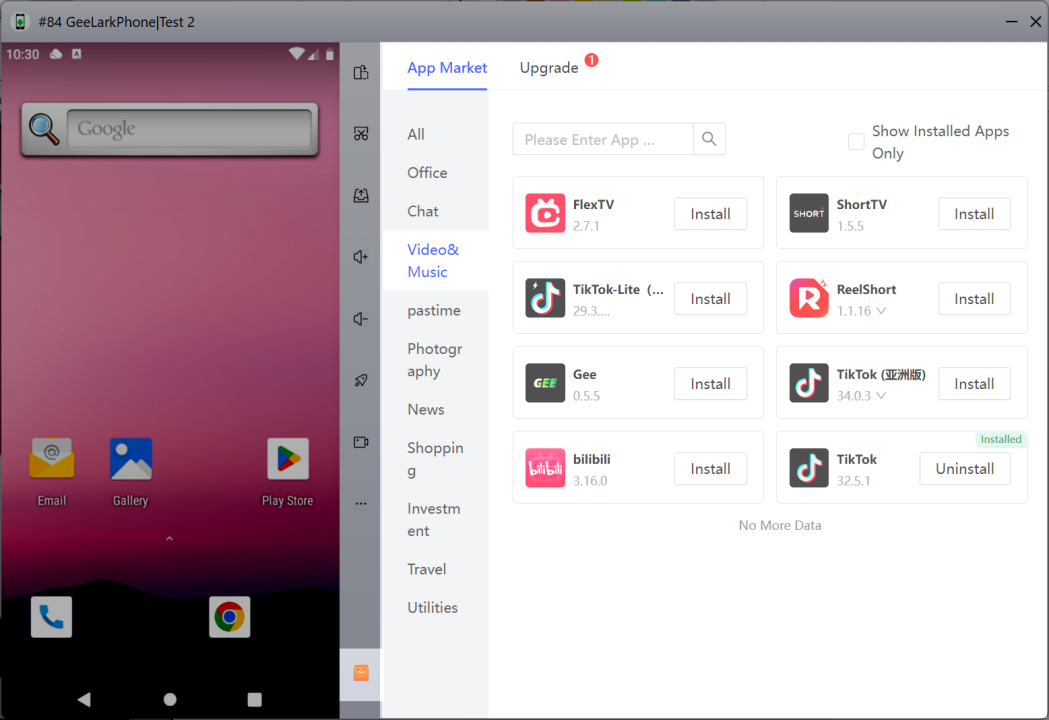
One of the coolest things about GeeLark’s cloud phone? It comes with its own app market. This means you can grab all the apps you need without even opening Google Play. Talk about being super convenient and efficient!
What really sets the antidetect cloud phone apart from just any antidetect browser is its ability to run mobile apps seamlessly. I’ll be putting it to the test with TikTok as my go-to example. So, keep on scrolling to see how it goes!
Watching videos
Watching TikTok on a cloud phone feels just like using an Android phone. Have a look at how it appears on the Basic (left) and the Performance (right) cloud phones.
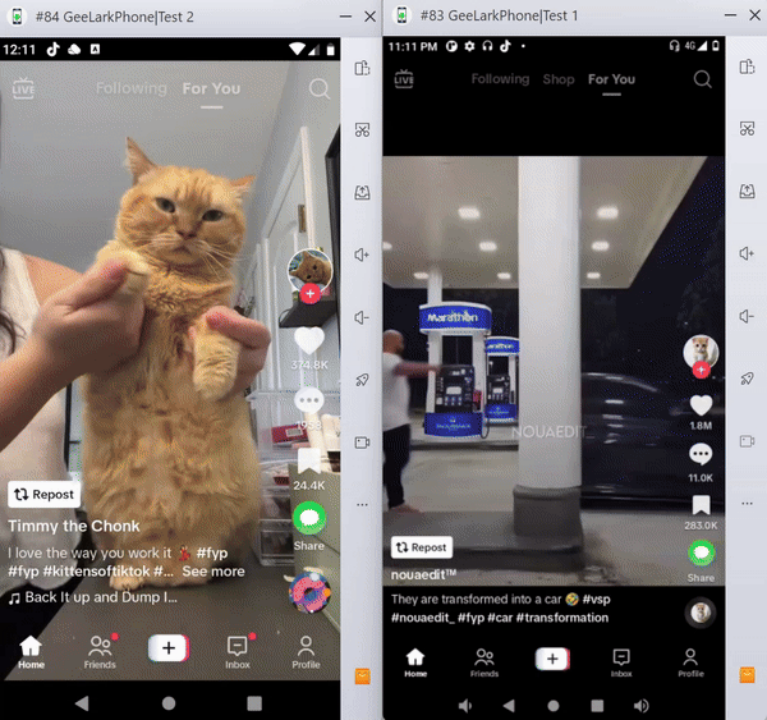
When it comes to watching TikTok, both cloud phones are super speedy. Not sure which one to pick? Why not give the Basic a try first?
Publishing pictures/videos
TikTok can access files on your cloud phone. That means you can easily post pictures and videos from your cloud phone straight to TikTok. If you're juggling multiple TikTok accounts, GeeLark’s cloud phones are a total game-changer. Imagine having dozens, even hundreds, of cloud phones on just one computer for all your TikTok accounts. It’s a huge time and cost saver, skipping the need for a bunch of real devices and the hassle of managing them one by one. Plus, it's convenient for a team to manage the accounts together. How cool is that?
Automation
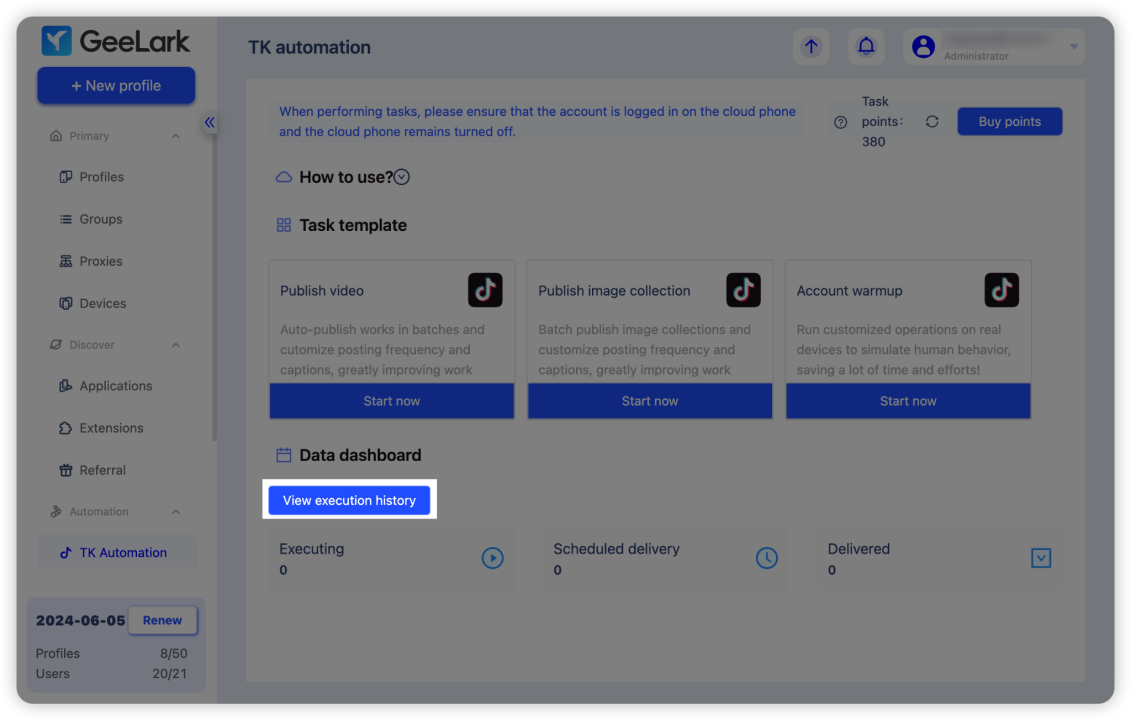
You just can't talk about boosting efficiency without mentioning automation. Right now, GeeLark offers three awesome TikTok automation templates: Publish video, Publish image collection, and Account warmup.
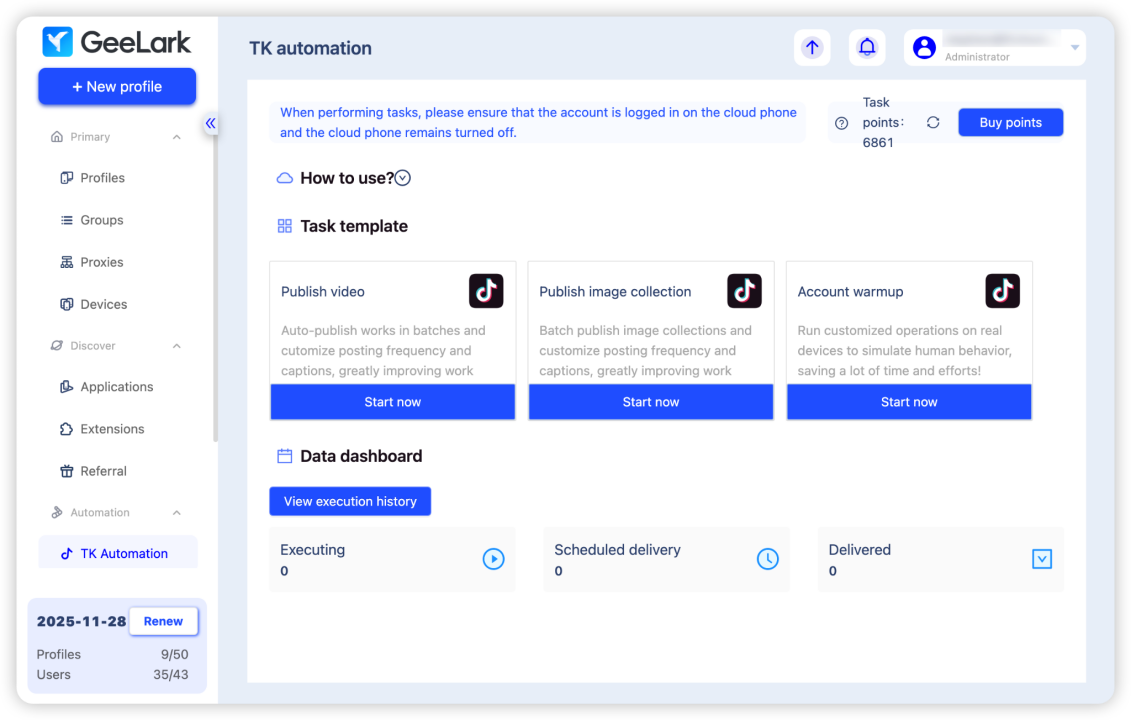
GeeLark uses a task points system. Each time you run an automation task, some task points get used up. But here's the good news: every new user gets 100 free task points to try out these automation tasks. So, definitely check out the task points instruction:
|
Charged item |
Point |
Note |
|
Post video |
1 |
Posting a regular video costs 1 point |
|
Post video with a yellow basket |
2 |
Adding a product link (a yellow basket) to your video costs 2 points |
|
Post picture |
1 |
Posting a picture costs 1 points |
|
Account warmup |
1 |
1 point is charged for 5 minutes (warmup for less than 5 minutes will be charged as 5 minutes). A random like/comment/add to favorite costs 1 point. |
I'm really loving GeeLark's TikTok automation because it runs on the cloud, which means you don't even need to have your phone profiles open. Just pick a template, and click Start, you're off to the Create new task page.
So how do these templates work?
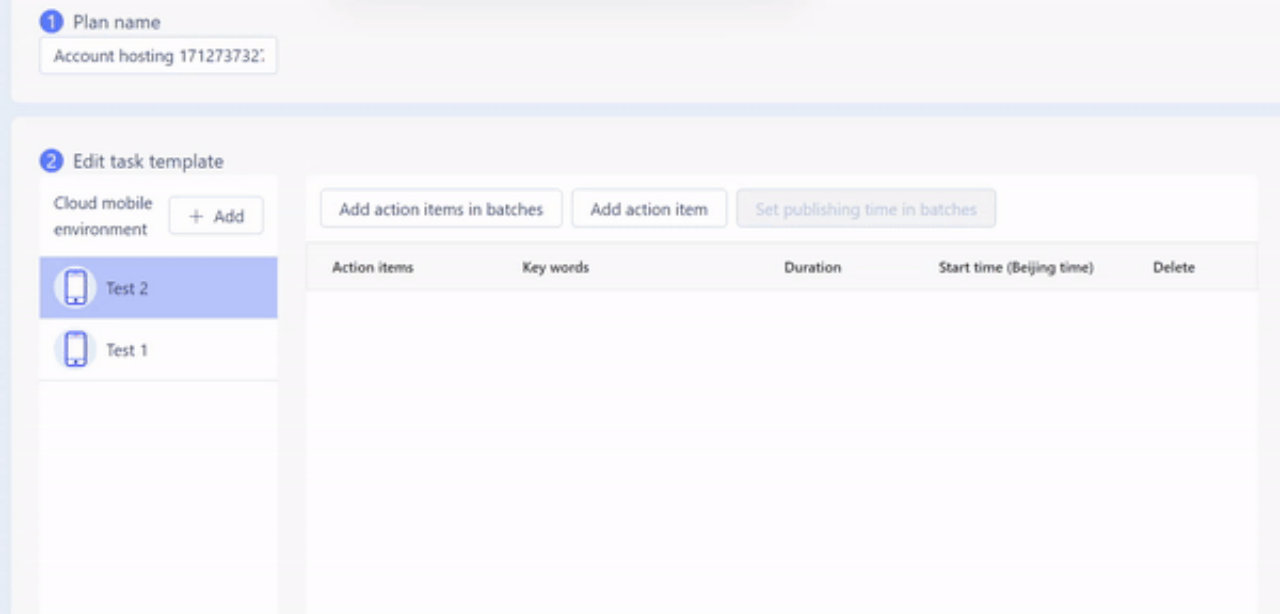
Account warmup
First off, start by adding the cloud phones you're planning to use for the automation task. After that, you've got two options to go about adding actions:
- Batch add actions: Set the same actions on all your cloud phones at once.
- Add action: Pick and choose different actions for each cloud phone, one at a time.
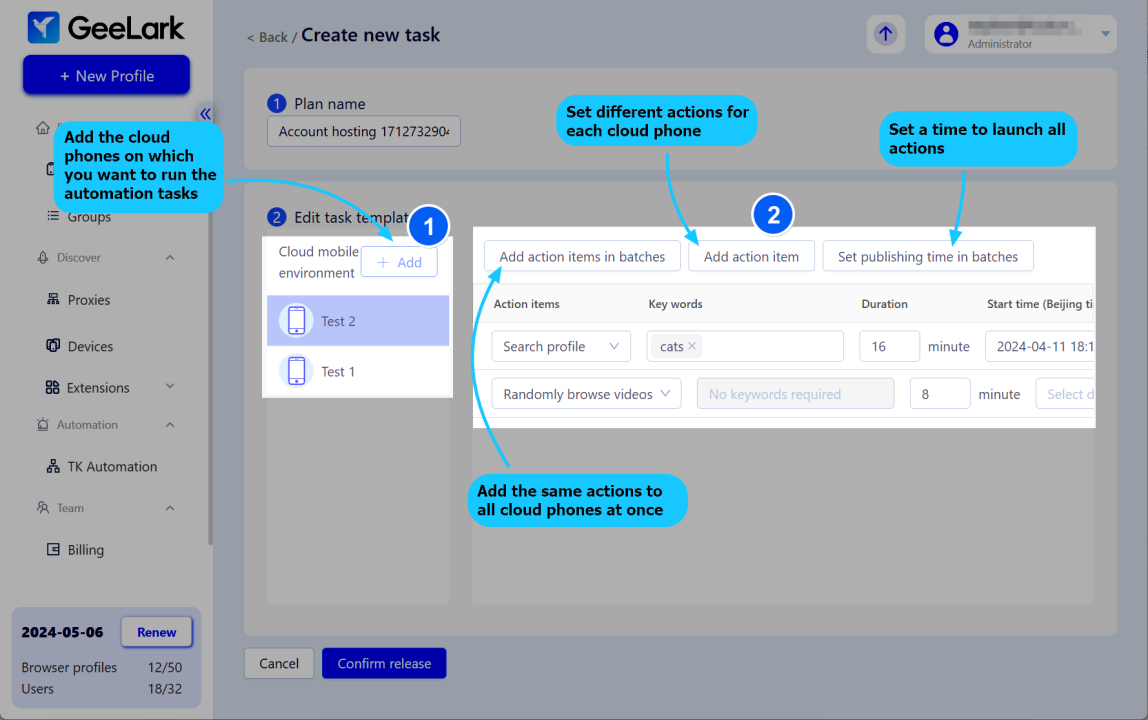
The Account warmup template offers three actions: Search short video, Search profile, and Randomly browse videos. You can set when to start the action. As for how long it will last, it will be automatically set by the system. You can also set a time to start all the tasks by clicking “Set publishing time in batches”.
Post video
First up, add the cloud phone profiles you want to work with.
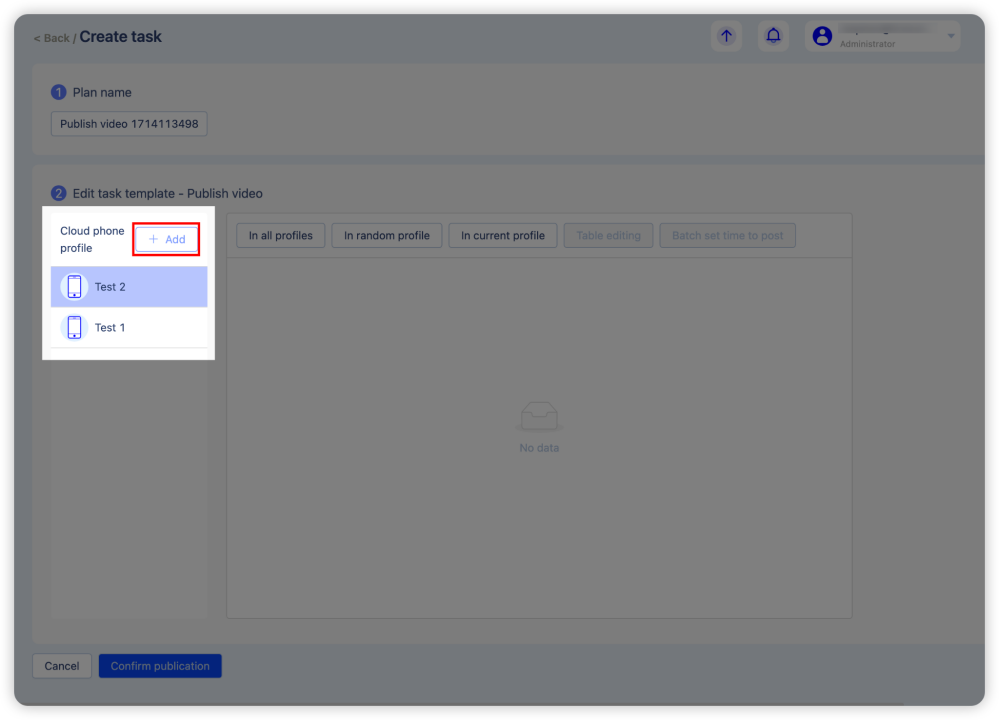
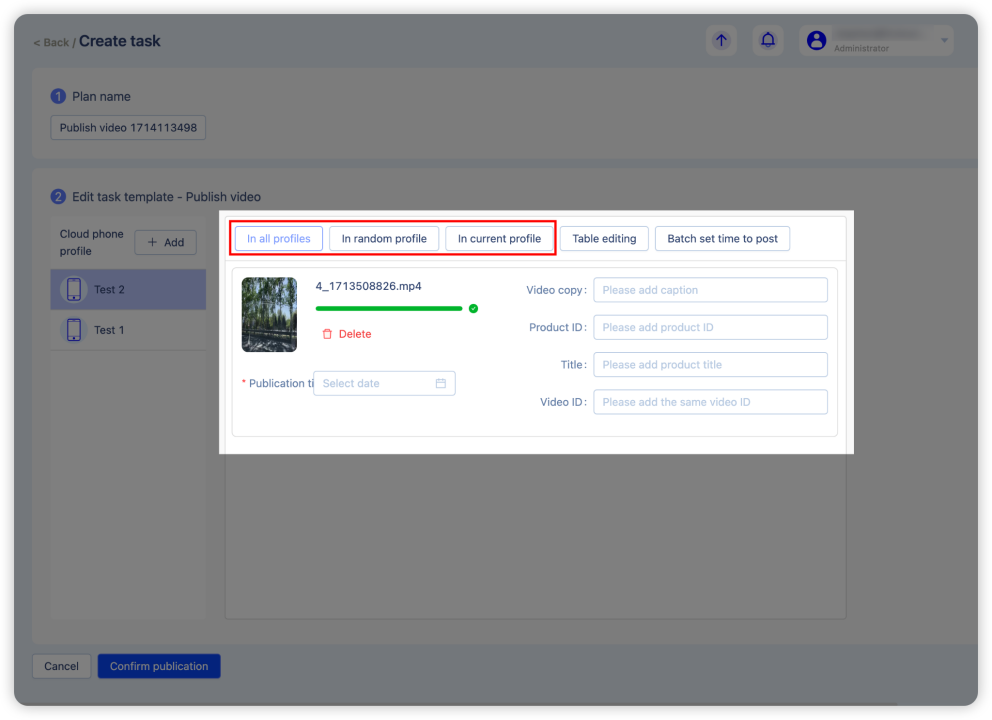
Then upload the videos you want to share on your TikTok accounts. Here are 3 options of uploading videos:
- In all profiles: Upload the video to alll profiles.
- In random profile: Upload the video to a random profile.
- In current profile: Upload the video to the current profile.
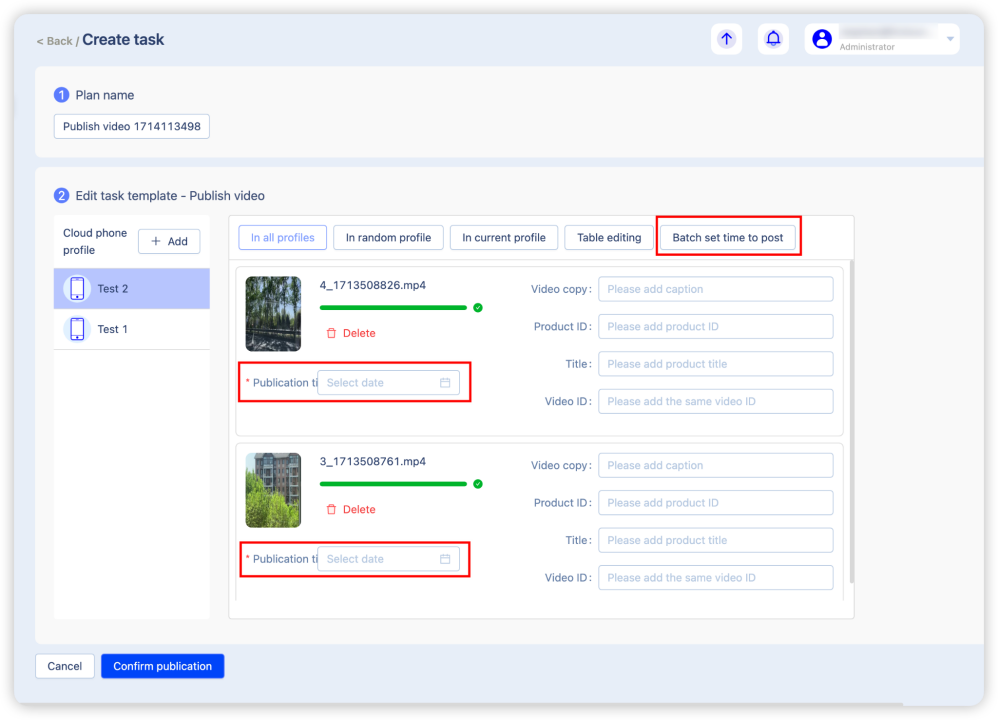
Next, you set the time to post the video, either individually, or in batches.
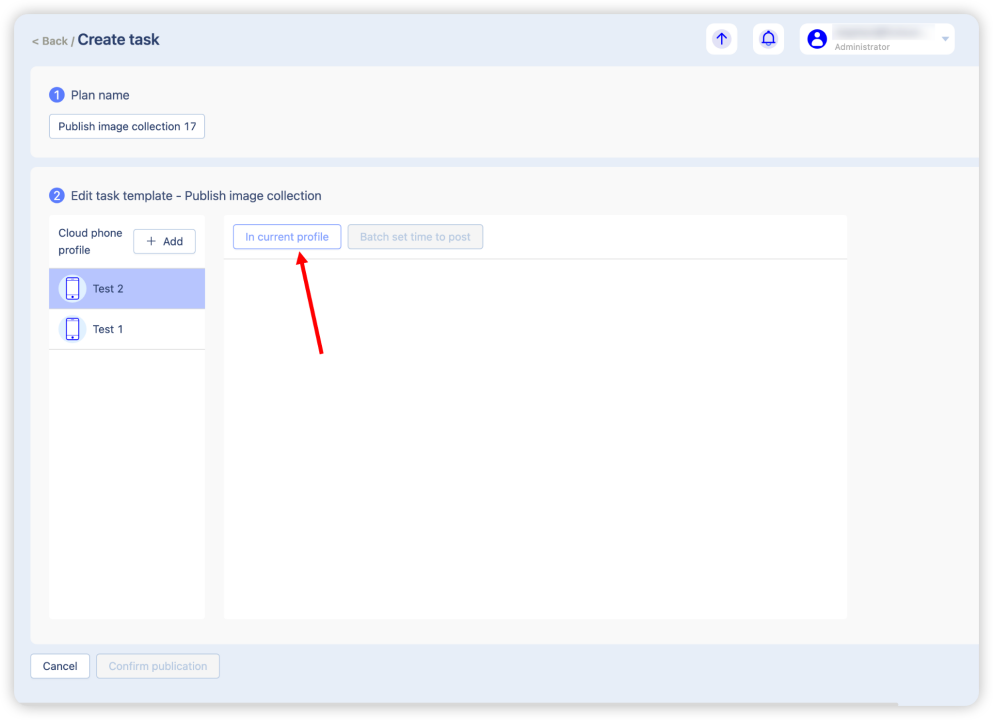
Post image collection
Use “In current profile” to post pictures on each TikTok account.
Tasks records
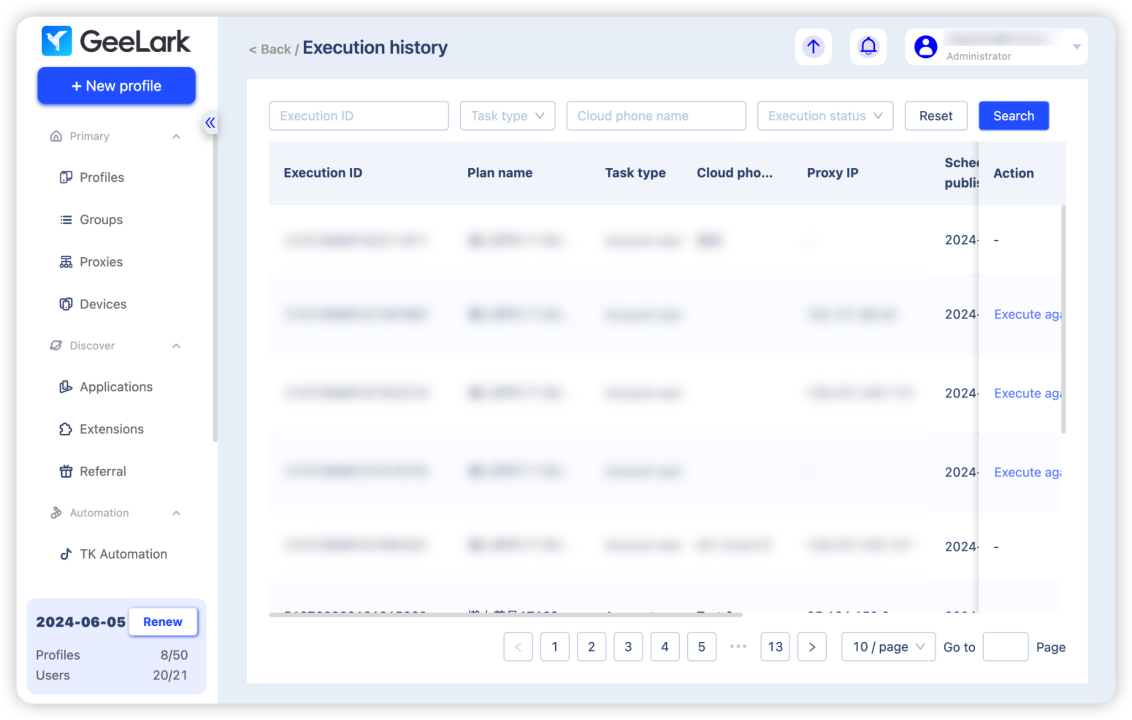
Click "View execution history" to see the schedules and runs of your tasks.
Right now, GeeLark might not have a ton of automation templates to choose from, but I’m keeping an eye out for more, especially for TikTok and other social platforms. Stay tuned!
Other features
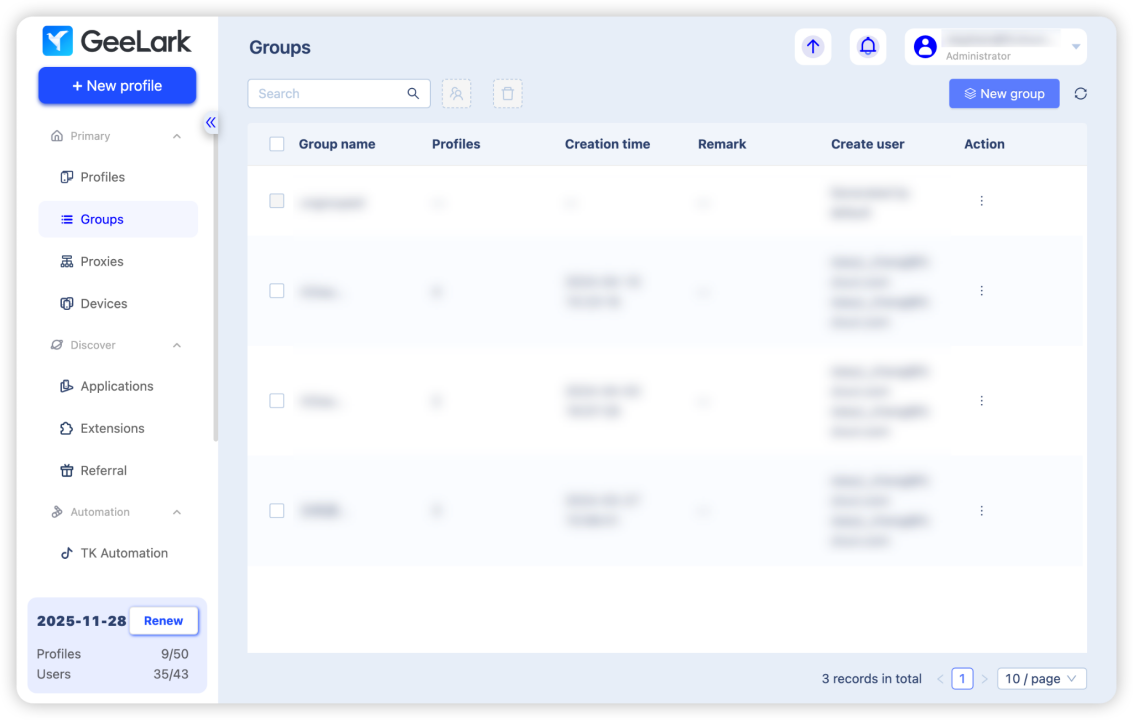
Group management
It lets you sort profiles by groups, making your work more effective and easier.
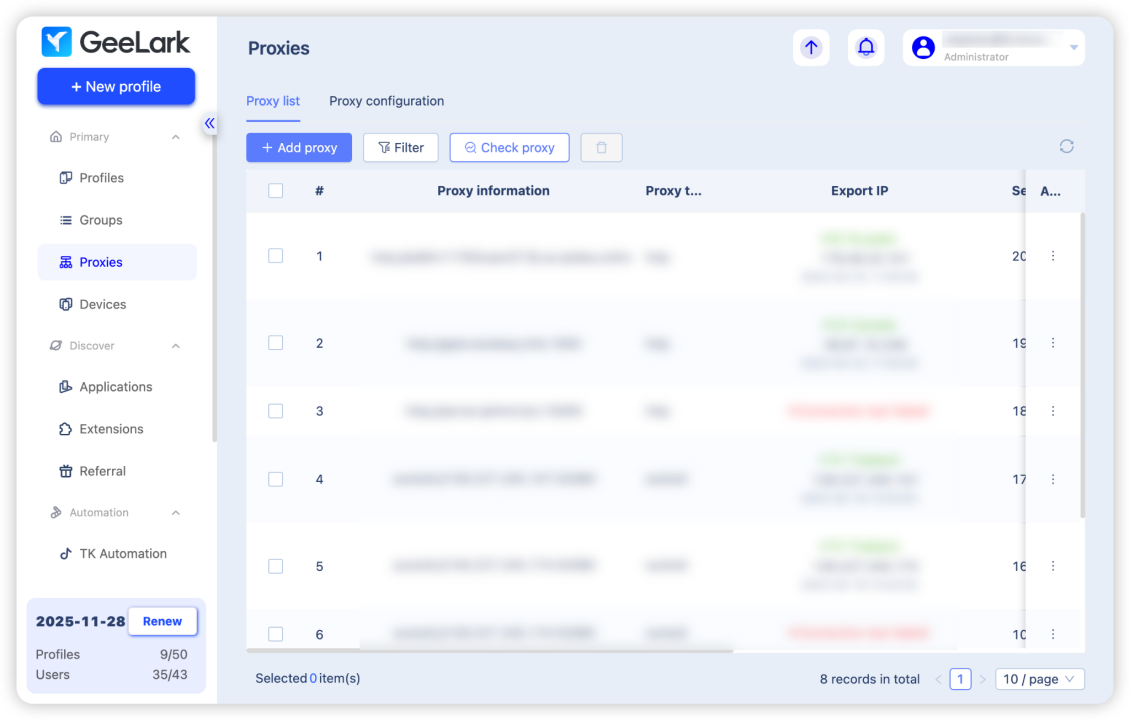
Proxy management
You can keep the details of your purchased proxies right here. That way, when you're setting up a new profile, just pick a proxy from the Saved proxies list; it saves you the hassle of entering the proxy information all over again.
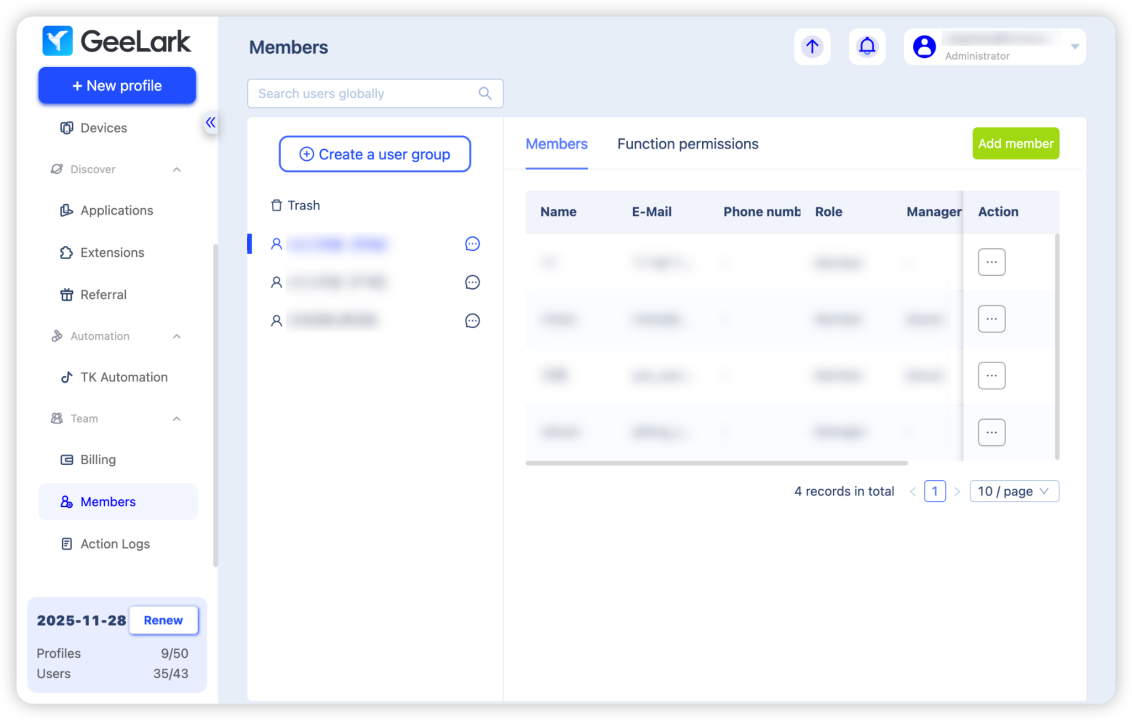
Team management
If you're looking to collaborate with your team, feel free to add more member seats. You can create various groups and assign different permissions to your team members.
Conclusion
An antidetect browser can simplify multi-accounting. However, if you need to manage your accounts via mobile app rather than the website, then opting for GeeLark's antidetect cloud phone might just be the smarter move. Its ability to mimic mobile phones, flexible pricing, automation tools, and proxy configuration truly set GeeLark apart as a game changer in the affiliate marketing world.
Find AI tools in Toolify
Join TOOLIFY to find the ai tools
Get started
- App rating
- 4.9
- AI Tools
- 20k+
- Trusted Users
- 5000+
- No complicated
-

- No difficulty
-

- Free forever
-

- Discover Leanbe: Boost Your Customer Engagement and Product Development
- Unlock Your Productivity Potential with LeanBe
- Unleash Your Naval Power! Best Naval Civs in Civilization 5 - Part 7
- Master Algebra: Essential Guide for March SAT Math
- Let God Lead and Watch Your Life Transform | Inspirational Video
- Magewell XI204XE SD/HD Video Capture Card Review
- Discover Nepal's Ultimate Hiking Adventure
- Master the Art of Debugging with Our Step-by-Step Guide
- Maximize Customer Satisfaction with Leanbe's Feedback Tool
- Unleashing the Power of AI: A Closer Look
- Transform Your Images with Microsoft's BING and DALL-E 3
- Create Stunning Images with AI for Free!
- Unleash Your Creativity with Microsoft Bing AI Image Creator
- Create Unlimited AI Images for Free!
- Discover the Amazing Microsoft Bing Image Creator
- Create Stunning Images with Microsoft Image Creator
- AI Showdown: Stable Diffusion vs Dall E vs Bing Image Creator
- Create Stunning Images with Free Ai Text to Image Tool
- Unleashing Generative AI: Exploring Opportunities in QE&T
- Create a YouTube Channel with AI: ChatGPT, Bing Image Maker, Canva
- Google's AI Demo Scandal Sparks Stock Plunge
- Unveiling the Yoga Master: the Life of Tirumalai Krishnamacharya
- Hilarious Encounter: Jimmy's Unforgettable Moment with Robert Irwin
- Google's Incredible Gemini Demo: Unveiling the Future
- Say Goodbye to Under Eye Dark Circles - Simple Makeup Tips
- Discover Your Magical Soul Mate in ASMR Cosplay Role Play
- Boost Kidney Health with these Top Foods
- OpenAI's GEMINI 1.0 Under Scrutiny
- Unveiling the Mind-Blowing Gemini Ultra!
- Shocking AI News: Google's Deception Exposed!
- Deciphering Camera & GPU Woes
- Intel's Austerity Drive: Responding to Semiconductor Bill
- Lumion vs Unreal Engine: The Ultimate Comparison
- AMD Navi: Only 40 Compute Units, Cause for Concern?
- Unlocking Windows 11 Security: TPM 2.0 Demystified
- Decoding Intel's Earnings: Insights & Recommendations
- Unveiling Open64 Compiler Suite 4.5.2
- Decoding Intel's Q1 Earnings: Expert Insights
- Intel's Q2 Earnings: Shocking Revelations Unveiled
- Unlocking Intel's Potential: A Strategic Analysis