































Table of Contents
- Key Points
- Understanding Image Translation
- Practical Implementation with OpenCV and Python
- Step-by-Step Guide on Image Translation Using OpenCV
- Image Translation: Weighing the Benefits and Drawbacks
- Frequently Asked Questions
- Further Exploration: Related Concepts


Understanding Image Translation
What is Image Translation?
Image translation is essentially the process of moving an image's pixels along either the horizontal (x-axis) or vertical (y-axis) direction.
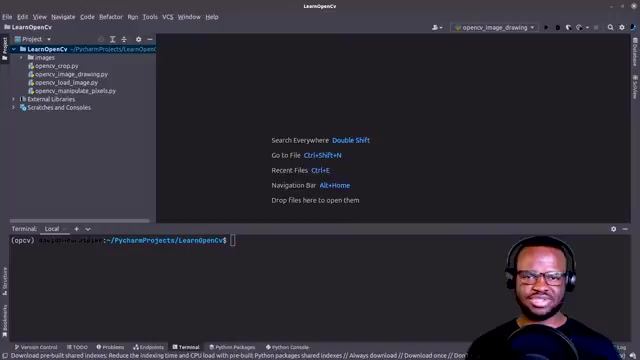
This transformation doesn't change the image's content but only its position within the frame. Image translation is a versatile technique used in numerous applications, including image registration, object tracking, and creating image mosaics.
To achieve image translation using OpenCV, you define a 2x3 affine transformation matrix. This matrix specifies the translation parameters along the x and y axes. Let's break down the math behind it.
Affine Transformation Matrix The affine transformation matrix is defined as:
M = [[1, 0, Tx],
     [0, 1, Ty]]
where:
Txrepresents the translation value along the x-axis (horizontal shift).Tyrepresents the translation value along the y-axis (vertical shift).
These Tx and Ty values control the amount of shift applied to the image. Positive values shift the image to the right (horizontally) or downwards (vertically), while negative values shift the image to the left or upwards.
The key here is understanding how Tx and Ty affect the image's positioning. A firm grasp of this concept is critical before diving into the code. Image translation is the bedrock for many advanced techniques, and it's crucial to understand how altering these values translates into image movement.
Practical Implementation with OpenCV and Python
Setting Up the Environment and Importing Libraries
Before implementing image translation, ensure you have OpenCV and NumPy installed. You can install these libraries using pip:
pip install opencv-python numpyOnce installed, import the necessary packages into your Python script:
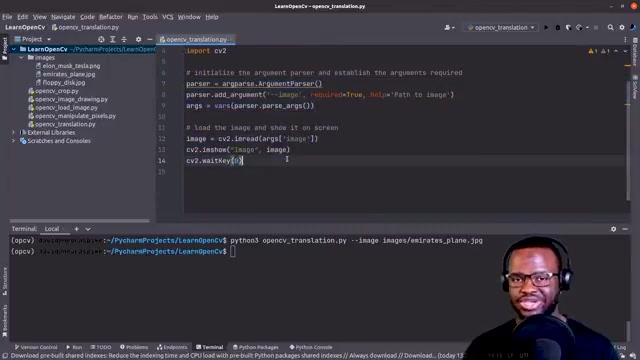
import numpy as np
import argparse
import cv2numpy: Used for numerical operations, particularly for creating the affine transformation matrix.argparse: Facilitates parsing command-line arguments.cv2: The OpenCV library itself.
# Initialize the argument parser and establish the arguments required
parser = argparse.ArgumentParser()
parser.add_argument("--image", required=True, help="Path to Image")
args = vars(parser.parse_args())

# Load the image and show it on screen
image = cv2.imread(args["image"])
cv2.imshow("image", image)
cv2.waitKey(0)
This boilerplate code sets up argument parsing, enabling you to specify the image path from the command line. The image is then loaded using cv2.imread and displayed using cv2.imshow. It's a standard setup, allowing the user to input an image via the command line interface, making the script versatile.
(h, w) = image.shape[:2]This line retrieves the height and width of the image, storing them in the variables h and w, respectively. This information is vital for the subsequent translation operations, as the dimensions determine how much the image can be shifted before parts are lost.
M = np.float32([[1, 0, 150], [0, 1, 50]])This is where the affine transformation matrix is defined using NumPy. This example sets Tx to 150 and Ty to 50, implying a shift of 150 pixels to the right and 50 pixels downwards. Remember, this matrix determines the translation parameters.
shifted = cv2.warpAffine(image, M, (w, h))Here's where the magic happens. The cv2.warpAffine function applies the affine transformation to the image. It takes the original image, the transformation matrix M, and the output image size (width and height) as arguments. The result is a translated version of the original image, stored in the shifted variable.
To display the translated image:
cv2.imshow("Shifted 1", shifted)
cv2.waitKey(0)
This code creates a new window displaying the translated image. Pressing any key will close the window, allowing you to view the result of the translation.
Let's see how different values can be used to shift the image to different directions:
M = np.float32([[1, 0, -150], [0, 1, -50]])In this adjustment, Tx and Ty are set to -150 and -50, respectively. This will shift the image 150 pixels to the left and 50 pixels upwards. Using negative values reverses the translation direction, providing control over the image's final position. This showcases how effortlessly the image can be manipulated using straightforward commands.
By altering the Tx and Ty parameters, you can precisely control how the image is shifted. Combining horizontal and vertical translations allows for versatile positioning of the image within the frame.
Common Issues and How to Resolve Them
While implementing image translation in OpenCV, you might encounter certain challenges. Understanding these common issues and their solutions can save you time and effort.
- Image Cropping: Shifting the image too far can lead to parts of the image being cropped off. To avoid this, ensure that the translation parameters (
TxandTy) are within reasonable limits based on the image dimensions. - Output Size: If the output size is not specified correctly, the image might appear distorted or incomplete. Always provide the original image dimensions to
cv2.warpAffineto maintain the image's aspect ratio. - Data Type Errors: Ensure the affine transformation matrix is of type
np.float32. Incorrect data types can lead to unexpected results or runtime errors. - Missing Libraries: Always verify that OpenCV and NumPy are correctly installed and imported. Missing libraries will result in import errors.
Step-by-Step Guide on Image Translation Using OpenCV
Step 1: Setting Up the Project and Importing Libraries
First, create a new Python script in your desired project directory.
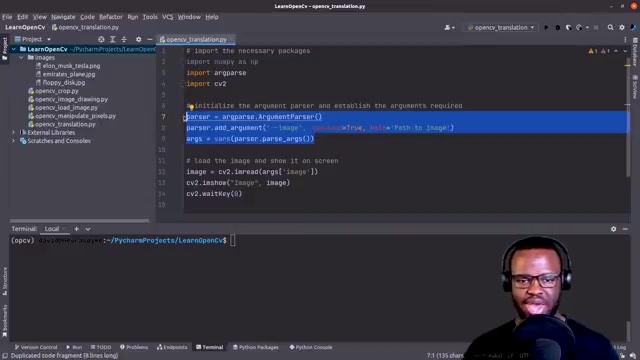
Then, import the necessary libraries, OpenCV, NumPy, and argparse:
import numpy as np
import argparse
import cv2
These libraries are essential for numerical operations, argument parsing, and image processing within OpenCV.
Step 2: Initializing Argument Parser
To handle image path input via the command line, initialize the argument parser:
parser = argparse.ArgumentParser()
parser.add_argument("--image", required=True, help="Path to Image")
args = vars(parser.parse_args())
This sets up the argument parser, enabling the script to accept the image path as a command-line argument.
Step 3: Loading the Image
Load the image using cv2.imread and display it on the screen:
image = cv2.imread(args["image"])
cv2.imshow("image", image)
cv2.waitKey(0)
This code reads the image from the specified path and displays it in a window. The cv2.waitKey(0) function ensures the window stays open until a key is pressed.
Step 4: Retrieving Image Dimensions
Retrieve the height and width of the image:
(h, w) = image.shape[:2]This provides the dimensions needed for the affine transformation.
Step 5: Defining the Affine Transformation Matrix
Define the affine transformation matrix using NumPy:
M = np.float32([[1, 0, 150], [0, 1, 50]])Modify the Tx and Ty values to control the translation along the x and y axes, respectively.
Step 6: Applying the Affine Transformation
Apply the affine transformation using cv2.warpAffine:
shifted = cv2.warpAffine(image, M, (w, h))This performs the image translation based on the defined matrix.
Step 7: Displaying the Translated Image
Display the translated image:
cv2.imshow("Shifted 1", shifted)
cv2.waitKey(0)
This opens a window showing the translated image. The window remains open until a key is pressed.
Step 8: Implementing Negative Shift
To shift the image to the left and upwards, use negative values for Tx and Ty:
M = np.float32([[1, 0, -150], [0, 1, -50]])This shifts the image 150 pixels to the left and 50 pixels upwards.
Step 9: Complete Code
Here’s the complete Python code that you can refer to:
import numpy as np
import argparse
import cv2

# Initialize the argument parser and establish the arguments required
parser = argparse.ArgumentParser()
parser.add_argument("--image", required=True, help="Path to Image")
args = vars(parser.parse_args())

# Load the image and show it on screen
image = cv2.imread(args["image"])
cv2.imshow("image", image)
cv2.waitKey(0)

(h, w) = image.shape[:2]

M = np.float32([[1, 0, 150], [0, 1, 50]])

shifted = cv2.warpAffine(image, M, (w, h))
cv2.imshow("Shifted 1", shifted)
cv2.waitKey(0)

M = np.float32([[1, 0, -150], [0, 1, -50]])

shifted2 = cv2.warpAffine(image, M, (w, h))
cv2.imshow("Shifted 2", shifted2)
cv2.waitKey(0)

cv2.destroyAllWindows()






Most people like


































Report
Please select a reason for reporting
- 13 Reasons to Switch from Snapchat to Text Messaging
- 7 Powerful Speech to Text Apps to Boost Productivity
- 10 Best Speech to Text Tools for Effortless Transcription
- 13 Free Tools to Easily Transcribe Audio to Text
- 15 Surprising Ways Google's Speech-to-Text Boosts Productivity
- 7 Best Free Online Audio to Text Transcription Tools
- 9 Tips to Transcribe Speech to Text Faster and Better
- 13 Best Speech to Text Software for Windows 10 in 2023
- 7 Tips for Choosing the Best Transcriber for Audio to Text
- 11 Reasons Why Dragon Speech-to-Text Apps are Game-Changers
- 6 Secrets to Enhance Your Speech to Text Transcription
- 6 Brilliant Ways to Boost Productivity with Talk-to-Text on Your MacBook
- 6 Ways Transcription Software Converts Audio to Text
- 8 Tips to Transcribe Speech to Text Like a Pro
- 6 Reasons IBM Watson Speech to Text is a Game-Changer
- 14 Powerful Ways Talk-to-Text Improves Your Workflow
- 12 Top Windows Speech-to-Text Software for Efficient Transcription
- 12 Game-Changing Benefits of Apple's Speech to Text Technology
- 9 Powerful Use Cases for AWS Speech to Text Technology
- 10 Easy Steps to Transcribe YouTube Videos to Text
- transcription audio en texte
- online audio transcription
- free audio file transcription
- free ai audio transcription
- audio transcription service
- audio transcription online free
- audio transcription free online
- audio to transcription software
- audio and transcript
- ai audio transcription free
- voice recording to text converter
- translate voice recording to text
- record voice to text
- audio recording to text converter
- voice recording and transcription
- chatgpt voice to text
- gmail voice to text
- speech to text reader
- speech to text ai free
- speech to talk
- How SEO and Marketing Dashboards Empower Agencies to Drive Results
- How to Use AI Tools to Find Internal Linking Opportunities Across a Business Website
- Discover Your Perfect Haircut with AI Hairstyle Apps
- Free Reputation Calculator Tools: How They're Adapting to Score AI Visibility, Not Just Rankings
- Design Professional Flyers for Free on Your Phone
- Best Free Flyer Maker Apps for Android: Design Like a Pro
- How to Know If Your Business Is Ready for an AI Customer Service Agent
- Revolutionizing Storytelling: From Novels to Screenplays with AI
- Create Engaging Animated Explainer Videos with a Free AI Tool
- Stop Multi-Subscribing: Benchmark Top AI Visual Models in One Canvas
- My Brand New Logo: AI-Powered Logo Design for Startups
- Create Stunning Logos with Free AI Logo Generator!
- AI Logo Maker: Design a Stunning Logo in Minutes
- Elevate Your Zoom Experience with Enhanced Name Tags by Warmly
- Top 5 AI Logo Makers in 2025: Design a Stunning Brand
- Creative Fabrica's AI Tools: Flow, Studio, and Font Generator
- Create Stunning Logos with Canva's Free AI Logo Generator
- Create Professional and Memorable Logos with LogoMaker.ai
- Design Your Own Font: A Step-by-Step Guide with Vectornator Pro
- AI Font Generator: Revolutionizing Typeface Design with AI

Copyright ©2026 toolify