































Table of Contents
- Key Points
- Getting Started with the Comic Book Effect
- Enhancing the Comic Book Effect
- Step-by-Step Guide to Creating the Comic Book Effect
- Adobe Photoshop for Comic Book Effect: Weighing the Options
- Frequently Asked Questions
- Related Questions



Getting Started with the Comic Book Effect
Preparing Your Photo in Photoshop
The first step to achieving a striking comic book effect is opening your chosen photo in Adobe Photoshop.
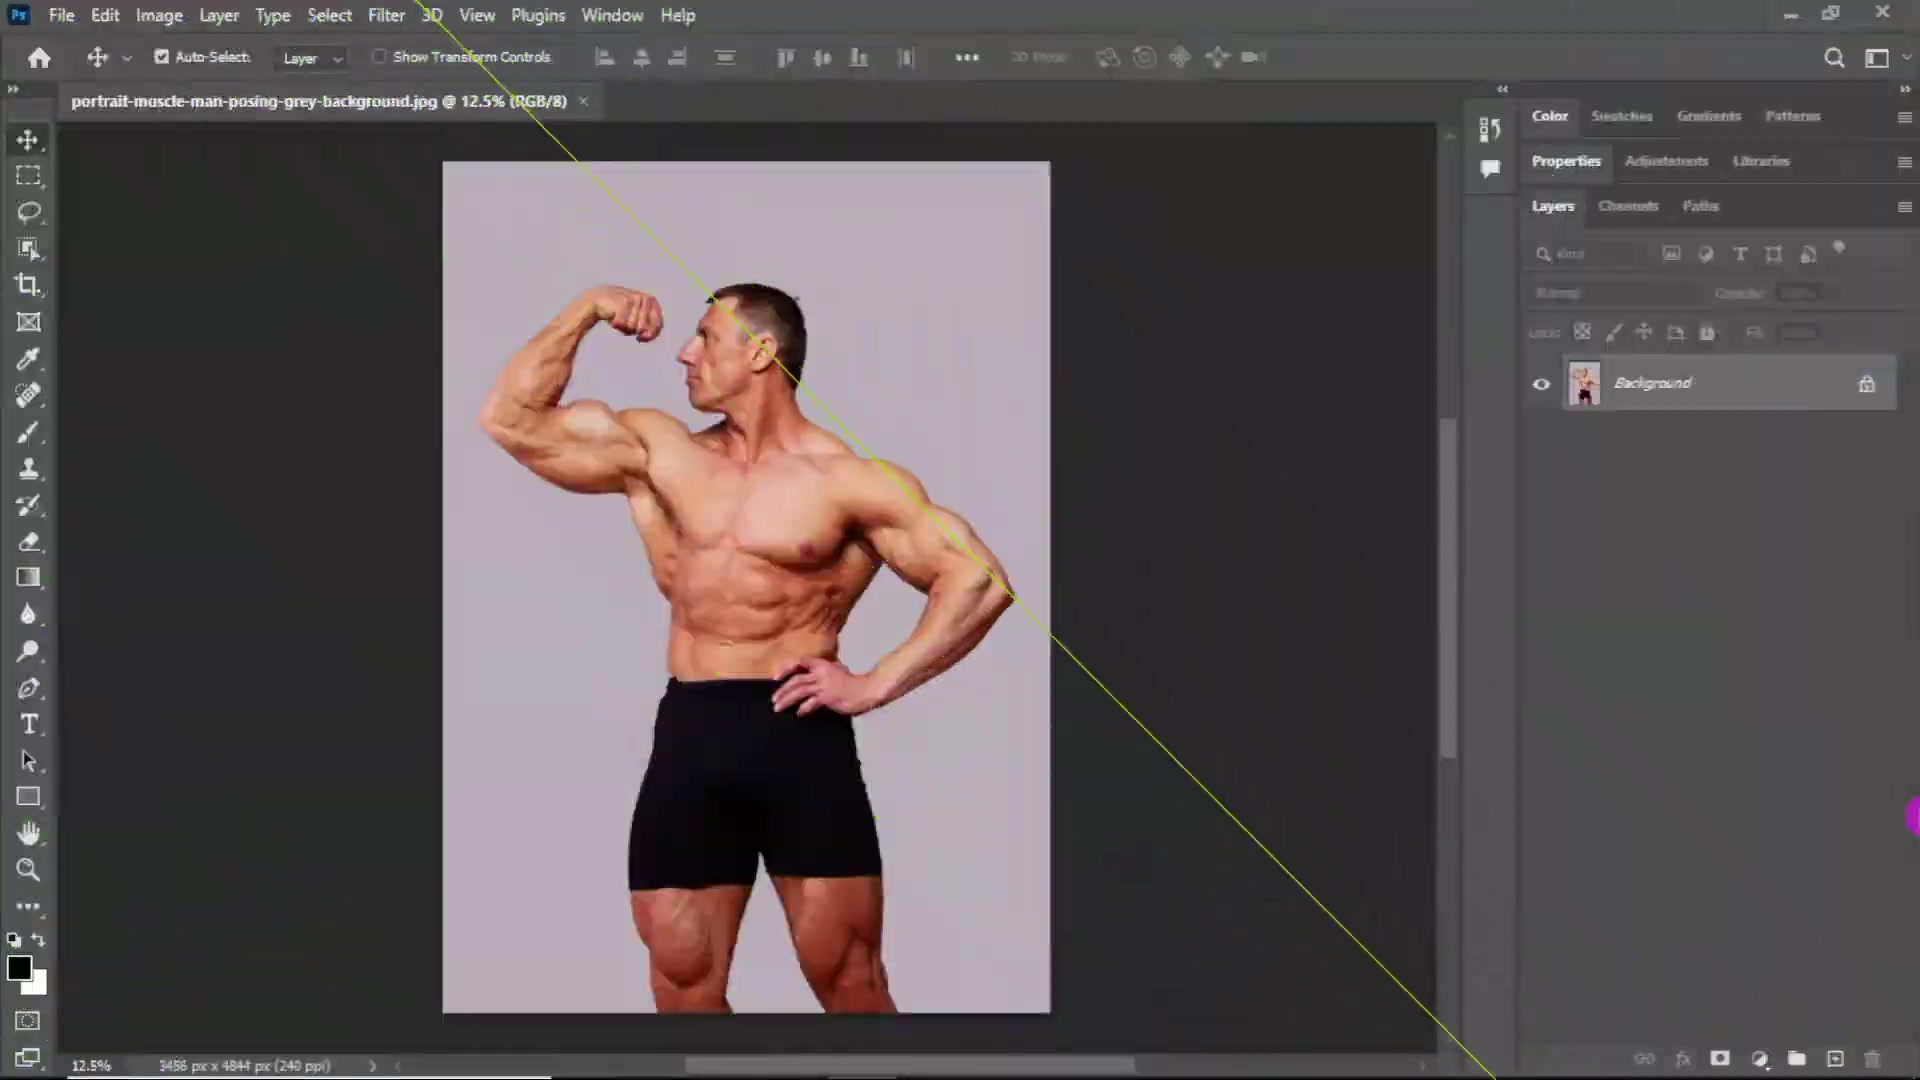
Ensure your image is high-resolution for the best results, as this will allow for more detailed adjustments and a cleaner final product. A resolution of at least 300 DPI is recommended, especially if you plan to print your artwork.
Once your image is open, it’s essential to evaluate its current state. Consider factors such as lighting, contrast, and overall composition. You might want to make some initial adjustments to these elements before diving into the specific comic book effects. For example, increasing the contrast can help to accentuate the details that will later be emphasized with filters and strokes. Properly preparing your photo lays the foundation for a successful transformation into eye-catching comic art.
Key Considerations for Photo Selection:
- Resolution: Aim for high-resolution images (300 DPI or higher). The higher the resolution, the more detail you can retain during the transformation.
- Clarity: Start with a clear, well-defined photo. Blurry or noisy images may not yield the best results.
- Contrast: Consider the existing contrast in your image. Adjusting contrast early can make subsequent steps more effective.
- Subject Matter: Photos with strong lines, defined shapes, and interesting textures tend to work best for comic book effects.
Cropping for Impact: Setting the Stage
The Crop Tool in Photoshop is invaluable for refining the composition of your image before applying any effects. Cropping allows you to focus on the most compelling aspects of your photo, eliminating distracting elements and drawing the viewer's eye to the key subject.
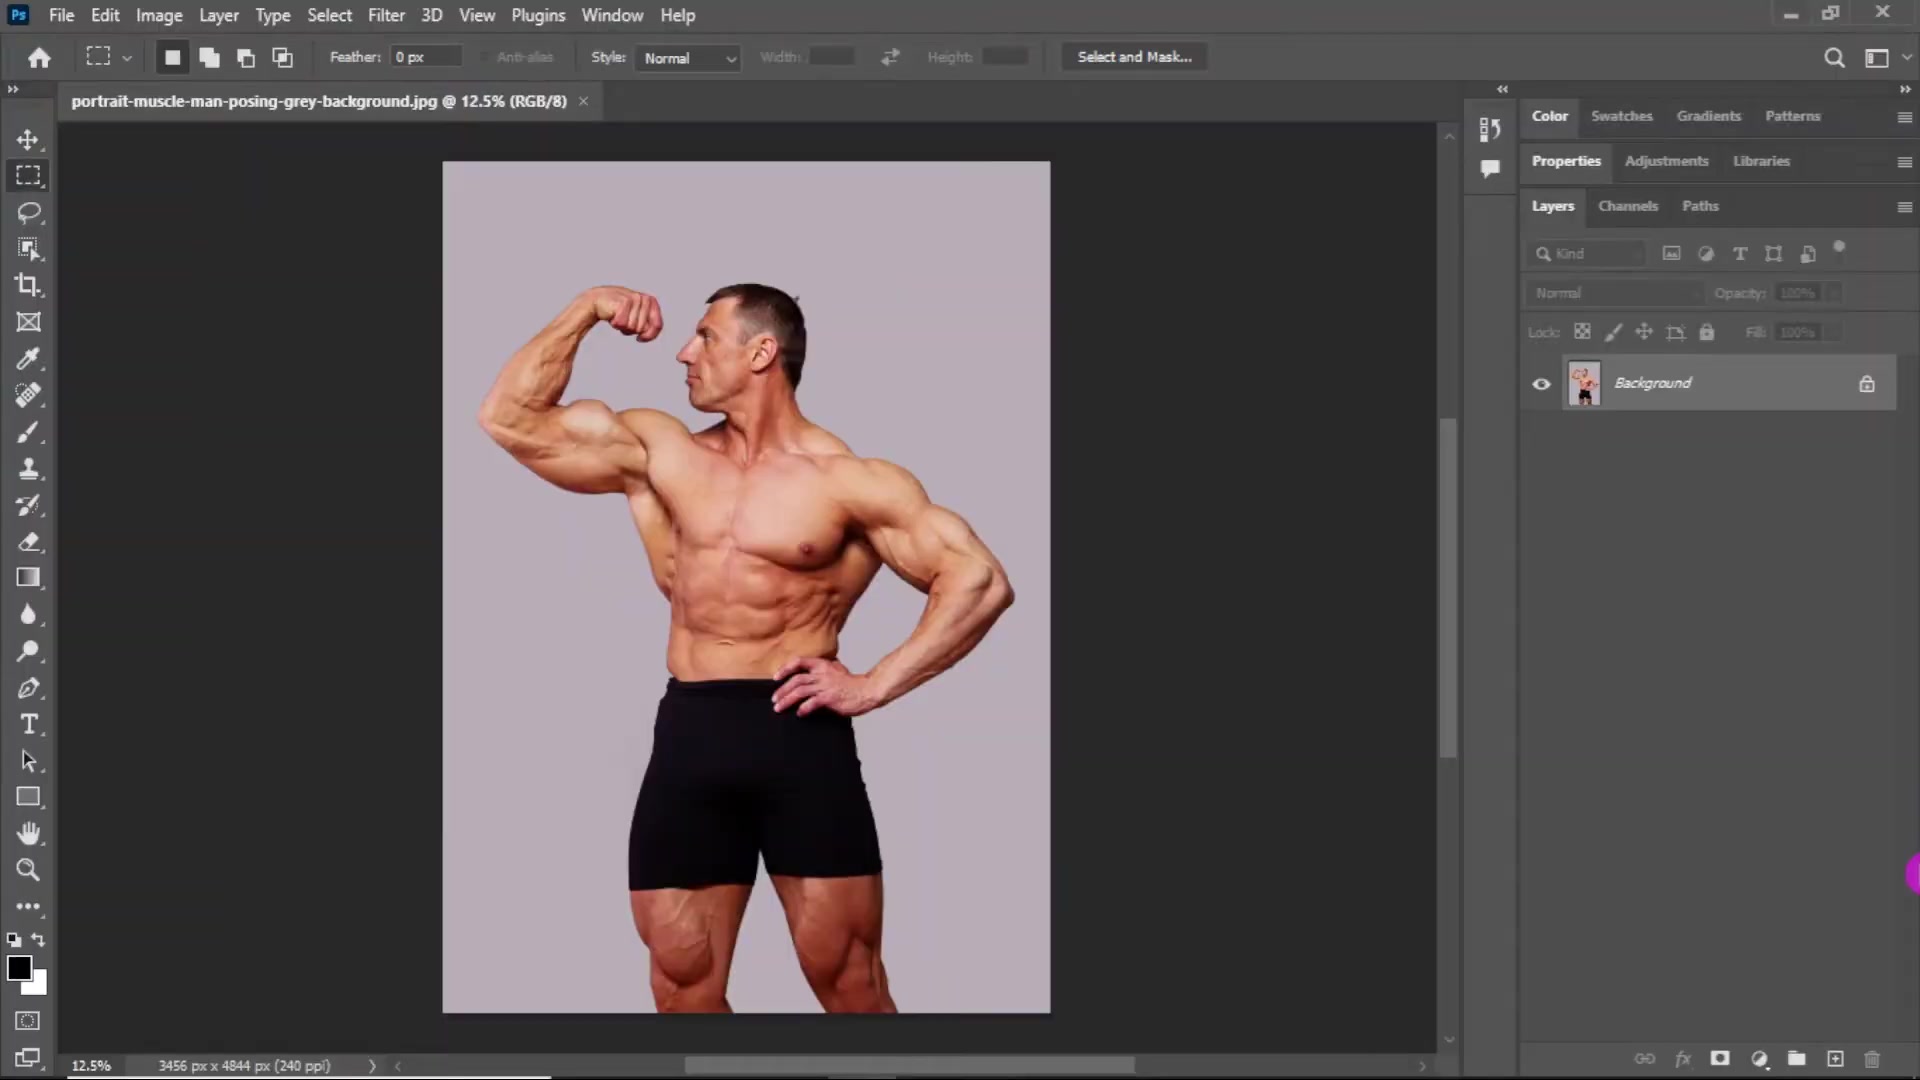
To access the Crop Tool, simply press the 'C' key on your keyboard or select it from the toolbar.
For comic book effects, consider cropping your image to emphasize dynamic angles or close-up details. Sometimes, a tighter crop can heighten the drama and intensity of the final piece. Using the Crop Tool effectively involves more than just trimming the edges; it’s about strategically reframing your photo to maximize its visual impact.
Adjusting Dimensions for Optimal Results:
- Width & Height: Set specific dimensions to ensure the image fits your desired canvas or print size. Maintaining aspect ratio is crucial, especially when preparing images for specific layouts.
- Resolution: Adjust the resolution to maintain image quality. A higher resolution ensures the comic book effect retains its details and Clarity, particularly for print.
- Composition: Use the rule of thirds as a guide. Positioning key elements along these lines creates visually appealing and balanced compositions.
Duplicating Layers: A Foundation for Non-Destructive Editing
Creating duplicate layers in Photoshop is a cornerstone of non-destructive editing.
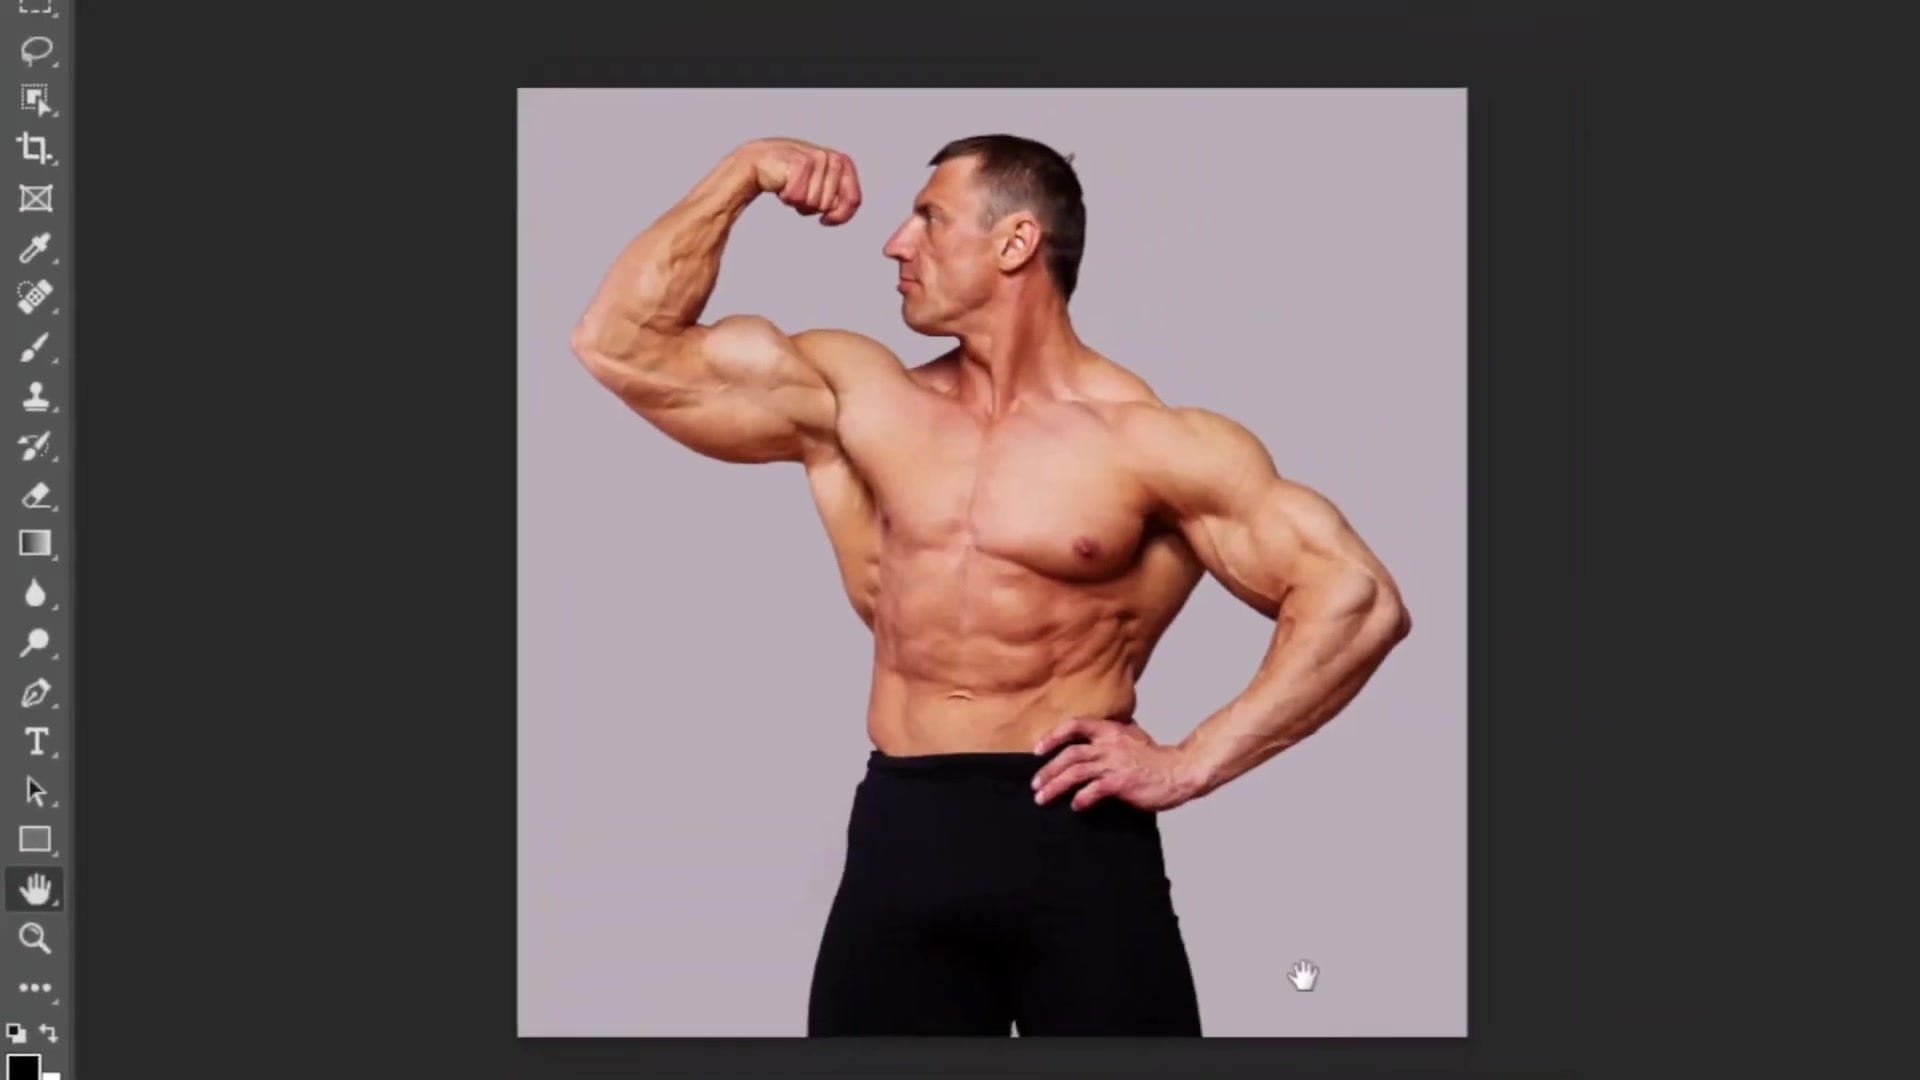
This technique allows you to experiment with various effects and filters without permanently altering your original image. By working on duplicate layers, you can always revert to the original state or adjust the intensity of your effects retroactively. For a comic book effect, duplicating layers provides the flexibility needed to create depth and detail without sacrificing the integrity of your base photo.
Why Duplicate Layers are Essential:
- Experimentation: Safely try out different filters and settings on duplicate layers, knowing you can always revert to the original if needed.
- Control: Fine-tune the intensity of each effect by adjusting the opacity of individual layers.
- Flexibility: Easily turn effects on or off, allowing for quick comparisons and adjustments.
- Non-Destructive Editing: Preserve your original image by applying all changes to duplicate layers.
Step-by-Step Guide to Creating the Comic Book Effect
Step 1: Apply Poster Edges Filter for Outlines
The Poster Edges filter is your first step towards defining the outlines and creating a Stylized, graphic look.
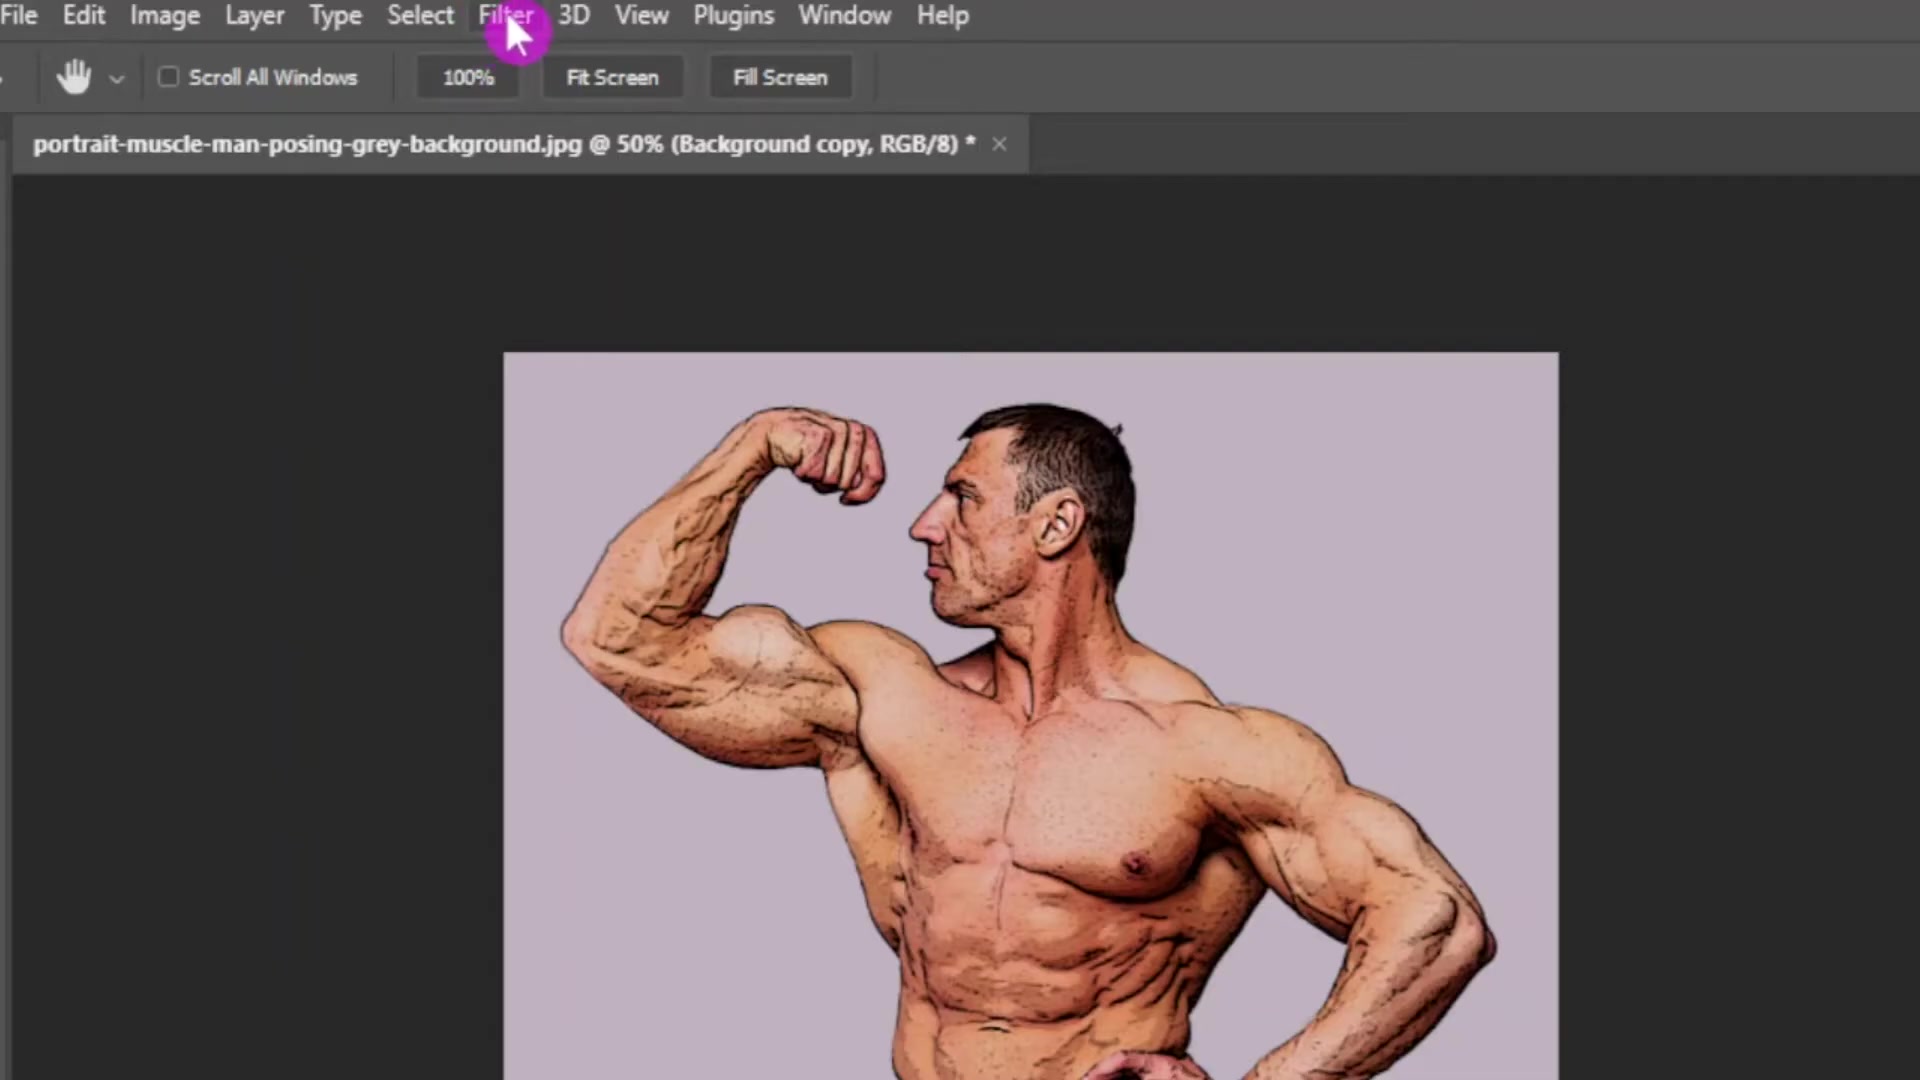
This filter simplifies the image by reducing the number of colors and emphasizing edges, which are crucial for the comic book effect.
To apply the Poster Edges filter:
- Select the middle duplicated layer.
- Go to Filter > Filter Gallery.
- Open the Artistic folder.
- Choose Poster Edges.
- Adjust the settings:
- Edge Thickness: 2
- Edge Intensity: 1
- Posterization: 2
- Click OK.
These settings will create distinct outlines without making the image look too harsh. Experiment with these values to achieve your desired level of detail and stylization. By default, Edge Thickness and Posterization are set to 2, and Edge Intensity is set to 1.
Step 2: Apply Oil Paint Filter for Smooth Cartoon Look
Next, the Oil Paint filter smooths out the details and gives the image a cartoon-like appearance, blending colors and reducing harsh textures. This step softens the photo, contributing to the polished, artistic aesthetic typical of comic books. This step helps with adding detail and depth to your image.
To apply the Oil Paint filter:
- Make sure the middle duplicated layer is still selected.
- Go to Filter > Stylize > Oil Paint.
-
Adjust the settings:
- Stylization: 5
- Cleanliness: 5
- Uncheck Lighting box
The oil paint filter values are now set to 5, and you uncheck the lighting box. This gives you a cartoon feel to the overall base of your image.
- Click OK to apply the filter.
These settings balance detail and smoothness, ensuring the image looks stylized but not overly processed. Feel free to experiment with these values to find what works best for your particular photo.
Step 3: Apply Poster Edges Filter (Again)
Applying the Poster Edges filter once more enhances the outlines, ensuring they stand out against the softened details from the Oil Paint filter. This step reinforces the defined edges, making the image pop with graphic clarity. The final filter will make your art piece stand out that much more.
To re-apply the Poster Edges filter:
- Ensure the middle duplicated layer is still selected.
- Go to Filter > Filter Gallery.
- Open the Artistic folder.
- Choose Poster Edges.
- Use the same settings as before:
- Edge Thickness: 2
- Edge Intensity: 1
- Posterization: 2
- Click OK to apply the filter.
Repeating this filter ensures that the outlines remain prominent, enhancing the overall comic book aesthetic. This technique adds depth and visual interest to the final image.
Step 4: Enhance Vibrancy for Dynamic Colors
Adding vibrancy is crucial to achieving the bold, dynamic colors characteristic of comic books.
This step intensifies the colors, making your image more lively and eye-catching. Vibrancy enhances the saturation of muted colors, giving your comic art a richer, more energetic look.
To add vibrancy:
- Create a new Vibrance adjustment layer by clicking on the Adjustment Layer icon in the Layers panel and selecting Vibrance.
- Increase the Vibrance value to +100%.
- Adjust the Saturation slider as needed to prevent over-saturation.
Setting the Vibrance to its maximum value ensures that all colors are intensified, while adjusting the Saturation slider helps maintain a natural and balanced look. These bold colors and dynamics will add a nice finish to your piece.
Step 5: Add Stroke and Inner Glow for Comic Outlines
Creating stroke and inner glow effects is key to defining the shapes and adding depth to your comic book image. The stroke outlines the image, while the inner glow provides a subtle highlight, enhancing the overall visual appeal.
To add stroke and inner glow:
- Select the middle duplicated layer.
- Click the fx button at the bottom of the Layers panel and choose Stroke.
- Set the stroke parameters:
- Color: White
- Size: 20 px
- Position: Outside
- Click the fx button again and choose Inner Glow.
- Set the inner glow parameters:
- Blend Mode: Normal
- Opacity: 100%
- Color: Black
- Choke: 100%
- Size: 23 px
- Click OK to apply the effects.
These settings create a crisp, white Outline with a subtle black highlight, adding depth and definition to the image. Feel free to adjust these values to achieve your desired level of outlining and glow.
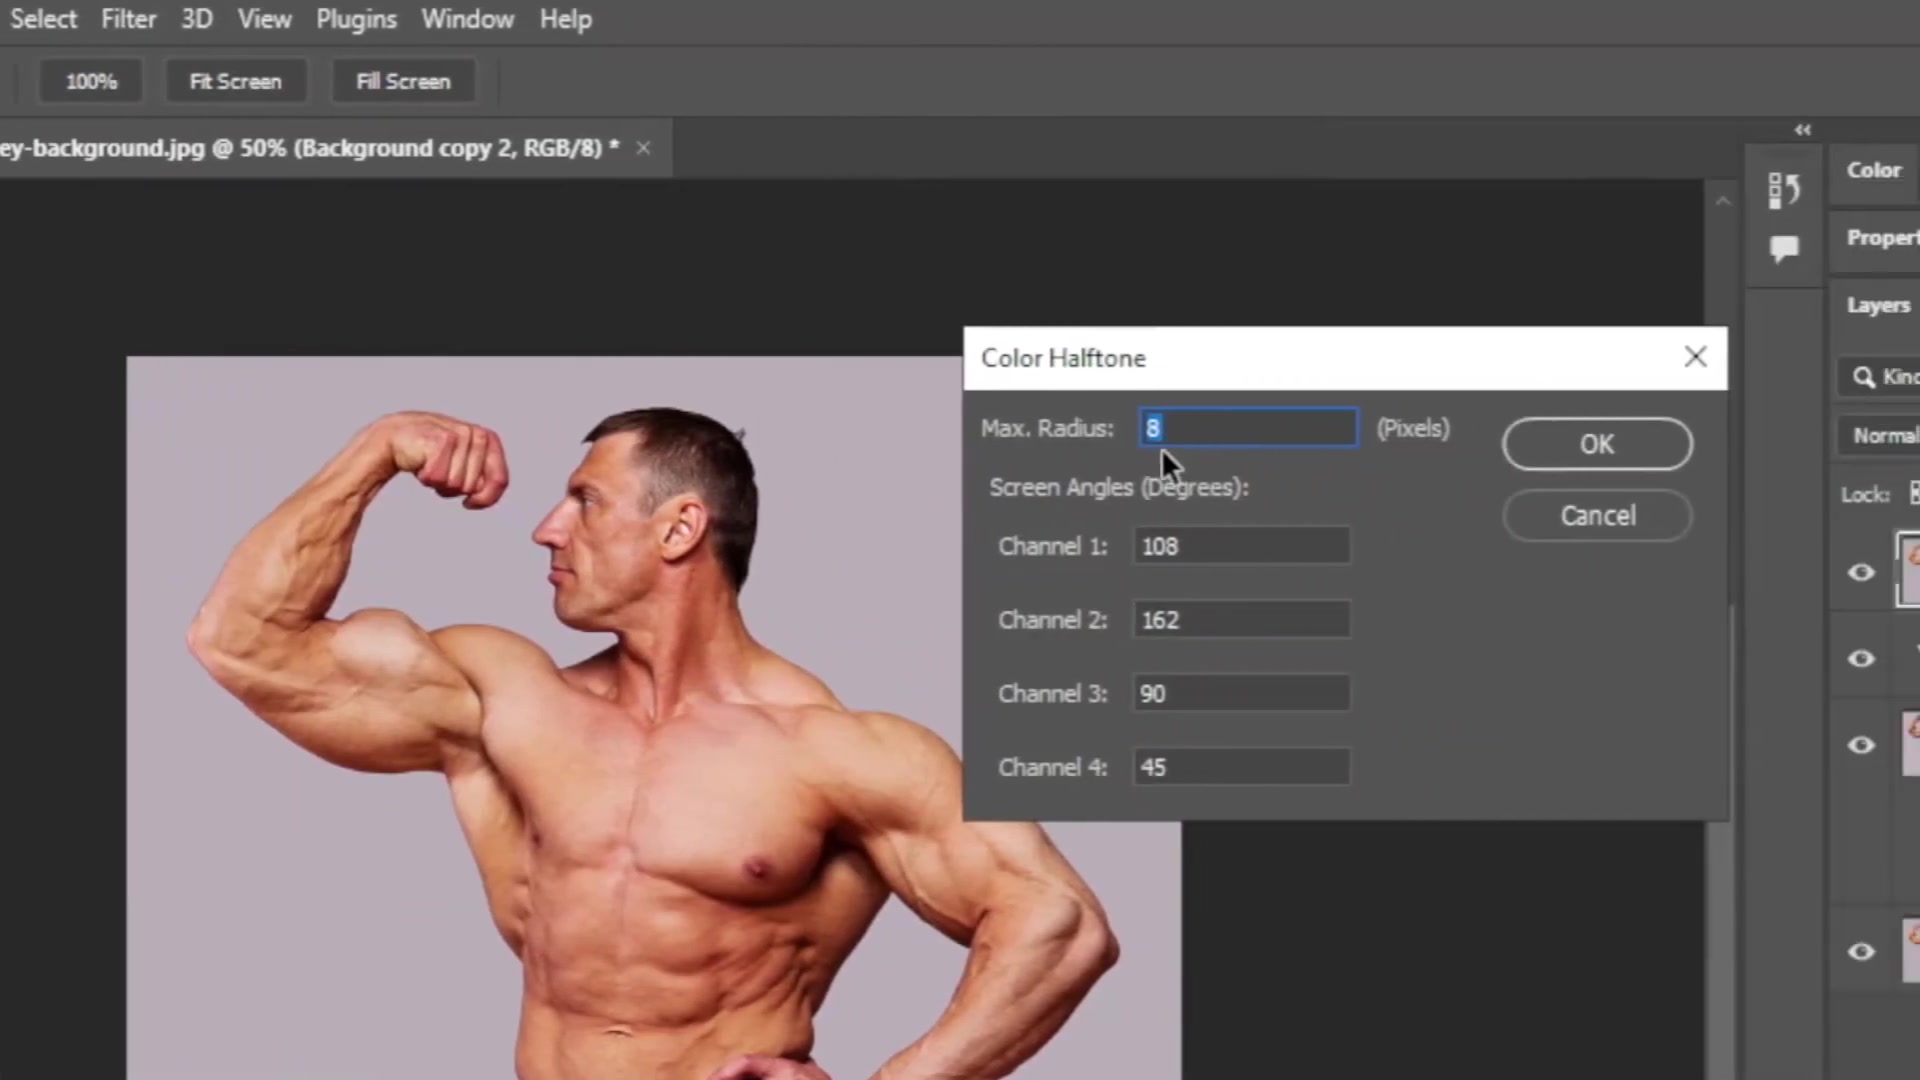
Step 6: Apply Color Halftone Filter for Comic Dots
The Color Halftone filter simulates the iconic dots used in comic book printing. This filter breaks down the image into a series of colored dots, giving it a classic comic book texture and vintage feel. This filter and design adds a classic comic book look, and gives your image that vintage and classic feel.
To apply the Color Halftone filter:
- Select the top duplicated layer.
- Go to Filter > Pixelate > Color Halftone.
- Set the Max. Radius to 4 pixels.
- Leave the Screen Angles at their default values.
- Click OK to apply the filter.
- Change the blending mode of this layer to Soft Light.
The Color Halftone filter adds a layer of authenticity to the comic book effect, making your image look like it came straight from the pages of a classic comic. With this final filter, your image is now a true comic book design.
Step 7: Adding Talk Bubbles and Text
Incorporating talk bubbles and text adds a narrative dimension to your comic book art. These elements provide context, convey dialogue, and inject personality into your images. Adding talk bubbles helps provide context and conveys dialogue that can add personality to your images, turning them into a comic panel.
To add talk bubbles and text:
- Create a new blank layer.
- Select the Custom Shape Tool from the toolbar.
- Choose a talk Bubble shape from the Shape dropdown menu.
- Draw the talk bubble on your canvas.
- Select the Type Tool (T) and add text inside the bubble.
- Adjust the Font, size, and color of the text to match the comic book style.
- Add a drop shadow to the text layer and stroke to the text.
To add the drop shadow and stroke effects to the text:
- Double click on the layer with the text.
- Select either a drop shadow or a stroke.
- Adjust accordingly.






Most people like






































Report
Please select a reason for reporting
- 13 Reasons to Switch from Snapchat to Text Messaging
- 7 Powerful Speech to Text Apps to Boost Productivity
- 10 Best Speech to Text Tools for Effortless Transcription
- 13 Free Tools to Easily Transcribe Audio to Text
- 15 Surprising Ways Google's Speech-to-Text Boosts Productivity
- 7 Best Free Online Audio to Text Transcription Tools
- 9 Tips to Transcribe Speech to Text Faster and Better
- 13 Best Speech to Text Software for Windows 10 in 2023
- 7 Tips for Choosing the Best Transcriber for Audio to Text
- 11 Reasons Why Dragon Speech-to-Text Apps are Game-Changers
- 6 Secrets to Enhance Your Speech to Text Transcription
- 6 Brilliant Ways to Boost Productivity with Talk-to-Text on Your MacBook
- 6 Ways Transcription Software Converts Audio to Text
- 8 Tips to Transcribe Speech to Text Like a Pro
- 6 Reasons IBM Watson Speech to Text is a Game-Changer
- 14 Powerful Ways Talk-to-Text Improves Your Workflow
- 12 Top Windows Speech-to-Text Software for Efficient Transcription
- 12 Game-Changing Benefits of Apple's Speech to Text Technology
- 9 Powerful Use Cases for AWS Speech to Text Technology
- 10 Easy Steps to Transcribe YouTube Videos to Text
- transcription audio en texte
- online audio transcription
- free audio file transcription
- free ai audio transcription
- audio transcription service
- audio transcription online free
- audio transcription free online
- audio to transcription software
- audio and transcript
- ai audio transcription free
- voice recording to text converter
- translate voice recording to text
- record voice to text
- audio recording to text converter
- voice recording and transcription
- chatgpt voice to text
- gmail voice to text
- speech to text reader
- speech to text ai free
- speech to talk
- How SEO and Marketing Dashboards Empower Agencies to Drive Results
- How to Use AI Tools to Find Internal Linking Opportunities Across a Business Website
- Discover Your Perfect Haircut with AI Hairstyle Apps
- Free Reputation Calculator Tools: How They're Adapting to Score AI Visibility, Not Just Rankings
- Design Professional Flyers for Free on Your Phone
- Best Free Flyer Maker Apps for Android: Design Like a Pro
- How to Know If Your Business Is Ready for an AI Customer Service Agent
- Revolutionizing Storytelling: From Novels to Screenplays with AI
- Create Engaging Animated Explainer Videos with a Free AI Tool
- Stop Multi-Subscribing: Benchmark Top AI Visual Models in One Canvas
- AI & Elections: Defending Democracy Against Misinformation
- Navigating Political Discourse: AI, Deepfakes, and Reality Checks
- Detecting Political Bias in News Articles: A Powerful AI Algorithm
- AI Bias Unveiled: Political Leanings in ChatGPT & Beyond
- Revolutionize Learning: Discover Quizzes AI for Engaging Interactive Quizzes
- From AI-Generated to Audience-Ready: How Quillbot Humanize AI Is Changing the Content Editing Process
- Building an AI Writing Stack in 2026: LLMs, Detectors, and Humanizers
- 7 Top AI-Powered Database Assistant Platforms
- An Objective Look at Modern Web-Based Visual Modifications
- My Honest Experience with VideoAI: The Secret Weapon for Creators Who Need Character Voices

Copyright ©2026 toolify