































Table of Contents
- Key Takeaways for Image Recognition with Neural Networks
- Building Blocks of an Image Recognition Program in Python
- Python Implementation: A Detailed Code Walkthrough
- Step-by-Step Guide: Using the Python Image Recognition Program
- Weighing the Options: Pros and Cons of This Python Image Recognition Approach
- Frequently Asked Questions
- Further Exploration: Diving Deeper into Image Recognition and Neural Networks



Building Blocks of an Image Recognition Program in Python
Lecture 6 Objectives: Writing the Image Recognition Program
This blog post is inspired by the lecture series focused on image recognition with neural networks. In lecture 6, the primary objective is to write the entire Image Recognition program in Python. This involves creating a program that can recognize handwritten digits, discussing topics not covered in previous lectures, and outlining future steps for expanding knowledge in this field.
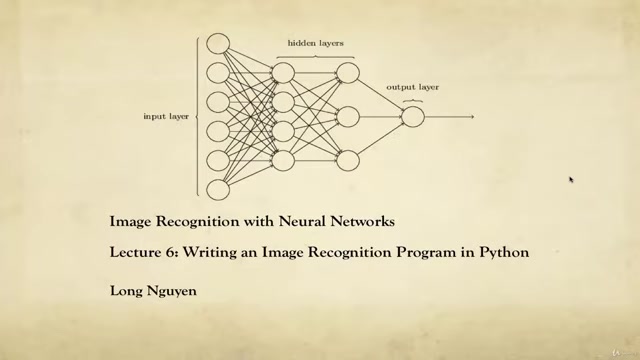
This is about putting the theory into practice and crafting a functional, albeit basic, image recognition system.
The objectives of this blog post are:
- Explain each line of code for recognizing handwritten digits.
- Address the topics we couldn’t cover, but are critical for a full understanding.
- Give a brief outlook on where to take it next, which might include other types of deep learning algorithms.
Understanding Mini-Batch Gradient Descent for Image Recognition
The core of our image recognition program lies in the concept of mini-batch gradient descent.
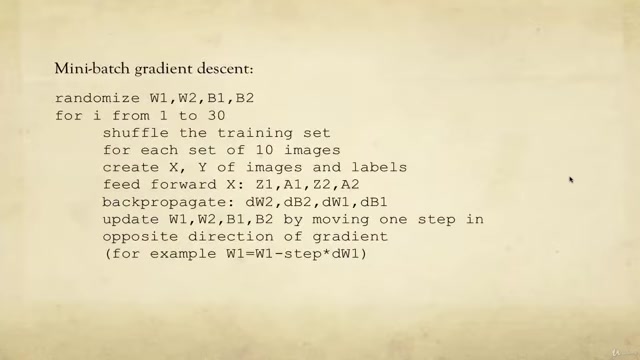
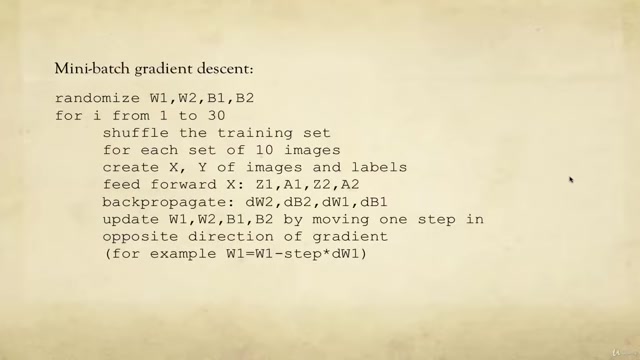
This algorithm is used to optimize the weights and biases (W1, W2, B1, B2) within the neural network. The initial step involves randomizing these parameters, as we don't yet know their ideal values. Then, the algorithm iterates through the entire dataset multiple times (e.g., 30 times), shuffling the training set in each iteration to avoid bias. For each shuffle, 10 images are picked at random. Vectorization creates X and Y to be the matrix of images and labels. The basic algorithm flow is:
- Randomize Weights and Biases: Initialize the parameters W1, W2, B1, and B2 with random values.
- Iterate Through the Dataset: Loop through the entire training dataset multiple times (epochs).
- Shuffle the Training Set: Randomize the order of images in each iteration.
- Create Mini-Batches: Divide the shuffled data into smaller sets of 10 images.
- Vectorize Mini-Batches: Represent the images and labels as matrices X and Y.
- Feed Forward: Input the mini-batch into the neural network to obtain intermediate variables (Z1, A1, Z2, A2).
- Backpropagate: Calculate the gradients (dW2, dB2, dW1, dB1) to determine the direction of steepest increase in the cost function.
- Update Parameters: Adjust the weights and biases in the opposite direction of the gradient to minimize the cost function (e.g., W1 = W1 - step * dW1).
This process is repeated iteratively to refine the parameters and improve the network's ability to accurately recognize images. This process is the foundation for making improvements to our parameters. Gradient descent helps minimize costs as it relates to image classification.
Keywords to repeat: Image recognition, mini-batch gradient descent, Python, neural networks, algorithms, training set, data, gradients, parameters.
Python Implementation: A Detailed Code Walkthrough
Code Structure and Libraries
The image recognition program is built using Python, leveraging several key libraries.
These include:
- mnist_loader: This user-made library help to load data wrapper.
- Numpy: Fundamental package for numerical computation in Python that allows for matrix manipulation.
- Random: Used for shuffle data.
- Matplotlib: Library used for plotting graphs of our MNIST images.
The overall structure of the program follows a modular design, with functions for data loading, image plotting, prediction, and gradient descent. This helps code scalability and readability.
Keywords to repeat: Python, image recognition, libraries, NumPy, data, MNIST, Matplotlib, modular design.
Key Functions in the Python Image Recognition Program
The python code has a few key functions. Understanding them will help you get started with programming your own image recognition code.
-
Plotting Images: To help understand our data, the code contains the function
plot_images()function to graph images to better understanding the dataset.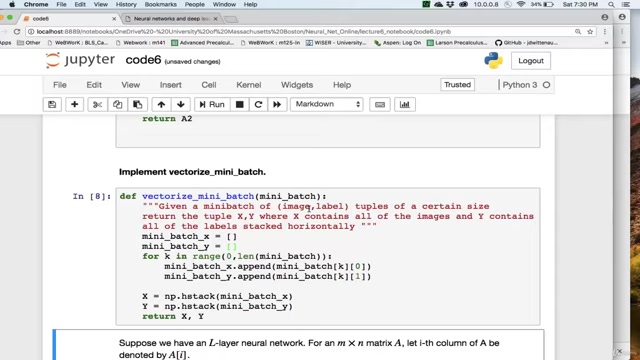
-
Prediction Function: Lecture 3 contains the explanation for
predict(), a cell that produces a prediction. -
Sigmoid and Sigmoid Prime Functions: The sigmoid function is defined with
Sigmoid(x)and the derivative of the sigmoid is theSigmoidPrime(x). This is used to generate our graph. -
Score Function : This determines how the image should be classified, and works as the classifier.
-
Mini Batch Function: This function vectorizes mini batches of images and labels. This function creates the tuple X and Y.
-
Gradient Descent Implementation: A description of the python code and process is as follows:
- First find W1, W2, B1, B2 all together as the SGD (Stochastic Gradient Descent) for training data, including epochs, mini batch size, step size, and test data. Use these SGD settings for gradient descent.
- This calculates the test results, and calculates epoch values as they improve based on various inputs of a picture (X) and label (Y) to produce an increasingly accurate number as a sum.
- Finally, return W1, B1, W2, and B2.








Most people like


































Report
Please select a reason for reporting
- 13 Reasons to Switch from Snapchat to Text Messaging
- 7 Powerful Speech to Text Apps to Boost Productivity
- 10 Best Speech to Text Tools for Effortless Transcription
- 13 Free Tools to Easily Transcribe Audio to Text
- 15 Surprising Ways Google's Speech-to-Text Boosts Productivity
- 7 Best Free Online Audio to Text Transcription Tools
- 9 Tips to Transcribe Speech to Text Faster and Better
- 13 Best Speech to Text Software for Windows 10 in 2023
- 7 Tips for Choosing the Best Transcriber for Audio to Text
- 11 Reasons Why Dragon Speech-to-Text Apps are Game-Changers
- 6 Secrets to Enhance Your Speech to Text Transcription
- 6 Brilliant Ways to Boost Productivity with Talk-to-Text on Your MacBook
- 6 Ways Transcription Software Converts Audio to Text
- 8 Tips to Transcribe Speech to Text Like a Pro
- 6 Reasons IBM Watson Speech to Text is a Game-Changer
- 14 Powerful Ways Talk-to-Text Improves Your Workflow
- 12 Top Windows Speech-to-Text Software for Efficient Transcription
- 12 Game-Changing Benefits of Apple's Speech to Text Technology
- 9 Powerful Use Cases for AWS Speech to Text Technology
- 10 Easy Steps to Transcribe YouTube Videos to Text
- transcription audio en texte
- online audio transcription
- free audio file transcription
- free ai audio transcription
- audio transcription service
- audio transcription online free
- audio transcription free online
- audio to transcription software
- audio and transcript
- ai audio transcription free
- voice recording to text converter
- translate voice recording to text
- record voice to text
- audio recording to text converter
- voice recording and transcription
- chatgpt voice to text
- gmail voice to text
- speech to text reader
- speech to text ai free
- speech to talk
- How SEO and Marketing Dashboards Empower Agencies to Drive Results
- How to Use AI Tools to Find Internal Linking Opportunities Across a Business Website
- Discover Your Perfect Haircut with AI Hairstyle Apps
- Free Reputation Calculator Tools: How They're Adapting to Score AI Visibility, Not Just Rankings
- Design Professional Flyers for Free on Your Phone
- Best Free Flyer Maker Apps for Android: Design Like a Pro
- How to Know If Your Business Is Ready for an AI Customer Service Agent
- Revolutionizing Storytelling: From Novels to Screenplays with AI
- Create Engaging Animated Explainer Videos with a Free AI Tool
- Stop Multi-Subscribing: Benchmark Top AI Visual Models in One Canvas
- Why do so many AI tools underdeliver for online stores?
- My Brand New Logo: AI-Powered Logo Design for Startups
- Create Stunning Logos with Free AI Logo Generator!
- AI Logo Maker: Design a Stunning Logo in Minutes
- Elevate Your Zoom Experience with Enhanced Name Tags by Warmly
- Top 5 AI Logo Makers in 2025: Design a Stunning Brand
- Creative Fabrica's AI Tools: Flow, Studio, and Font Generator
- Create Stunning Logos with Canva's Free AI Logo Generator
- Create Professional and Memorable Logos with LogoMaker.ai
- Design Your Own Font: A Step-by-Step Guide with Vectornator Pro

Copyright ©2026 toolify