































Table of Contents
- Key Points
- Step-by-Step Guide to Building a Real-Time Selenium with Java Automation Framework
- Code Snippets and Implementation Examples
- How to Use Selenium Framework
- Pricing
- Pros and Cons
- Core Features
- Use Cases
- FAQ
- Related Questions


Step-by-Step Guide to Building a Real-Time Selenium with Java Automation Framework
Step 1: Understand the Layers (Architecture Overview)
The layers of a Selenium automation framework are foundational to its design and functionality. These layers dictate how different parts of the testing process interact and contribute to the overall robustness and maintainability of the framework.
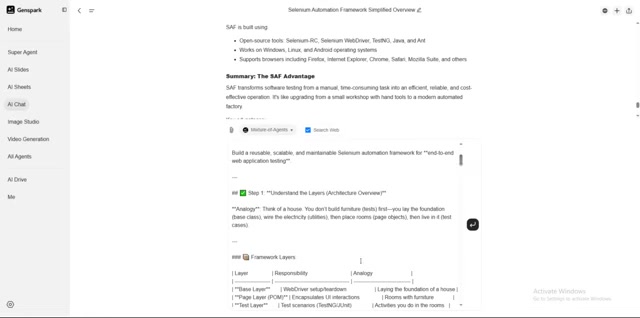
Understanding these layers is crucial for any qa Automation Engineer aiming to build a scalable and efficient testing solution.
-
Base Layer: This layer is responsible for the WebDriver setup and teardown. It's the foundation upon which all other layers are built. Think of it as laying the foundation of a house.
-
Page Layer (POM - Page Object Model): This layer encapsulates UI interactions. It represents pages with locations and actions, allowing for a more modular and maintainable approach to interacting with web elements. This is like furnishing the rooms of a house.
-
Test Layer: This layer contains the TestNG tests (or JUnit). This includes actions you do in the rooms.
Step 2: Setting up Core Tools (Laying the Foundation)
Setting up the core tools is a crucial step in building a Selenium automation framework with Java. This process involves installing and configuring the necessary software and libraries that will form the backbone of your framework.
Proper setup ensures that all components work together seamlessly, enabling you to write and execute automated tests efficiently.
-
Install JDK: Java Development Kit (JDK) is essential for Java-based projects. Just as you'd need bricks for a house, Java is essential for your framework.
-
Choose an IDE: IntelliJ IDEA or Eclipse helps organize and write your code efficiently, like a workbench for carpentry.
-
Download Selenium WebDriver: This is the machinery that interacts with the browsers—think of it like the construction equipment used to build different parts of your house.
-
Maven or Gradle for Dependency Management: Use Maven or Gradle as your build tool (think of it as the general contractor that brings all resources together).
Step 3: Project Structure (Blueprint for Expansion)
Organizing your project structure is like zoning different sections in a new building. Effective project structuring ensures clarity, maintainability, and scalability. This involves creating a well-organized directory structure with separate packages for different components of your framework.
-
src/main/java: Source code (Page Objects, Utilities). -
src/test/java: Test cases. -
src/test/resources: Test data, configurations.
Step 4: Adopt Design Patterns (Building Practices)
Design patterns in Selenium automation frameworks provide tested solutions to common problems, enhancing code reusability, maintainability, and scalability.
These patterns act as blueprints, guiding the structure and interaction of components within the framework.
-
Page Object Model (POM): Treat each web page or component as a separate Java class. This reduces duplication (like pre-fabricated wall panels fit together easily) and makes maintenance easier if the UI changes.
-
Use Utility and Base Classes: Common actions (e.g., clicking, waiting, logging) are centralized, much like shared tools in a workshop.
Step 5: Layer your Architecture (Separation of Concerns)
Creating distinct layers improves framework organization, modularity, and maintainability. Here’s how different layers contribute to the structure:
-
Test Layer: Houses actual test scenarios (like living spaces in a house).
-
Business Logic Layer: Encapsulates user actions (like rules for using different rooms).
-
Page Layer: Represents UI elements (like room blueprints and layouts).
-
Utility Layer: For helpers like logging, data management, and configurations.
Step 6: Enhance with TestNG (The Supervisor)
TestNG is a powerful testing framework that offers advanced features for Selenium automation, including parallel test execution, data-driven testing, and flexible reporting.
Integrating TestNG enhances test execution management, reporting, and overall framework efficiency.
- Use TestNG Framework: Handles test execution, reporting, parallel runs, data-driven tests, and dependencies. It's like your project manager, ensuring everything runs on schedule and reporting issues as they occur.
Step 7: Data-Driven and Config Management (Like Rewriting Easily)
Data-driven testing and configuration management are essential for creating flexible and maintainable automation frameworks. [t:01:10] These practices enable you to externalize test data and configurations, making tests more adaptable and easier to manage.
-
Use Property/Config Files: Keep URLs, credentials, and environment settings outside the code for easy tweaks.
-
Externalize Test Data: Use Excel, CSV, or JSON for test data, and connect them via utilities (like having detailed blueprints for every scenario).
Step 8: Implement Logging and Reporting (On-Site Inspection Reports)
Robust logging and reporting mechanisms are essential for tracking test execution, diagnosing issues, and providing detailed feedback on test outcomes. This involves integrating logging libraries and reporting tools to capture and present test results effectively.
-
Integrate Reporting Tools such as Extent Reports: These provide visual, interactive outputs for test runs—like inspection reports with diagrams and notes.
-
Add Logging Libraries: Log4j or similar for debugging and runtime analysis.
Step 9: Plan for Parallel & Cross-Browser Testing (Multiple Crews, Multiple Sites)
Planning for parallel and cross-browser testing is critical for achieving comprehensive test coverage and reducing test execution time. [t:01:12] This involves setting up a testing grid or utilizing cloud platforms to execute tests across various browsers and environments concurrently.
- Selenium Grid or Cloud Services: Enables simultaneous test executions on different browsers and OS, akin to dispatching multiple teams to different building locations.
Step 10: Maintenance & CI Integration (Regular Upkeep & Automation)
Integrating with Continuous Integration (CI) tools, and maintaining the framework, improves version control, and streamlines automated code changes and test runs. [t:01:15] This is like regular upkeep and automation.
-
Version Control (Git): Track all changes, enabling collaboration (like construction logs and issue trackers).
-
CI/CD Integration (Jenkins, GitLab CI): Trigger builds automatically on code changes, run tests, and publish reports. This is the automated quality inspection after each build phase.



Most people like






























Report
Please select a reason for reporting
- 13 Reasons to Switch from Snapchat to Text Messaging
- 7 Powerful Speech to Text Apps to Boost Productivity
- 10 Best Speech to Text Tools for Effortless Transcription
- 13 Free Tools to Easily Transcribe Audio to Text
- 15 Surprising Ways Google's Speech-to-Text Boosts Productivity
- 7 Best Free Online Audio to Text Transcription Tools
- 9 Tips to Transcribe Speech to Text Faster and Better
- 13 Best Speech to Text Software for Windows 10 in 2023
- 7 Tips for Choosing the Best Transcriber for Audio to Text
- 11 Reasons Why Dragon Speech-to-Text Apps are Game-Changers
- 6 Secrets to Enhance Your Speech to Text Transcription
- 6 Brilliant Ways to Boost Productivity with Talk-to-Text on Your MacBook
- 6 Ways Transcription Software Converts Audio to Text
- 8 Tips to Transcribe Speech to Text Like a Pro
- 6 Reasons IBM Watson Speech to Text is a Game-Changer
- 14 Powerful Ways Talk-to-Text Improves Your Workflow
- 12 Top Windows Speech-to-Text Software for Efficient Transcription
- 12 Game-Changing Benefits of Apple's Speech to Text Technology
- 9 Powerful Use Cases for AWS Speech to Text Technology
- 10 Easy Steps to Transcribe YouTube Videos to Text
- transcription audio en texte
- online audio transcription
- free audio file transcription
- free ai audio transcription
- audio transcription service
- audio transcription online free
- audio transcription free online
- audio to transcription software
- audio and transcript
- ai audio transcription free
- voice recording to text converter
- translate voice recording to text
- record voice to text
- audio recording to text converter
- voice recording and transcription
- chatgpt voice to text
- gmail voice to text
- speech to text reader
- speech to text ai free
- speech to talk
- Create Engaging Animated Explainer Videos with a Free AI Tool
- Stop Multi-Subscribing: Benchmark Top AI Visual Models in One Canvas
- Best Seedance 2.5 API Provider: Every Price on the Market, Checked at Source
- AI OnlyFans: How to Generate $30,000/Month (Legally)
- Transform Your Script into an Engaging Video with AI Video Maker!
- AI Marketing Automation: A Comprehensive Guide for Small Businesses
- Midjourney Alternative for Anime Art Creators: Why PixAI May Be Better for Character Workflows
- 10 Things Most People Get Wrong About AI Image Search
- AI Girlfriend Apps: Top Choices Redefining Relationships 2025
- How to Reduce Quoting Errors in Salesforce with AI-Assisted Quote Creation
- Revideo.io: The Future of Reverse Video Search Technology
- Mastering Cold Calling: The Buffoon Technique for Client Acquisition
- Top AI Image Generators: Photo-Realistic Results in 2025
- Top 5 AI Image Generators: Create Stunning Visuals Easily
- Mastering Camera Angle Control: Top 4 AI Image & Video Generators for Cinematic Precision
- Top 4 AI Tools to Generate Flawless Digital Personas in 2026
- Why AI Language Tutors Underperform in Low-Resource Languages (And How to Work Around It)
- Top 5 AI Detector Tools: Ensuring Originality in Your Content
- How to Tell If an AI Study Tool Is Actually Helping You Learn (6 Checks for 2026)
- From Auto-Cuts to Generative Clips: Top 4 AI Video Editor Platforms Tested

Copyright ©2026 toolify