































Table of Contents
- Key Points
- Setting the Stage: Prerequisites and Environment Setup
- Enhancing Productivity with Tmux
- Streamlining Development with Command-Line Tools
- The Cost of Command-Line Development
- The Bottom Line: Pros and Cons of Command-Line Development
- Key Features of Command-Line Development Stack
- Where Command-Line Development Shines
- Frequently Asked Questions About Command-Line Spring Boot Development
- Exploring Further: Related Questions and Resources


Setting the Stage: Prerequisites and Environment Setup
Essential Tools for Command-Line Spring Boot Development
Before diving into the creation process, it's crucial to have the right tools installed and configured. This Tutorial focuses primarily on Unix-based operating systems, but offers potential workarounds for Windows users. Here's a breakdown of the essential components:
- Java Development Kit (JDK): A JDK is essential for compiling and running Java code. Ensure you have a compatible version installed, with Java 11 or higher recommended for modern Spring Boot projects.
Ubuntu users can install OpenJDK 11 by using the command
sudo apt install openjdk-11-jdk. Mac OS users likely already have a compatible JDK or can easily install one via Homebrew or similar package managers. Make sure that $JAVA_HOME variable are properly set. - Vim: Vim is a powerful, configurable text editor. Even though Vim is not user friendly, if you master it, you would find the true power of coding. This classic text editor allows for efficient file creation and modification directly from the command line. Ubuntu users can install Vim using
sudo apt install vim. - Tmux: tmux is a terminal multiplexer, enabling you to manage multiple terminal sessions within a single window. This is invaluable for organizing your workflow and keeping everything accessible. You can install tmux using
sudo apt install tmuxon Ubuntu. - curl: curl is a command-line tool for transferring data with URLs. In this tutorial, curl will be used to interact with the Spring Initializr API. Install curl on Ubuntu using
sudo apt install curl. - unzip: The project generated is a zip file.
Unziphelps you to decompress. Install it withsudo apt install unzip.
Having these tools ready is key to a smooth command-line Spring Boot experience. While this tutorial is primarily tailored for Unix-like systems, Windows users can leverage the Windows Subsystem for Linux (WSL) to create a compatible environment.
Setting up your Vim environment is crucial for effcient development, below are some best settings to start with, if you know Vim well, you can skip this.
" Basic settings
set nocompatible  " Disable compatibility with vi
set backspace=indent,eol,start  " Enable backspace over everything

" Indentation
set tabstop=4       " Number of columns per tab
set shiftwidth=4    " Number of spaces for auto-indent
set expandtab       " Use spaces instead of tabs
set autoindent      " Automatically indent new lines
set smartindent     " More intelligent auto-indenting

" Searching
set hlsearch        " Highlight search results
set incsearch       " Show search results as you type

" UI Enhancements
syntax on           " Enable syntax highlighting
set number          " Show line numbers
set ruler           " Show cursor position

" Plugin management (example using vim-plug)
call plug#begin('~/.vim/plugged')

Plug 'tpope/vim-fugitive'  " Git integration
Plug 'scrooloose/nerdtree'  " File system explorer

call plug#end()

" NERDTree configuration
map <C-n> :NERDTreeToggle<CR>  " Toggle NERDTree with Ctrl+n
Creating a Spring Boot Project with Curl and Spring Initializr API
One awesome thing about Spring, if you are using start.spring.io to generate your project, it comes with an API endpoint.
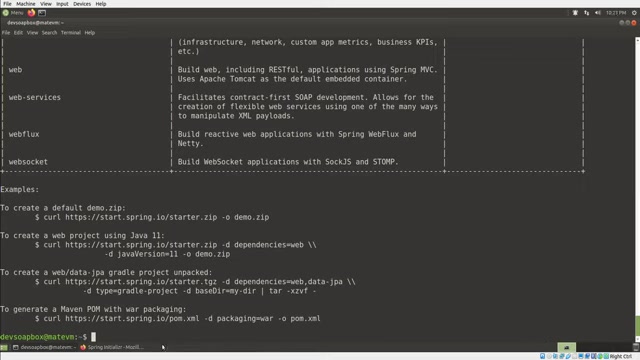
You can leverage the Spring Initializr API to generate a basic Spring Boot project directly from the command line using curl. This offers a streamlined approach compared to navigating the Spring Initializr website.
To generate a project, craft a curl command with the desired project settings as parameters. Here's an example:
curl https://start.spring.io/starter.zip -d dependencies=web,data-jpa -d javaVersion=11 -o myproject.zipLet's break down this command:
curl: Invokes the curl command-line tool.https://start.spring.io/starter.zip: Specifies the Spring Initializr API endpoint for generating a zip file containing the project structure.-d dependencies=web,data-jpa: Defines the project's dependencies. In this case, it includes Spring Web (for building web applications) and Spring Data JPA (for database interaction). Separate multiple dependencies with commas.-d javaVersion=11: Specifies the Java version to use. Here, it's set to Java 11.-o myproject.zip: Designates the output file name for the generated project asmyproject.zip.
After executing this command, you'll have a zip file named myproject.zip containing the basic Spring Boot project structure with the specified dependencies and Java version. It's recommended you review its documents before starting your work.
Customizing Your Spring Boot Project Generation
The Spring Initializr API offers flexibility in customizing project generation. Here are some popular and useful parameters:
type: Specifies the project type (e.g.,maven-project,gradle-project). Maven project and Gradle project are by far two of the most popular build systems that you can choose from.groupId: Defines the project's group ID (e.g.,com.example).groupIdis a unique base name of the company or the group and is the same as the reverse domain name convention.artifactId: Specifies the project's artifact ID (e.g.,demo).ArtifactIdis name the specific project.name: Sets the project's name.description: Provides a brief description of the project.packaging: Determines the packaging type (e.g.,jar,war).JARpackages multiple files into one archive file.WARfile is used to deploy web application.javaVersion: Specifies the Java version (e.g.,11,17).
By modifying these parameters in your curl command, you can fine-tune the generated project to perfectly match your requirements. When combined with Vim and Tmux, this provides a powerful environment to build great applications.
Command-Line Project Directory Structure and Setup
Now that you have a Spring Boot project, the next step is to set up the directory and prepare your editing environment. You'll need to decompress the zip file and open the project folder before doing anything else.
mkdir myproject
unzip myproject.zip -d myproject
cd myprojectmkdir: This command creates a new folder, the name can be whatever you choose.unzip: The command decompress your zip file into the directory just created.cd: Finally, switch into that directory.
With all project files unpacked, you are now ready to start building your Spring Boot project using your command-line tools!
Vim Essentials: Navigating and Editing Your Spring Boot Project
Vim might be scary at the beginning, but once you get pass the first few bumps, you will enjoy it. It is like driving a manual car, if you can only drive automatic cars, it means that you don't know how to drive. Here are some must know commands, but this is not going to be a Vim tutorial, it is only here to help you start your first project.
- Normal Mode Commands: These commands are used for navigation and file manipulation.
i: Insert mode (enter text input).:w: Save the current file.:q: Quit Vim.:wq: Save the file and quit.:q!: Quit Vim without saving changes.gg: Go to the beginning of the file. (Capitalized GG)Shift + g: Go to the end of the file. (Shift key combined with g)$: Move the cursor to the end of the current line.0: Move the cursor to the beginning of the current line.dd: delete the current line.
- Search Commands: Quickly locate text within the file.
/pattern: Search forward for the specified pattern.?pattern: Search backward for the specified pattern.n: Move to the next match.N: Move to the previous match.
- Netrw Directory Listing.
:edit: It let you open up directory structure. With these fundamental Vim commands, you can efficiently navigate and edit your Spring Boot project files.
Testing the Application: Command-Line Curl Requests
Once you have set up your Spring Boot app, we need to call it from the terminal.
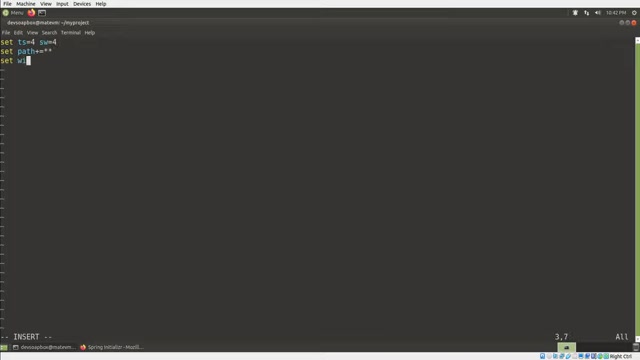
You can do this with a http client like curl with simple commands
curl -X POST -H "Content-Type: application/json" -d '{"name": "Test Ale", "abv": 6.5}' http://localhost:8080/beersThis command creates a beer using POST and Content-Type. You need to be aware that, by convention, your restful resource will be plural, for example your class entity is Beer, then you need to call the beers restful endpoint.
When you run the project, you should see something like below that confirm the service is running successfully
{
  "name": "Test Ale",
  "abv": 6.5,
  "id": 2,
  "_links": {
    "self": {
      "href": "http://localhost:8080/beers/2"
    },
    "beer": {
      "href": "http://localhost:8080/beers/2"
    }
  }
}





Most people like


































Report
Please select a reason for reporting
- 13 Reasons to Switch from Snapchat to Text Messaging
- 7 Powerful Speech to Text Apps to Boost Productivity
- 10 Best Speech to Text Tools for Effortless Transcription
- 13 Free Tools to Easily Transcribe Audio to Text
- 15 Surprising Ways Google's Speech-to-Text Boosts Productivity
- 7 Best Free Online Audio to Text Transcription Tools
- 9 Tips to Transcribe Speech to Text Faster and Better
- 13 Best Speech to Text Software for Windows 10 in 2023
- 7 Tips for Choosing the Best Transcriber for Audio to Text
- 11 Reasons Why Dragon Speech-to-Text Apps are Game-Changers
- 6 Secrets to Enhance Your Speech to Text Transcription
- 6 Brilliant Ways to Boost Productivity with Talk-to-Text on Your MacBook
- 6 Ways Transcription Software Converts Audio to Text
- 8 Tips to Transcribe Speech to Text Like a Pro
- 6 Reasons IBM Watson Speech to Text is a Game-Changer
- 14 Powerful Ways Talk-to-Text Improves Your Workflow
- 12 Top Windows Speech-to-Text Software for Efficient Transcription
- 12 Game-Changing Benefits of Apple's Speech to Text Technology
- 9 Powerful Use Cases for AWS Speech to Text Technology
- 10 Easy Steps to Transcribe YouTube Videos to Text
- transcription audio en texte
- online audio transcription
- free audio file transcription
- free ai audio transcription
- audio transcription service
- audio transcription online free
- audio transcription free online
- audio to transcription software
- audio and transcript
- ai audio transcription free
- voice recording to text converter
- translate voice recording to text
- record voice to text
- audio recording to text converter
- voice recording and transcription
- chatgpt voice to text
- gmail voice to text
- speech to text reader
- speech to text ai free
- speech to talk
- Revolutionizing Storytelling: From Novels to Screenplays with AI
- Create Engaging Animated Explainer Videos with a Free AI Tool
- Stop Multi-Subscribing: Benchmark Top AI Visual Models in One Canvas
- Best Seedance 2.5 API Provider: Every Price on the Market, Checked at Source
- AI OnlyFans: How to Generate $30,000/Month (Legally)
- Transform Your Script into an Engaging Video with AI Video Maker!
- AI Marketing Automation: A Comprehensive Guide for Small Businesses
- Midjourney Alternative for Anime Art Creators: Why PixAI May Be Better for Character Workflows
- 10 Things Most People Get Wrong About AI Image Search
- AI Girlfriend Apps: Top Choices Redefining Relationships 2025
- Top 4 AI Platforms to Extend Video: The Ultimate Comparison for Creators
- Top 8 Best AI Image Editor Tools for Creative Professionals in 2026
- Experience the Future of Virtual Assistants with F.R.I.D.A.Y. AI
- Learn How to Train an AI to Play Snake with Reinforcement Learning
- Creating a Unique AI Game Environment with Pygame
- Mastering the Classic Java Snake Game
- Discover the Power of Codex: Snake Game Created in Python
- Building an AI to Master Snake Game
- Revolutionize the Classic Snake Game with AI
- Websim AI: Create Games and Apps with Just a Few Prompts

Copyright ©2026 toolify