































Table of Contents
- Key Points
- Setting Up Your AI Background Remover
- Step-by-step Implementation
- Step-by-step Instructions
- Advantages and Disadvantages
- Frequently Asked Questions
- Related Questions


Setting Up Your AI Background Remover
Understanding the Tools and Technologies
Before diving into the code, let's understand the core components that make this ai Background Remover work. We'll be using a combination of powerful Python libraries to achieve efficient and accurate Image Segmentation.
- OpenCV (cv2):

This library is essential for image and video processing. It provides a wide range of functionalities for image manipulation, video capture, and various image processing tasks. OpenCV is robust, well-documented, and supports numerous image and video formats, making it an excellent choice for this project. The article will use the functions of this library extensively.
- NumPy: NumPy is the fundamental Package for scientific computing in Python. It provides support for large, multi-dimensional arrays and matrices, along with a collection of mathematical functions to operate on these arrays. This is vital for handling image data, as images are essentially multi-dimensional arrays of pixel values. NumPy supports handling arrays and numerical operations.
- PyTorch: PyTorch is a popular deep learning framework that allows us to easily build and train neural networks. In this project, PyTorch will be used to run the DeepLabV3 model, enabling efficient inference and background removal. PyTorch is a deep learning framework and tool.
- Torchvision: Torchvision is a library that complements PyTorch by providing pre-trained models, image transformation tools, and datasets. Torchvision is going to handle image transformation and pretrained models, which greatly simplifies the process of implementing complex AI models.
- DeepLabV3: DeepLabV3 is a deep learning model specifically designed for semantic image segmentation. Semantic segmentation involves classifying each pixel in an image, allowing us to distinguish between different objects and, in our case, separate the foreground from the background. It is a deep learning model and pre-trained weights used for image segmentation.
- OS: This module provides a way of using operating system dependent functionality.
OSmodule will help to provide a way of using operating system dependent functionality.
Installing the Necessary Libraries
Before you can begin writing the code, you need to install the required Python libraries. It's highly recommended to use a virtual environment to manage dependencies and avoid conflicts with other projects. To install the libraries, open your terminal and run the following commands:
pip install opencv-python numpy torch torchvisionThis command will install OpenCV, NumPy, PyTorch, and Torchvision, setting you up for the rest of the project. The article highly recommend using a virtual environment.
Examining the Python Code: Core Components
Let’s take a look at the Python code required to implement our AI Background Remover. We will break down each section of the code for an in-depth understanding.

The code starts by importing the necessary libraries:
import cv2
import numpy as np
import torch
import torchvision
import os
from torchvision.models.segmentation import deeplabv3_resnet101
The article has all the required libraries to start the coding.
Next, we define a class named BackgroundRemover. This class encapsulates the logic for initializing the background remover with a pre-trained segmentation model:
class BackgroundRemover:
    def __init__(self):
        # Initialize the background remover with a pre-trained segmentation model.
        self.device = torch.device('cuda' if torch.cuda.is_available() else 'cpu')
        print ('Using device:', self.device)

        self.model = deeplabv3_resnet101(pretrained=True)
        self.model.eval()

        self.preprocess = torchvision.transforms.Compose([
            torchvision.transforms.ToTensor(),
            torchvision.transforms.Normalize(
                mean=[0.485, 0.456, 0.406],
                std=[0.229, 0.224, 0.225]
            )
        ])
Here’s what each line does:
self.device = torch.device('cuda' if torch.cuda.is_available() else 'cpu'): This line checks if a GPU is available and sets the device to CUDA if possible, otherwise it uses the CPU. Using a GPU significantly speeds up the model's processing.self.model = deeplabv3_resnet101(pretrained=True): This line loads the pre-trained DeepLabV3 model with ResNet101 as the backbone. Thepretrained=Trueargument downloads the pre-trained weights. This utilizes DeepLabV3 model and pretrained weights.self.model.Eval(): This line sets the model to evaluation mode, disabling training and enabling inference.self.preprocess = torchvision.transforms.Compose(...): This sets up preprocessing transforms for the image. The main motive of this is to set up preprocessing transforms to work with image. It includes converting the image to a tensor and normalizing it using pre-defined mean and standard deviation values. These values are standard for pre-trained models in Torchvision and help improve performance.
The class is now initialized with the necessary pre-trained weights.
Now, let's convert the BGR format of OpenCV to RGB format. OpenCV uses BGR format, so in this section, we are going to convert to RGB :
    def get_person_mask(self, image):
        # Generate a segmentation mask that identifies people in the image.
        image_rgb = cv2.cvtColor(image, cv2.COLOR_BGR2RGB)

        input_tensor = self.preprocess(image_rgb)
        input_batch = input_tensor.unsqueeze(0).to(self.device)

        with torch.no_grad():
            output = self.model(input_batch)['out'][0]

        segmentation_map = torch.argmax(output.cpu(), dim=0).numpy()
        mask = (segmentation_map == 15).astype(np.uint8)
        return mask
Here’s what’s happening:
image_rgb = cv2.cvtColor(image, cv2.COLOR_BGR2RGB): OpenCV uses BGR format, but our model expects RGB, so we convert the image format.input_tensor = self.preprocess(image_rgb): The image is preprocessed using the transforms defined earlier.input_batch = input_tensor.unsqueeze(0).to(self.device): We add a batch dimension to the tensor and move it to the device (GPU or CPU).with torch.no_grad():: This context manager disables gradient calculation, saving memory and computation time.output = self.model(input_batch)['out'][0]: The image is passed through the DeepLabV3 model to get the segmentation output.segmentation_map = torch.argmax(output.cpu(), dim=0).numpy(): The output tensor is processed to get the pixel-wise class predictions.mask = (segmentation_map == 15).astype(np.uint8): A binary mask is created where pixels classified as person (class 15) are set to 1, and all other pixels are set to 0.
The function generates a mask identifying where people are located in an image.
Below code removes the background from an image and then keeps the person:
    def remove_background(self, image, bg_color=None, use_checkerboard=True):
        # Remove the background from an image, keeping only the person.
        person_mask = self.get_person_mask(image)
        mask_3channel = np.stack([person_mask]*3, axis=2)

        h, w, _ = image.shape

        if use_checkerboard:
            checker_size = 20
            background = np.zeros((h, w, 3), dtype=np.uint8)
            for i in range(0, h, checker_size):
                for j in range(0, w, checker_size):
                    if (i//checker_size + j//checker_size) % 2 == 0:
                        background[i:i+checker_size, j:j+checker_size] = [200, 200, 200] # Light Gray
                    else:
                        background[i:i+checker_size, j:j+checker_size] = [100, 100, 100] # Dark Gray
        else:
            if bg_color is None:
                bg_color = (0, 255, 0) # Green by default
            background = np.ones_like(image) * np.array(bg_color, dtype=np.uint8)

        result = image * mask_3channel + background * (1 - mask_3channel)
        return result.astype(np.uint8)
What each line performs:
person_mask = self.get_person_mask(image): This line calls theget_person_maskfunction to obtain the binary mask indicating the location of people.mask_3channel = np.stack([person_mask]*3, axis=2): The binary mask is converted into a 3-Channel mask to match the color channels of the image.- The mask is converted into 3 channel mask
h, w, _ = image.Shape: The Height and width of the image are extracted.- The new variables are set to image shape
The last step is to use solid color to completely transform the background by using the below line of code.
With the above lines of codes, the background from the image gets removed and the important part keeps.
Step-by-step Implementation
Setting Up the Environment and Installing Libraries
To begin, ensure that you have Python installed on your system. This guide uses Python 3.6 or higher. Open your terminal or command Prompt and follow these steps:
- Create a Virtual Environment:
python3 -m venv venv
source venv/bin/activate  # On Linux/macOS
.\venv\Scripts\activate # On Windows- Install Required Packages:
pip install opencv-python numpy torch torchvision
Loading and Preparing the DeepLabV3 Model
The most critical step involves loading the DeepLabV3 model. Ensure that PyTorch and Torchvision are correctly installed before proceeding. Follow the code below:
import cv2
import numpy as np
import torch
import torchvision
from torchvision.models.segmentation import deeplabv3_resnet101
import torchvision.transforms as transforms

class BackgroundRemover:
    def __init__(self):
        self.device = torch.device('cuda' if torch.cuda.is_available() else 'cpu')
        print ('Using device:', self.device)

        self.model = deeplabv3_resnet101(pretrained=True)
        self.model.eval()

        self.preprocess = transforms.Compose([
            transforms.ToTensor(),
            transforms.Normalize(
                mean=[0.485, 0.456, 0.406],
                std=[0.229, 0.224, 0.225]
            )
        ])
Explanation:
- This section initializes the background remover and loads the model.
- Utilizes CUDA if available, otherwise defaults to the CPU.
- Normalizes data during the model processing using normalization.
Removing Background Function Breakdown
The core of our background remover lies in the remove_background function.
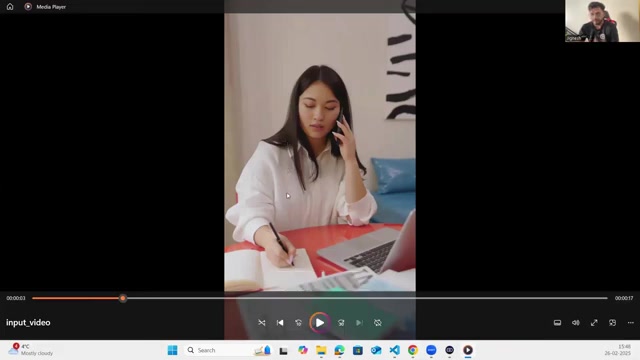
This function takes an image, generates a mask, and replaces the background accordingly.
    def remove_background(self, image, bg_color=None, use_checkerboard=True):
        person_mask = self.get_person_mask(image)
        mask_3channel = np.stack([person_mask]*3, axis=2)

        h, w, _ = image.shape

        if use_checkerboard:
            checker_size = 20
            background = np.zeros((h, w, 3), dtype=np.uint8)
            for i in range(0, h, checker_size):
                for j in range(0, w, checker_size):
                    if (i//checker_size + j//checker_size) % 2 == 0:
                        background[i:i+checker_size, j:j+checker_size] = [200, 200, 200] # Light Gray
                    else:
                        background[i:i+checker_size, j:j+checker_size] = [100, 100, 100] # Dark Gray
        else:
            if bg_color is None:
                bg_color = (0, 255, 0) # Green by default
            background = np.ones_like(image) * np.array(bg_color, dtype=np.uint8)

        result = image * mask_3channel + background * (1 - mask_3channel)
        return result.astype(np.uint8)
The following steps are followed here:
- The steps Mentioned above can be followed to identify how background replacement or removals works.
person_mask = self.get_person_mask(image): This calls theget_person_maskfunction to create a binary mask.mask_3channel = np.stack([person_mask]*3, axis=2): This converts the binary mask into a three-channel mask to be compatible with RGB images.- The binary mask is stacked to create a three-channel mask for color blending.
h, w, _ = image.shape: The height and width of the image are extracted for creating the background.- Creates the required checker board to replace the images.
- With the functions of this code, now we can replace the background of any images.






Most people like



































Report
Please select a reason for reporting
- 13 Reasons to Switch from Snapchat to Text Messaging
- 7 Powerful Speech to Text Apps to Boost Productivity
- 10 Best Speech to Text Tools for Effortless Transcription
- 13 Free Tools to Easily Transcribe Audio to Text
- 15 Surprising Ways Google's Speech-to-Text Boosts Productivity
- 7 Best Free Online Audio to Text Transcription Tools
- 9 Tips to Transcribe Speech to Text Faster and Better
- 13 Best Speech to Text Software for Windows 10 in 2023
- 7 Tips for Choosing the Best Transcriber for Audio to Text
- 11 Reasons Why Dragon Speech-to-Text Apps are Game-Changers
- 6 Secrets to Enhance Your Speech to Text Transcription
- 6 Brilliant Ways to Boost Productivity with Talk-to-Text on Your MacBook
- 6 Ways Transcription Software Converts Audio to Text
- 8 Tips to Transcribe Speech to Text Like a Pro
- 6 Reasons IBM Watson Speech to Text is a Game-Changer
- 14 Powerful Ways Talk-to-Text Improves Your Workflow
- 12 Top Windows Speech-to-Text Software for Efficient Transcription
- 12 Game-Changing Benefits of Apple's Speech to Text Technology
- 9 Powerful Use Cases for AWS Speech to Text Technology
- 10 Easy Steps to Transcribe YouTube Videos to Text
- transcription audio en texte
- online audio transcription
- free audio file transcription
- free ai audio transcription
- audio transcription service
- audio transcription online free
- audio transcription free online
- audio to transcription software
- audio and transcript
- ai audio transcription free
- voice recording to text converter
- translate voice recording to text
- record voice to text
- audio recording to text converter
- voice recording and transcription
- chatgpt voice to text
- gmail voice to text
- speech to text reader
- speech to text ai free
- speech to talk
- How to Use AI Tools to Find Internal Linking Opportunities Across a Business Website
- Discover Your Perfect Haircut with AI Hairstyle Apps
- Free Reputation Calculator Tools: How They're Adapting to Score AI Visibility, Not Just Rankings
- Design Professional Flyers for Free on Your Phone
- Best Free Flyer Maker Apps for Android: Design Like a Pro
- How to Know If Your Business Is Ready for an AI Customer Service Agent
- Revolutionizing Storytelling: From Novels to Screenplays with AI
- Create Engaging Animated Explainer Videos with a Free AI Tool
- Stop Multi-Subscribing: Benchmark Top AI Visual Models in One Canvas
- Best Seedance 2.5 API Provider: Every Price on the Market, Checked at Source
- Top AI Social Media Management Tools: Automate Your Content Strategy
- Free AI Text to Video Generator: Create Stunning Videos from Text
- Discover 17 ChatGPT Alternatives: A Comprehensive Comparison
- Character.AI vs. Janitor AI: Which AI Chat Platform Reigns Supreme?
- Top Virtual Assistant Companies in 2026: Reviews, Pricing, and Plans Compared
- Unveiling FaceCheck.ID: Revolutionizing Reverse Image Searches with AI
- 11 Best AI Dialers in 2026: Features, Pricing, Pros and Cons
- How I Direct Consistent AI Clips: A Hands-On Guide to Multi-Model Generation
- A Realistic Review of the Photo Generator Image Tool
- Playwright MCP Server: Automated Web Testing with Agent Mode

Copyright ©2026 toolify