































Table of Contents
- Key Points
- Understanding CodeWiz and Coding School 3
- Deeper Dive into Command Blocks
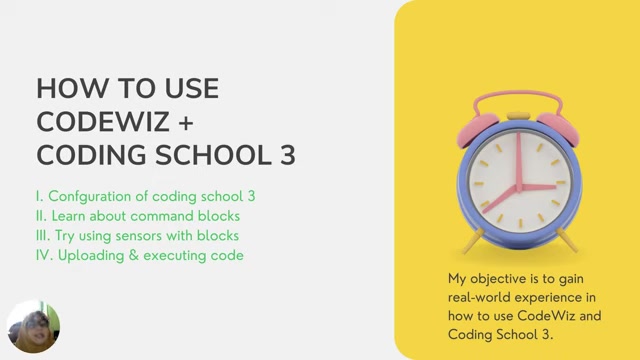
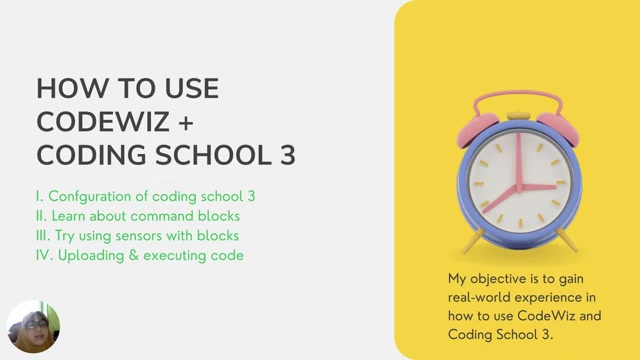
- How to Use CodeWiz + Coding School 3
- Pros and Cons of Using CodeWiz + Coding School 3
- FAQ
- Related Questions


Understanding CodeWiz and Coding School 3
What is Coding School 3?
Coding School 3 is a block-based programming environment, inspired by Scratch.
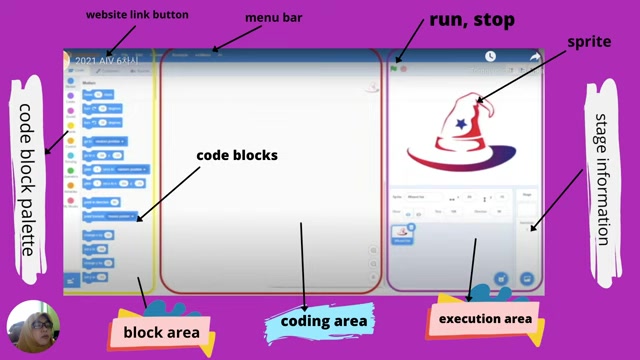
This visual approach to coding simplifies the process, making it ideal for beginners. It allows users to create programs by dragging and dropping command blocks, eliminating the need to write complex lines of text-based code. CodeWiz is a coding board. It provides a variety of commands in blocks form for coding school 3 and allows to use basic & external sensors easily on real world application. Coding School 3 is built upon Scratch 3, ensuring easy & intuitive coding experince for kids.
This environment provides a solid foundation for learning programming concepts, problem-solving, and computational thinking. It is a stepping stone towards more advanced coding languages and methodologies, fostering a love for coding from an early age. Coding School 3 program is a block-based program that is built on scratch 3. This program provides a variety of commands in block form for easy programming of basic and external sensors into the Codewiz board.
How to Use CodeWiz + Coding School 3
Configuration of Coding School 3
The initial setup involves several steps to ensure the platform is ready for use. The CodeWiz board offers numerous functions, selected through the board connection process
. This includes setting up the development environment (such as CodeWiz and Coding School 3).
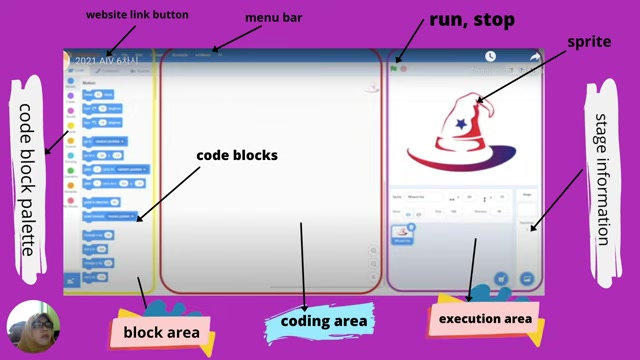
Coding School 3 offers three main areas within its interface: the block area, coding area, and execution area . The block area is where you find all available code blocks organized into categories. The coding area is your workspace where you assemble these blocks into programs. The execution area displays the output of your code in action, providing immediate feedback. Make sure that you connect the codewiz to the battery without connecting it to the computer to provide power.
Learning About Command Blocks
Command blocks are the building blocks of your code in Coding School 3. These are the individual units that give instructions to the computer
.
Different types of blocks exist, each with a unique purpose:
Hat blocks initiate scripts.
Stack blocks perform basic commands, while
*Boolean blocks determine the truth of statements.
Understanding their connectivity is essential for assembling coherent programs that flow seamlessly.
Trying sensors with blocks
Experimentation with sensors can significantly expand your understanding of coding
. The use of microphone sensors, button sensors, light sensors, distance sensors, three-axis sensor, buzzer sensors, touch sensors, Wifi sensors, and Neopixel and how they interact with command blocks provides invaluable experience. Understanding sensor data and how to Translate this information into actions is key. By doing this, you can control the outputs depending on real world application. Below is the list of Sensor, functions & output for Codewiz board:
| Sensor | Function | Outputs | |
|---|---|---|---|
| Mic Sensor | Measures the sound in environment | A value from 0 to 1023 | |
| Button Sensor | Detects whether the button is pressed or not | The value of 1 (truth) when the button sensor is pressed, and 0 (false) when the button sensor is not pressed. | |
| Light Sensor | Measures the light value in environment | A value from 0 to 1023. The darker it is, the greater the value. | |
| Distance sensor | Measures the distance from the object | The distance from the object in mm. | |
| 3-Axis sensor | Detects the slope | The values of the x, y, and z axes from -90 to 90. | |
| Buzzer sensor | Plays some tone if trigger | Some tone starts with ‘C’ and followed by other tones. | |
| Touch sensor | Touch can make a noise | Sound is produce from the board | |
| WiFi sensor | Date and time can be sync from internet | Date and Time data will be produce | |
| Neopixel | Colors can be displayed | Colors from 5 Neopixel | . |
Uploading and Executing Code
With your code assembled, the next step is uploading and executing it
. Coding School 3 provides a straightforward process for uploading your code onto the CodeWiz board.
After the code is uploaded successfully, you will see the message ”Upload Complete” displayed on the screen. To execute code, connect the Codewiz to the battery without connecting it to the computer to provide power. Connecting to the battery ensures that your program can run independently.









Most people like































Report
Please select a reason for reporting
- 13 Reasons to Switch from Snapchat to Text Messaging
- 7 Powerful Speech to Text Apps to Boost Productivity
- 10 Best Speech to Text Tools for Effortless Transcription
- 13 Free Tools to Easily Transcribe Audio to Text
- 15 Surprising Ways Google's Speech-to-Text Boosts Productivity
- 7 Best Free Online Audio to Text Transcription Tools
- 9 Tips to Transcribe Speech to Text Faster and Better
- 13 Best Speech to Text Software for Windows 10 in 2023
- 7 Tips for Choosing the Best Transcriber for Audio to Text
- 11 Reasons Why Dragon Speech-to-Text Apps are Game-Changers
- 6 Secrets to Enhance Your Speech to Text Transcription
- 6 Brilliant Ways to Boost Productivity with Talk-to-Text on Your MacBook
- 6 Ways Transcription Software Converts Audio to Text
- 8 Tips to Transcribe Speech to Text Like a Pro
- 6 Reasons IBM Watson Speech to Text is a Game-Changer
- 14 Powerful Ways Talk-to-Text Improves Your Workflow
- 12 Top Windows Speech-to-Text Software for Efficient Transcription
- 12 Game-Changing Benefits of Apple's Speech to Text Technology
- 9 Powerful Use Cases for AWS Speech to Text Technology
- 10 Easy Steps to Transcribe YouTube Videos to Text
- transcription audio en texte
- online audio transcription
- free audio file transcription
- free ai audio transcription
- audio transcription service
- audio transcription online free
- audio transcription free online
- audio to transcription software
- audio and transcript
- ai audio transcription free
- voice recording to text converter
- translate voice recording to text
- record voice to text
- audio recording to text converter
- voice recording and transcription
- chatgpt voice to text
- gmail voice to text
- speech to text reader
- speech to text ai free
- speech to talk
- How to Use AI Tools to Find Internal Linking Opportunities Across a Business Website
- Discover Your Perfect Haircut with AI Hairstyle Apps
- Free Reputation Calculator Tools: How They're Adapting to Score AI Visibility, Not Just Rankings
- Design Professional Flyers for Free on Your Phone
- Best Free Flyer Maker Apps for Android: Design Like a Pro
- How to Know If Your Business Is Ready for an AI Customer Service Agent
- Revolutionizing Storytelling: From Novels to Screenplays with AI
- Create Engaging Animated Explainer Videos with a Free AI Tool
- Stop Multi-Subscribing: Benchmark Top AI Visual Models in One Canvas
- Best Seedance 2.5 API Provider: Every Price on the Market, Checked at Source
- Top AI Social Media Management Tools: Automate Your Content Strategy
- Free AI Text to Video Generator: Create Stunning Videos from Text
- Discover 17 ChatGPT Alternatives: A Comprehensive Comparison
- Character.AI vs. Janitor AI: Which AI Chat Platform Reigns Supreme?
- Top Virtual Assistant Companies in 2026: Reviews, Pricing, and Plans Compared
- Unveiling FaceCheck.ID: Revolutionizing Reverse Image Searches with AI
- 11 Best AI Dialers in 2026: Features, Pricing, Pros and Cons
- How I Direct Consistent AI Clips: A Hands-On Guide to Multi-Model Generation
- A Realistic Review of the Photo Generator Image Tool
- Playwright MCP Server: Automated Web Testing with Agent Mode

Copyright ©2026 toolify