































Table of Contents
- Key Points
- Crafting Your Animated AI Avatar: A Detailed Guide
- How to Use Animated AI Avatar For Your Brand
- Advantages and Disadvantages of Animated AI Avatars
- FAQ
- Related Questions


Crafting Your Animated AI Avatar: A Detailed Guide
Step 1: Generating Your AI Avatar Image with Leonardo AI
The first step in creating a dynamic AI avatar is generating a high-quality image. Leonardo AI
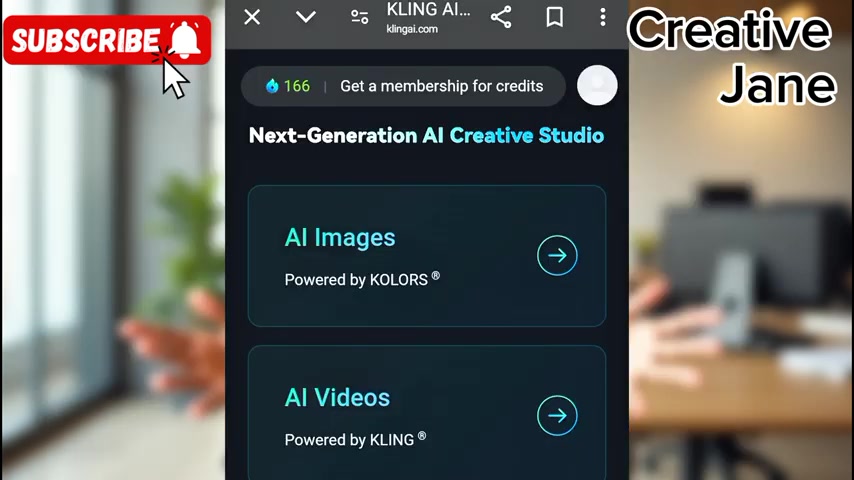
is an excellent tool for this, offering a range of features and models to create realistic and engaging avatars.
To get started:
- Sign Up and Navigate: Sign into your Leonardo AI account and navigate to the 'Image Generation' section.
- Craft Your Prompt: Use a detailed prompt to describe your ideal avatar. A well-crafted prompt ensures the AI generates an image that closely matches your vision. Let's get the exact prompt by typing 'I need the Prompt' in the comments section of the video.
Here’s an example of a prompt that can be used:
“A highly realistic AI-generated professional female avatar with a confident and engaging facial expression, looking directly at the camera. She has smooth, neatly styled hair (such as a sleek ponytail or straight, shoulder-length hair) and a polished, business-casual outfit (a fitted blazer over a stylish blouse). Her skin is smooth, and her eyes are expressive, conveying intelligence and warmth. She is slightly gesturing with her hands as if speaking naturally, making subtle yet engaging hand movements. The background is a modern, well-lit studio setting with soft, neutral colors that create a professional and visually appealing look. The lighting is balanced, ensuring clarity and depth in the image.”
By using a prompt like the one above we can help generate a high quality and realistic AI avatar to use in our videos and content.
- Generate and Upscale: Generate multiple images based on your prompt. Once you find an image you like, upscale it to ensure high resolution for animation .
Step 2: Animating Hand Gestures and Expressions Using Kling AI
Once you have your avatar image, it's time to bring it to life with Kling AI. This tool allows you to animate specific parts of the avatar, such as hand gestures and facial expressions, adding a layer of realism to your virtual presenter.
Here’s how to animate hand gestures and expressions:
- Access Kling AI: Open your Google browser and search for Kling AI.
- Sign Up/Log in: Sign up for a new account or log in to an existing one.
- Upload Your Avatar: Select the 'AI Video' option and upload the AI avatar image you generated in Leonardo AI
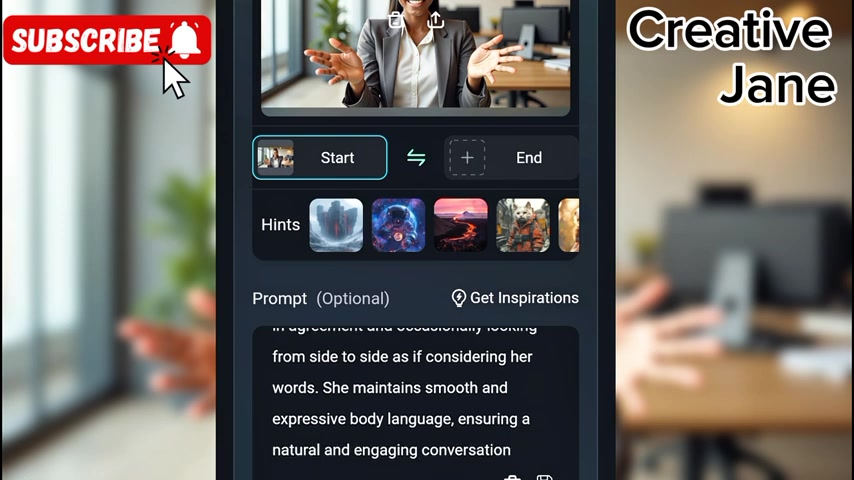
.
- Add Animation Prompt: In the prompt box, type detailed instructions for the desired hand gestures and facial expressions. For example, use the following prompt:
“The AI avatar is seated at a desk in a professional office setting. She moves her hands naturally while speaking, occasionally gesturing to emphasize key points. Her head tilts slightly as she engages with the viewer, nodding subtly in agreement and occasionally looking from side to side as if considering her words. She maintains smooth and expressive body language, ensuring a natural and engaging conversation.”
- Adjust Settings: Adjust the animation duration and other settings to match your desired outcome . Setting adjustments should include duration of the video and setting up some negative prompts to avoid unnatural facial expressions.
- Generate Animation: Click 'Generate' to let Kling AI process your request .
- Preview and Adjust: Once the animation is generated, preview it and make any necessary adjustments to refine the movements and expressions.
Adding a prompt to control the movement of objects you can add additional realism to your video that will help give more life to your videos.
Step 3: Creating Full-Body Motion with Kling AI
Taking animation a step further, you can use Kling AI to create full-body motions, such as standing up and walking. This adds a dynamic element to your avatar, making it feel more present and engaging.
Follow these steps to create a walking AI avatar:
- Upload Avatar: Upload the second AI avatar image (standing version).
- AI Video: Choose AI video option and import the standing AI avatar you wish to use in your animation
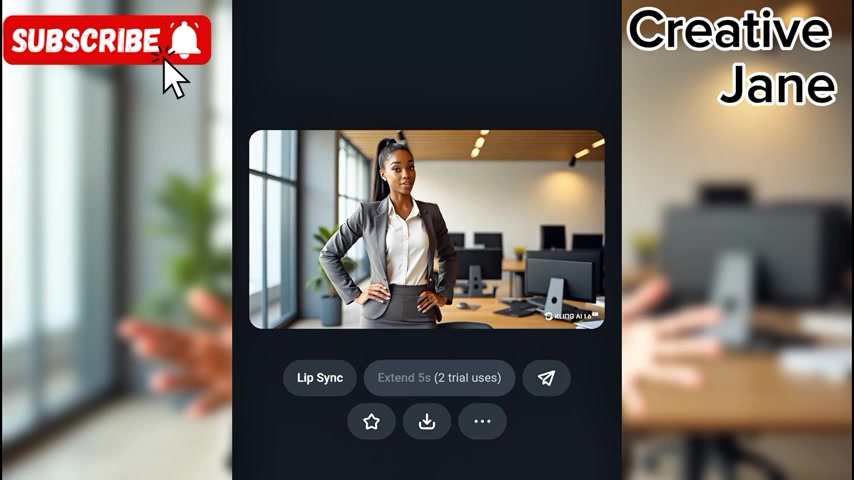
.
- Animation Prompt: Enter a new animation prompt that makes your AI avatar stand up and walk around.
Here is a great standing animation prompt:
“The AI avatar is seated at a desk in a professional office. She looks at the camera while speaking, then smoothly stands up from the chair. She steps away from the table and walks forward into an open space, as if approaching someone for a conversation. Her stride is natural and confident, with subtle arm movements complementing her steps. As she moves closer, she maintains eye contact with the camera, occasionally making small, engaging hand gestures. She pauses briefly as if addressing the viewer directly, then continues walking naturally, ensuring a smooth and lifelike interaction.”
- Fine-Tune Settings: Set the animation duration and change your previous settings .
- Negative Prompts (Optional): Add the negative prompts for better quality, natural movements.
“Avoid unnatural or robotic movements. No stiff or jerky hand gestures. No exaggerated or overly fast hand waving. No awkward or unnatural facial expressions. No sudden head jerks or unnatural tilting. No glitchy or unnatural body movements. No exaggerated blinking or mouth movements. No crossing arms or covering the face. No awkward pauses or freezing. No unnatural hand clipping into the body or table. No looking away from the viewer for too long. No unnatural foot sliding or hovering”
- Generate Animation: Start the rendering process .
- Preview Animation: After the generation process is completed, you can evaluate if your configuration had the intended results. If not, you can tweak settings and prompts for a better outcome.
Step 4: Combining Animations with CapCut
To make your AI avatar truly dynamic, combine the different animations you’ve created into a single video using CapCut. This powerful video editing tool allows you to seamlessly merge various clips.
To create a seamless video, follow these steps:
- Create a New Project: Create a new project in CapCut .
- Import Animations: Import your hand gesture video and your avatar standing/walking video into the new project.
- Edit and Align: Combine the videos you previously created to create a cohesive and natural end product. You can also trim and align the clips to ensure a smooth transition between actions. Fine tune each transition to match what you want to portray in your animated AI avatar .
- Export Final Result: Export the video after combining the different animations into one cohesive clip.
Step 5: Lip-Sync with DreamFace AI
One of the most crucial aspects of making an AI avatar believable is ensuring that its lips move in sync with the audio. DreamFace AI is specifically designed for this purpose, making it easy to add realistic lip-sync to your avatar.
Here are the steps for adding a great lip-sync to your AI:
- Install DreamFace AI: First, you'll need to download and install DreamFace AI from your Appstore.
- Select Video Lip Sync: Select a video you want to put the lip-sync on and upload it to the application. To create a realistic and professional video, it is important to choose the correct script to match the avatar in your content .
- Upload AI Voice: Create an AI voice by first importing the pre-recorded video to clip champ, and having that be your avatars voice. Then upload the voice to dream face.
- Select Video Lip Sync
- Animate: Tap the animate button to process the audio and allow the Avatar to perform Lip Sync .








Most people like































Report
Please select a reason for reporting
- 13 Reasons to Switch from Snapchat to Text Messaging
- 7 Powerful Speech to Text Apps to Boost Productivity
- 10 Best Speech to Text Tools for Effortless Transcription
- 13 Free Tools to Easily Transcribe Audio to Text
- 15 Surprising Ways Google's Speech-to-Text Boosts Productivity
- 7 Best Free Online Audio to Text Transcription Tools
- 9 Tips to Transcribe Speech to Text Faster and Better
- 13 Best Speech to Text Software for Windows 10 in 2023
- 7 Tips for Choosing the Best Transcriber for Audio to Text
- 11 Reasons Why Dragon Speech-to-Text Apps are Game-Changers
- 6 Secrets to Enhance Your Speech to Text Transcription
- 6 Brilliant Ways to Boost Productivity with Talk-to-Text on Your MacBook
- 6 Ways Transcription Software Converts Audio to Text
- 8 Tips to Transcribe Speech to Text Like a Pro
- 6 Reasons IBM Watson Speech to Text is a Game-Changer
- 14 Powerful Ways Talk-to-Text Improves Your Workflow
- 12 Top Windows Speech-to-Text Software for Efficient Transcription
- 12 Game-Changing Benefits of Apple's Speech to Text Technology
- 9 Powerful Use Cases for AWS Speech to Text Technology
- 10 Easy Steps to Transcribe YouTube Videos to Text
- transcription audio en texte
- online audio transcription
- free audio file transcription
- free ai audio transcription
- audio transcription service
- audio transcription online free
- audio transcription free online
- audio to transcription software
- audio and transcript
- ai audio transcription free
- voice recording to text converter
- translate voice recording to text
- record voice to text
- audio recording to text converter
- voice recording and transcription
- chatgpt voice to text
- gmail voice to text
- speech to text reader
- speech to text ai free
- speech to talk
- How to Use AI Tools to Find Internal Linking Opportunities Across a Business Website
- Discover Your Perfect Haircut with AI Hairstyle Apps
- Free Reputation Calculator Tools: How They're Adapting to Score AI Visibility, Not Just Rankings
- Design Professional Flyers for Free on Your Phone
- Best Free Flyer Maker Apps for Android: Design Like a Pro
- How to Know If Your Business Is Ready for an AI Customer Service Agent
- Revolutionizing Storytelling: From Novels to Screenplays with AI
- Create Engaging Animated Explainer Videos with a Free AI Tool
- Stop Multi-Subscribing: Benchmark Top AI Visual Models in One Canvas
- Best Seedance 2.5 API Provider: Every Price on the Market, Checked at Source
- Top AI Social Media Management Tools: Automate Your Content Strategy
- Free AI Text to Video Generator: Create Stunning Videos from Text
- Discover 17 ChatGPT Alternatives: A Comprehensive Comparison
- Character.AI vs. Janitor AI: Which AI Chat Platform Reigns Supreme?
- Top Virtual Assistant Companies in 2026: Reviews, Pricing, and Plans Compared
- Unveiling FaceCheck.ID: Revolutionizing Reverse Image Searches with AI
- 11 Best AI Dialers in 2026: Features, Pricing, Pros and Cons
- How I Direct Consistent AI Clips: A Hands-On Guide to Multi-Model Generation
- A Realistic Review of the Photo Generator Image Tool
- Playwright MCP Server: Automated Web Testing with Agent Mode

Copyright ©2026 toolify