































Table of Contents
- Key Points
- Getting Started with Logo Design Using AI
- Creating a Logo with Stable Diffusion and Vector Studio
- Step-by-Step Guide to Logo Creation
- Advantages and Disadvantages of Using AI for Logo Design
- FAQ
- Related Questions


Getting Started with Logo Design Using AI
Installing the Vector Graphics Plugin
To begin designing logos with Stable Diffusion, you'll first need to install a vector graphics plugin. This plugin allows you to create scalable vector graphics, which are essential for logo design. A good starting point is the Stable Diffusion WebUI Vector Studio.
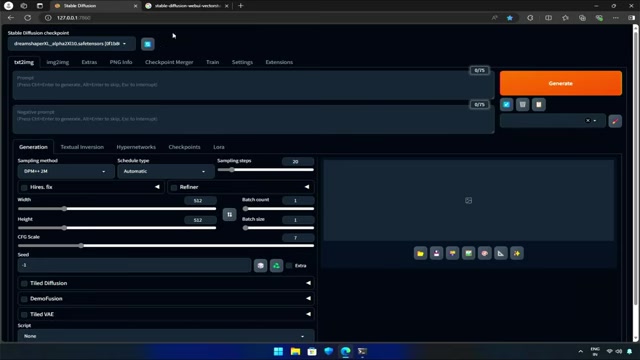
To locate this plugin, search for 'Stable Diffusion WebUI Vector Studio' on Google. The search results should lead you to a GitHub link where the plugin is hosted. I recommend referring to the video description for direct links and additional resources.
Once you've found the GitHub repository, copy the link from the code section. Next, navigate to the extensions menu within your Stable Diffusion Automatic1111 web UI. From there, select 'Install from URL' and paste the copied address. Initiate the installation process by clicking the 'Install' button and waiting for the installation to complete. Once the installation is complete, verify it in the installed tab and restart the web UI to complete the setup. You should now see a new menu item labeled 'Vector Studio' in your web UI.
Note: It's crucial to ensure that all dependencies are installed correctly to avoid any errors during the logo generation process.
Installing Potrace Dependency
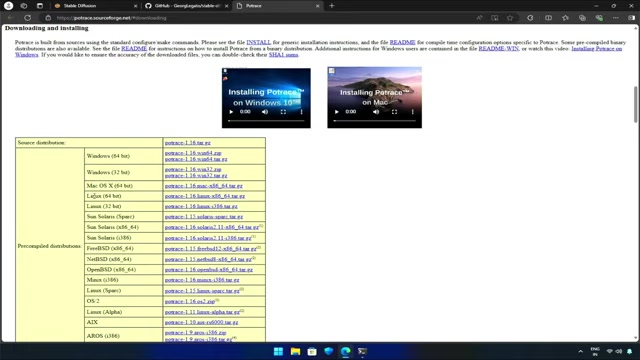
Before fully utilizing the Vector Studio plugin, there's an essential dependency that needs to be set up: Potrace. Navigate back to the Vector Studio webpage and find the installation instructions for Potrace software.
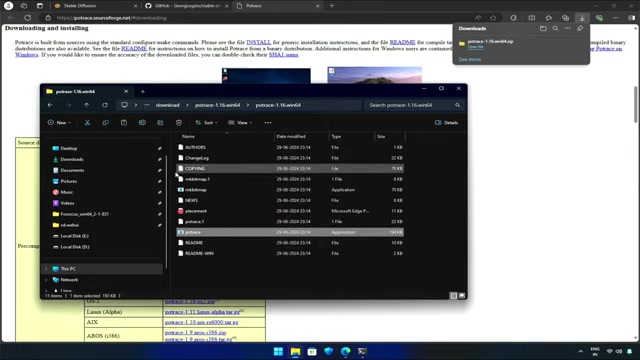
Potrace is a tool used for tracing bitmaps, converting them into smooth, scalable vector graphics. You'll find a link to download Potrace suitable for your operating system, whether it's Windows, macOS, or Linux.
For Windows users, download the Windows version. After downloading, unzip the file and open the folder. Locate the 'potrace.exe' executable file and copy it. Now, paste this file into the 'bin' directory within the Vector Studio plugin folder. This directory is typically located within your Stable Diffusion Web UI extensions folder.
By correctly installing Potrace, you're equipping Vector Studio with the necessary tools to convert raster images into high-quality vector graphics. This step is crucial for achieving professional-looking logos.
Creating a Logo with Stable Diffusion and Vector Studio
Setting Up the Prompt
Now that you have set up the tools, you can start creating logos. You won't be using the Vector Studio feature directly. Instead, access Vector Studio from the script section of the web UI. Click to open it and explore the various image styles available, including illustrations, logos, tattoos, anime, stickers, and more.
To begin, you'll need a prompt that specifies the design parameters for your logo. For example: “Flat color, modern multi-color logo of a falcon's head on a white background, black and white logos”. This prompt provides the AI with instructions to generate a logo with specific attributes. I will share the Prompt, please check the description.
Add negative prompts in the prompt words field. In the negative prompt, I will insert two commonly used negative words separated by a comma. These general WORD vectors are often used for negative keywords.
Next, in the vector studio settings, select style to logo. I’ll uncheck this option, this will make the white parts of our drawn image transparent. The output format will be SVG vector graphics. Now we are ready to generate.
Remember to specify details such as color schemes, background preferences, and the main subject of the logo. The clearer and more detailed your prompt, the better the AI can interpret your vision.
Refining the Logo with Image-to-Image Techniques
Once Stable Diffusion generates an initial set of logos, you can refine the design using image-to-image techniques. This involves using an existing image as a reference for the AI to modify and enhance. Copy the prompt to the image-to-image section, including the negative prompt words.
Import an image for Stable Diffusion to mimic, and it will generate a new set of images, selecting 'Illustration' option and unchecking the 'White is Opaque' option.
This process allows you to influence the style, details, and overall aesthetic of the logo. Adjust the parameters and experiment with different images to achieve the desired outcome. You can switch the base model and sampler to generate another set of images. The key here is iteration and experimentation to fine-tune the logo. The newly generated image has borrowed the style of the original image in its lines.
Leveraging LoRA Models for Logo Generation
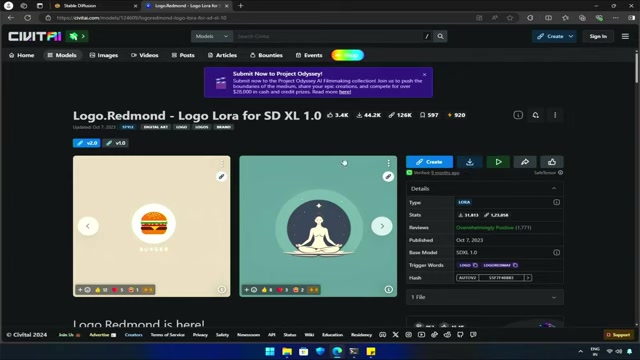
For those seeking more specialized logo designs, consider leveraging LoRA (Low-Rank Adaptation) models. LoRA models are designed to fine-tune specific aspects of image generation, allowing for greater control over the final result. It is recommended to find some LoRA models specifically designed for logo generation in the community. Open Civit AI to search Logo Redmond to find it, then we can download and import it.
To incorporate a LoRA model, first, import it into your Stable Diffusion Automatic1111 setup. The Lora model has helped refine the design and produce a more professional looking logo.
The LoRA model is added to the workflow and it has trigger words. It is recommended to copy the two trigger words and make sure to use it correctly by comma separators. By utilizing trigger words, you can achieve more consistent and high-quality logo generations tailored to your specific needs.





Most people like


































Report
Please select a reason for reporting
- 13 Reasons to Switch from Snapchat to Text Messaging
- 7 Powerful Speech to Text Apps to Boost Productivity
- 10 Best Speech to Text Tools for Effortless Transcription
- 13 Free Tools to Easily Transcribe Audio to Text
- 15 Surprising Ways Google's Speech-to-Text Boosts Productivity
- 7 Best Free Online Audio to Text Transcription Tools
- 9 Tips to Transcribe Speech to Text Faster and Better
- 13 Best Speech to Text Software for Windows 10 in 2023
- 7 Tips for Choosing the Best Transcriber for Audio to Text
- 11 Reasons Why Dragon Speech-to-Text Apps are Game-Changers
- 6 Secrets to Enhance Your Speech to Text Transcription
- 6 Brilliant Ways to Boost Productivity with Talk-to-Text on Your MacBook
- 6 Ways Transcription Software Converts Audio to Text
- 8 Tips to Transcribe Speech to Text Like a Pro
- 6 Reasons IBM Watson Speech to Text is a Game-Changer
- 14 Powerful Ways Talk-to-Text Improves Your Workflow
- 12 Top Windows Speech-to-Text Software for Efficient Transcription
- 12 Game-Changing Benefits of Apple's Speech to Text Technology
- 9 Powerful Use Cases for AWS Speech to Text Technology
- 10 Easy Steps to Transcribe YouTube Videos to Text
- transcription audio en texte
- online audio transcription
- free audio file transcription
- free ai audio transcription
- audio transcription service
- audio transcription online free
- audio transcription free online
- audio to transcription software
- audio and transcript
- ai audio transcription free
- voice recording to text converter
- translate voice recording to text
- record voice to text
- audio recording to text converter
- voice recording and transcription
- chatgpt voice to text
- gmail voice to text
- speech to text reader
- speech to text ai free
- speech to talk
- How to Use AI Tools to Find Internal Linking Opportunities Across a Business Website
- Discover Your Perfect Haircut with AI Hairstyle Apps
- Free Reputation Calculator Tools: How They're Adapting to Score AI Visibility, Not Just Rankings
- Design Professional Flyers for Free on Your Phone
- Best Free Flyer Maker Apps for Android: Design Like a Pro
- How to Know If Your Business Is Ready for an AI Customer Service Agent
- Revolutionizing Storytelling: From Novels to Screenplays with AI
- Create Engaging Animated Explainer Videos with a Free AI Tool
- Stop Multi-Subscribing: Benchmark Top AI Visual Models in One Canvas
- Best Seedance 2.5 API Provider: Every Price on the Market, Checked at Source
- Top AI Social Media Management Tools: Automate Your Content Strategy
- Free AI Text to Video Generator: Create Stunning Videos from Text
- Discover 17 ChatGPT Alternatives: A Comprehensive Comparison
- Character.AI vs. Janitor AI: Which AI Chat Platform Reigns Supreme?
- Top Virtual Assistant Companies in 2026: Reviews, Pricing, and Plans Compared
- Unveiling FaceCheck.ID: Revolutionizing Reverse Image Searches with AI
- 11 Best AI Dialers in 2026: Features, Pricing, Pros and Cons
- How I Direct Consistent AI Clips: A Hands-On Guide to Multi-Model Generation
- A Realistic Review of the Photo Generator Image Tool
- Playwright MCP Server: Automated Web Testing with Agent Mode

Copyright ©2026 toolify