































Table of Contents
- Key Points
- Understanding Metaballs and Illustrator Basics
- Advanced Techniques for Unique Metaball Patterns
- Creating Your First Metaball Pattern in Illustrator
- Advantages and Disadvantages of Using Metaball Patterns
- FAQ
- Related Questions


Understanding Metaballs and Illustrator Basics
What are Metaballs?
Metaballs, also known as blobs or marching squares, are organic-looking n-dimensional objects. When two or more metaballs get close, they merge in a smooth, fluid way. This effect is achieved through mathematical functions that define the field around each ball, causing them to Blend. This natural-looking merge is ideal for creating abstract designs and fluid shapes.

In the world of Graphic Design, using metaballs can bring dynamic and organic patterns that stand out. They offer an alternative to rigid geometric shapes, making designs more visually engaging. Imagine using metaball Patterns for:
- Website backgrounds, adding depth and visual interest.
- Textiles, where fluidity can make the design more appealing.
- Logos and branding, offering a unique and Memorable visual mark.
- Abstract illustrations, allowing the creation of complex, eye-catching pieces.
Using Adobe Illustrator will help in this process, as its vector-based nature ensures these patterns can be scaled infinitely without loss of quality. Knowing how to navigate and utilize Illustrator’s key tools is essential to bring your metaball pattern designs to life.
Setting Up Your Illustrator Document
Before diving into the pattern creation, setting up your document correctly is crucial. A well-prepared document ensures that you can easily manipulate and Scale your design without losing quality. Begin by creating a new document in Adobe Illustrator. A square canvas is generally recommended for seamless patterns, as it simplifies the tiling process. A good starting point is 1500 x 1500 pixels.

Here’s how to set up your document:
- Create a New Document: Go to File > New in Illustrator.
- Define the Canvas Size: In the New Document dialog box, set the Width and Height to 1500 px each.
- Color Mode: Ensure your color mode is set to CMYK if the final design is for print, or RGB if it is for digital use.
- Raster Effects: Set the Raster Effects to High (300 ppi) for better resolution.
- Click Create: Your new, square canvas is ready for your metaball pattern.
Having the right canvas size helps during duplication and tiling of the pattern, ensuring seamless edges. Additionally, setting the correct color mode from the start will prevent issues later in the design process.
Advanced Techniques for Unique Metaball Patterns
Randomizing Colors for a Dynamic Look
Adding random colors to your metaball pattern can significantly enhance its visual appeal. This can be achieved using scripting or manual color adjustments.

One popular method involves using a script called 'Random Selection'.
The main steps involve:
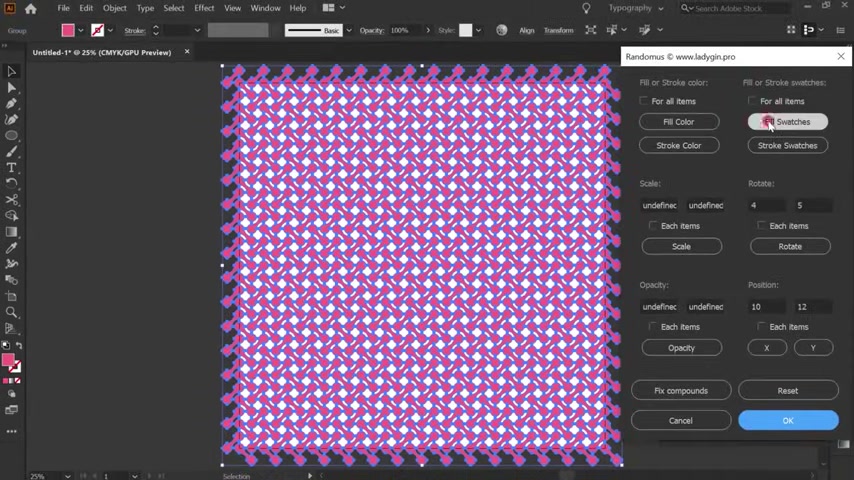
- Ungroup the Pattern: To change the color in your pattern, you need to ungroup your created design.
- Open up ‘Random Selection’ script: Once the design is ungrouped, open the script by going to File->Scripts->Other Script.
- Select what you want the script to do: In the box that pops up you can pick the fill or stroke color.
- Choose which color swatches to use: In the Color Swatches menu pick the colors that you want to use in the pattern.
- Click OK: Clicking 'Ok' will randomize your color selection.
The great thing about this script is it allows you to quickly iterate different random color combinations and make your design more interesting. Keep in mind that you can also customize the random colors manually as well as add gradients for more dynamic gradients.
Creating Your First Metaball Pattern in Illustrator
Step 1: Create a Basic Circle
The foundation of a metaball is a circle. In Adobe Illustrator, select the Ellipse Tool (L). Hold Shift while dragging to create a perfect circle. A common size to start with is 100 x 100 pixels, but feel free to adjust based on your desired pattern density.

Initially, set the fill color to black and remove the stroke. The exact color isn't critical at this stage, as it can be easily changed later. The goal is to have a clean, solid circle as the base for your metaball Shape.
Here are the key steps:
- Select the Ellipse Tool (L).
- Hold Shift to create a perfect circle.
- Set Dimensions to 100 x 100 pixels.
- Fill with black, remove stroke.
Creating a precise circle is essential because the smoothness of your final pattern depends on the initial shape. A slightly distorted circle can lead to noticeable imperfections in the final design.
Step 2: Add a Cyan Stroke
To begin creating the metaball effect, add a stroke to your circle. Select a cyan (light blue) color for the stroke. A thicker stroke helps enhance the merging effect when you duplicate the circles. Set the stroke weight to approximately 20 points.
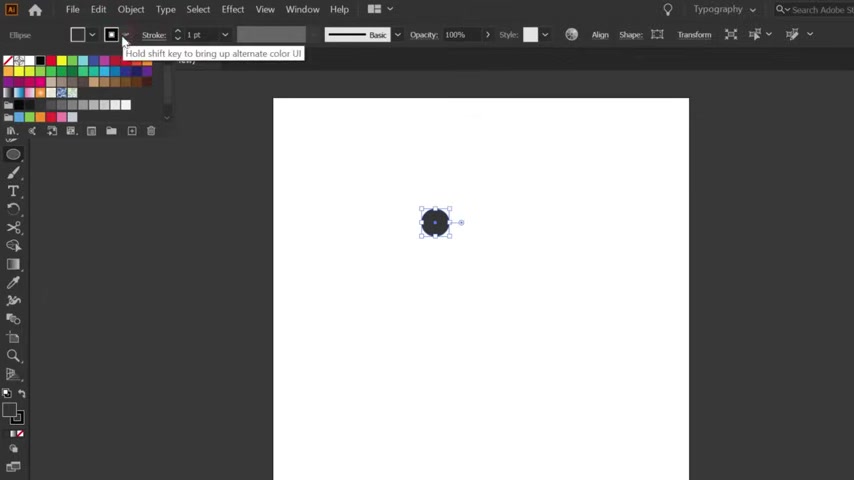
Make sure the stroke is aligned to the outside of the circle. Illustrator provides options for stroke alignment; selecting ‘Align Stroke to Outside’ ensures that the stroke extends outwards from the circle’s edge.
Key steps for this part include:
- Add a cyan stroke to the circle.
- Set the stroke weight to 20 points.
- Align the stroke to the outside.
The stroke color and weight are important as they define how the metaballs will blend. A contrasting color like cyan helps Visualize the blending effect more clearly.
Step 3: Using the Transform Effect
The Transform Effect is key to creating multiple metaballs that seamlessly merge. To apply this effect, select your stroked circle and go to Effect > Distort & Transform > Transform.
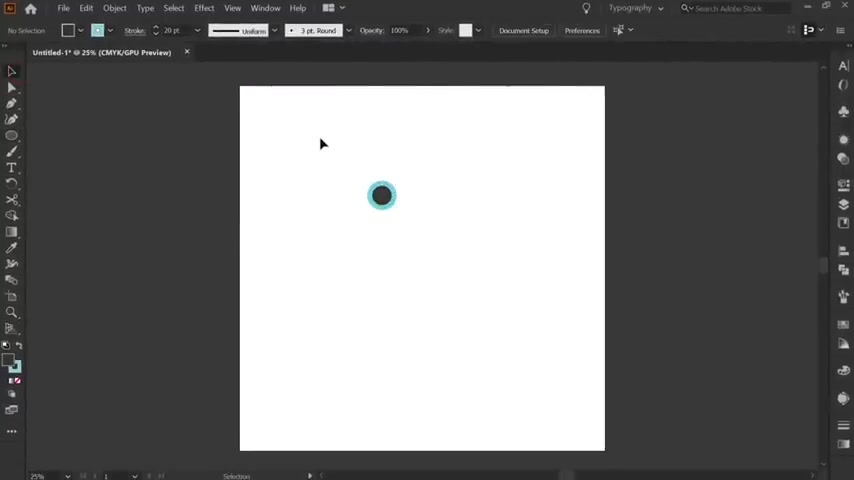
In the Transform Effect dialog, make the following settings:
- Move: Set the horizontal move value to approximately 100 pixels. This value depends on the size of the original circle. Adjust until the duplicated circles are close but not overlapping significantly.
- Copies: Set the number of copies to 2. This will create two additional circles that merge with the original circle.
- Click OK to apply the effect.
Here’s what the Transform Effect achieves:
- It duplicates the original circle.
- It positions the copies horizontally, creating a merging effect.
- It maintains the stroke and fill properties of the original circle.
The Transform Effect is a non-destructive way to duplicate and position objects, meaning you can always go back and adjust the parameters without permanently altering the original circle.
Step 4: Expand Appearance and Refine
To finalize the metaball shape, you need to expand the appearance of the transformed circles. Go to Object > Expand Appearance. This converts the effect into actual shapes that you can manipulate with Illustrator’s tools.
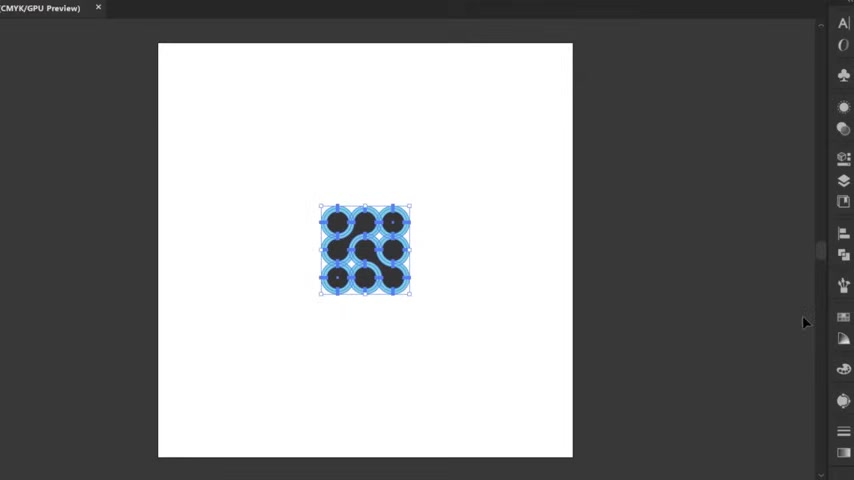
Next, use the Shape Builder Tool (Shift + M) to merge the circles into a single, Cohesive shape. Select all the circles, then click and drag with the Shape Builder Tool to unite the overlapping areas. This creates the smooth, flowing metaball effect you’re aiming for.
Key steps for refining the shape:
- Expand the appearance (Object > Expand Appearance).
- Select the Shape Builder Tool (Shift + M).
- Merge the circles by clicking and dragging.
Expanding the appearance makes the effect permanent, so it’s essential to be happy with the arrangement before proceeding.
Step 5: Create a Tiled Pattern
With a single metaball shape created, you can proceed with tiling the pattern. Select the metaball and go to Object > Pattern > Make. Illustrator will automatically tile the shape and enter Pattern Editing mode.
Adjust the Tile Type, Width, and Height settings to control the pattern's density and layout. For a seamless grid pattern, use the GRID tile type. Experiment with different settings to find a layout that appeals to you. Reduce both the width and height and you’ll see the pattern overlap and the metaballs start to connect.
Key settings to adjust include:
- Tile Type: Grid
- Width: Adjust to control horizontal spacing
- Height: Adjust to control vertical spacing
Experiment with different overlaps to achieve diverse visual effects. Once satisfied, click 'Done' at the top of the screen to save the pattern swatch.



Most people like









































Report
Please select a reason for reporting
- 13 Reasons to Switch from Snapchat to Text Messaging
- 7 Powerful Speech to Text Apps to Boost Productivity
- 10 Best Speech to Text Tools for Effortless Transcription
- 13 Free Tools to Easily Transcribe Audio to Text
- 15 Surprising Ways Google's Speech-to-Text Boosts Productivity
- 7 Best Free Online Audio to Text Transcription Tools
- 9 Tips to Transcribe Speech to Text Faster and Better
- 13 Best Speech to Text Software for Windows 10 in 2023
- 7 Tips for Choosing the Best Transcriber for Audio to Text
- 11 Reasons Why Dragon Speech-to-Text Apps are Game-Changers
- 6 Secrets to Enhance Your Speech to Text Transcription
- 6 Brilliant Ways to Boost Productivity with Talk-to-Text on Your MacBook
- 6 Ways Transcription Software Converts Audio to Text
- 8 Tips to Transcribe Speech to Text Like a Pro
- 6 Reasons IBM Watson Speech to Text is a Game-Changer
- 14 Powerful Ways Talk-to-Text Improves Your Workflow
- 12 Top Windows Speech-to-Text Software for Efficient Transcription
- 12 Game-Changing Benefits of Apple's Speech to Text Technology
- 9 Powerful Use Cases for AWS Speech to Text Technology
- 10 Easy Steps to Transcribe YouTube Videos to Text
- transcription audio en texte
- online audio transcription
- free audio file transcription
- free ai audio transcription
- audio transcription service
- audio transcription online free
- audio transcription free online
- audio to transcription software
- audio and transcript
- ai audio transcription free
- voice recording to text converter
- translate voice recording to text
- record voice to text
- audio recording to text converter
- voice recording and transcription
- chatgpt voice to text
- gmail voice to text
- speech to text reader
- speech to text ai free
- speech to talk
- Meshy AI: How to Create 3D Models from Text and Images
- How SEO and Marketing Dashboards Empower Agencies to Drive Results
- How to Use AI Tools to Find Internal Linking Opportunities Across a Business Website
- Discover Your Perfect Haircut with AI Hairstyle Apps
- Free Reputation Calculator Tools: How They're Adapting to Score AI Visibility, Not Just Rankings
- Design Professional Flyers for Free on Your Phone
- Best Free Flyer Maker Apps for Android: Design Like a Pro
- How to Know If Your Business Is Ready for an AI Customer Service Agent
- Revolutionizing Storytelling: From Novels to Screenplays with AI
- Create Engaging Animated Explainer Videos with a Free AI Tool
- Meshy AI: How to Create 3D Models from Text and Images
- ASOMobile Helps Teams Benchmark App Store Screenshots Against Competitors
- How to Match LMS Software With Your Organization's Training Plan
- Revolutionizing Email Marketing Agency with AI
- How to Convert BTC to HNT
- Unleashing the Power of AI: Cognizant's Roadmap for Transformation
- Frame to Video Review: A Practical Look at Turning Two Still Frames Into Motion
- NVIDIA NIM: Revolutionizing Supply Chain Data Analysis with AI
- Top AI Tools That Help Brands Stand Out Offline (Not Just Online)
- Top 5 Cold Email Software: Maximize Your Outreach in 2025

Copyright ©2026 toolify