































Table of Contents
- Key Points
- Understanding the Need for Dockerizing Angular Applications
- Optimizing Node_Modules and Deployment Size with Docker
- Dockerizing Your Angular Application: A Step-by-Step Guide
- Pricing and Availability
- Pros and Cons of Dockerizing Angular Apps
- Core Features of Docker and VS Code Remote - Containers
- Use Cases for Dockerizing Angular Applications
- Frequently Asked Questions (FAQ)
- Related Questions: Exploring Advanced Docker Concepts and Angular Best Practices


Understanding the Need for Dockerizing Angular Applications
The Problem: Large Node Modules and Inconsistent Environments
One of the major pain points in Angular development is the sheer size of the node_modules folder.

Each Angular application tends to consume a huge amount of disk space due to the extensive dependencies required. Depending on the application's complexity, the node_modules folder can range from 600 MB to 1.5 GB or even more. This substantial size presents several challenges:
- Disk Space Consumption: Large node_modules folders quickly fill up hard drives, especially on development machines.
- Build and Deployment Times: The more dependencies you have, the longer it takes to build and deploy your application. This slows down the development cycle and increases the time to market.
- Inconsistent Environments: Developing Angular apps across different machines or teams without a consistent environment setup can lead to compatibility issues and unexpected bugs. Differences in Node.js versions, global dependencies, and operating systems can cause discrepancies that are difficult to debug.
To address these challenges, containerization with Docker offers a powerful and effective solution.
Docker: A Solution for Consistent and Efficient Angular Development
Docker is a platform that enables you to package your application and its dependencies into a standardized unit called a container. This container can then be run consistently across different environments, ensuring that your application behaves the same way regardless of where it's deployed.

By dockerizing your Angular application, you can achieve the following benefits:
- Consistent Environments: Docker ensures that your application runs in an isolated container with all the necessary dependencies, eliminating environment-related inconsistencies.
- Reduced Node Modules Size: By building your application inside a Docker container, you can optimize the node_modules folder and include only the dependencies required for production.
- Faster Build and Deployment Times: Docker images can be easily shared and deployed, streamlining the deployment process and reducing the time it takes to get your application live.
- Simplified Dependency Management: Docker simplifies dependency management by encapsulating all dependencies within the container, reducing the risk of conflicts and versioning issues.
- Scalability and Portability: Docker containers are highly scalable and portable, making it easy to deploy your Angular application to various cloud platforms or on-premise servers.
Dockerizing Your Angular Application: A Step-by-Step Guide
Step 1: Prerequisites - Setting Up Your Development Environment
Before you begin, make sure you have the following prerequisites installed:
- Node.js and npm: Angular CLI requires Node.js. You can download either the LTS (recommended for most users) or Current version. Visit the Node.js downloads page to install the correct version for your operating system.
-
Angular CLI: The Angular CLI is a command-line interface tool that you use to initialize, develop, scaffold, and maintain Angular applications. Install the Angular CLI globally using npm:
npm install -g @angular/cli - Docker Desktop: Docker Desktop provides a user-friendly interface for building, running, and managing Docker containers on your local machine.
Download Docker Desktop from the Docker website. Choose the appropriate version for your operating system (Windows, macOS).
- Visual Studio Code: VS Code is a popular code editor with excellent support for Angular and Docker development. Download Visual Studio Code from the Visual Studio Code website.
- Visual Studio Code Remote - Containers Extension: The Remote - Containers extension allows you to develop inside Docker containers directly from Visual Studio Code. Install this extension from the VS Code Marketplace.
Step 2: Creating a New Angular Application (or Using an Existing One)
If you're starting a new Angular project, use the Angular CLI to create a new application:
```bash
ng new my-angular-app
cd my-angular-app
```
If you already have an existing Angular project, navigate to its root directory using the cd command:
```bash
cd existing-angular-app
```
Step 3: Creating a Dockerfile
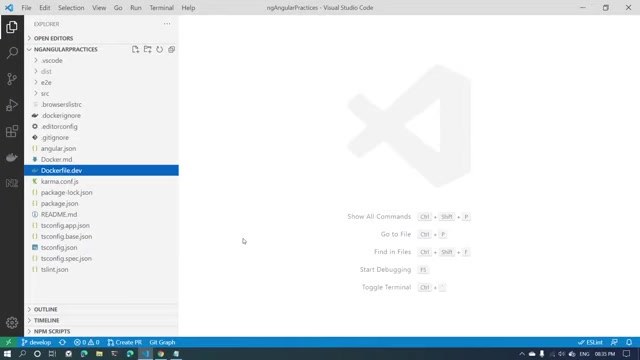
A Dockerfile is a text document that contains all the commands a user could call on the command line to assemble an image. In the root directory of your Angular application, create a new file named Dockerfile (without any file extension). Add the following content to the Dockerfile:
```dockerfile
FROM node:12.7-alpine

RUN mkdir -p /usr/src/app
WORKDIR /usr/src/app

COPY package.json /usr/src/app

RUN npm install

COPY . /usr/src/app

EXPOSE 4200

CMD [ \"npm\", \"start\"]
```
Let's break down what each line in the Dockerfile does:
FROM node:12.7-alpine: This line specifies the base image for the Docker container. In this case, it uses a lightweight Alpine Linux-based image with Node.js version 12.7 pre-installed. Using Alpine Linux reduces the overall size of the image.RUN mkdir -p /usr/src/app: This command creates a directory inside the container where your Angular application will reside.WORKDIR /usr/src/app: This sets the working directory for subsequent commands to/usr/src/app.COPY package.json /usr/src/app: This copies thepackage.jsonfile (which contains your application's dependencies) into the container.RUN npm install: This command installs the application's dependencies usingnpm install. By copying only thepackage.jsonfile first, Docker can cache this step, making subsequent builds faster if the dependencies haven't changed.COPY . /usr/src/app: This copies the rest of your application's source code into the container.EXPOSE 4200: This exposes port 4200, the default port for Angular development servers, from the container.CMD [ \"npm\", \"start\"]: This specifies the command to run when the container starts. In this case, it starts the Angular development server usingnpm start.
Step 4: Creating a .dockerignore File
To further optimize your Docker image and prevent unnecessary files from being copied into the container, create a .dockerignore file in the root directory of your Angular application. Add the following content to the .dockerignore file:
```
node_modules
dist
.git
.DS_Store
npm-debug.log
```
This file tells Docker to exclude the node_modules folder, the dist folder (which contains the production build of your application), the .git folder, and other unnecessary files from the Docker image. This significantly reduces the size of the image and improves build times.
Step 5: Building the Docker Image
Now that you have a Dockerfile and a .dockerignore file, you can build the Docker image. Open a terminal, navigate to the root directory of your Angular application, and run the following command:
```bash
docker build -t angular-docker .
```
This command builds a Docker image with the tag angular-docker based on the instructions in the Dockerfile. The . specifies that the build context is the current directory.
The build process may take some time, especially the first time you run it, as Docker needs to download the base image and install the dependencies. After the build process is complete, you can verify that the image has been created by running the following command:
```bash
docker images
```
This will list all the Docker images on your system, including the angular-docker image you just built.
Step 6: Running the Docker Container
To run your Angular application inside a Docker container, use the following command:
```bash
docker run -p 4200:4200 angular-docker
```
This command does the following:
-p 4200:4200: This maps port 4200 on your host machine to port 4200 inside the container.angular-docker: This specifies the name of the Docker image to run.
Once the container is running, you can access your Angular application by opening your web browser and navigating to http://localhost:4200.
Step 7: Developing Inside the Docker Container with Visual Studio Code
Visual Studio Code's Remote - Containers extension allows you to develop directly inside the Docker container, providing a seamless development experience. To get started, follow these steps:
- Open Your Angular Project in Visual Studio Code: Open the root directory of your Angular application in Visual Studio Code.
- Open the Project in a Container: Use the Remote-Containers: Reopen in Container command. This will rebuild the container, including installing the VS Code server and required extensions within the container.
- Start Editing, Building, and Debugging: Now you can open a integrated terminal inside VS Code and execute commands such as
ng serveto start the application. The file system and all the commands will be executed inside the container itself.
This provides a consistent environment between developing and building angular projects. **

**








Most people like





































Report
Please select a reason for reporting
- 13 Reasons to Switch from Snapchat to Text Messaging
- 7 Powerful Speech to Text Apps to Boost Productivity
- 10 Best Speech to Text Tools for Effortless Transcription
- 13 Free Tools to Easily Transcribe Audio to Text
- 15 Surprising Ways Google's Speech-to-Text Boosts Productivity
- 7 Best Free Online Audio to Text Transcription Tools
- 9 Tips to Transcribe Speech to Text Faster and Better
- 13 Best Speech to Text Software for Windows 10 in 2023
- 7 Tips for Choosing the Best Transcriber for Audio to Text
- 11 Reasons Why Dragon Speech-to-Text Apps are Game-Changers
- 6 Secrets to Enhance Your Speech to Text Transcription
- 6 Brilliant Ways to Boost Productivity with Talk-to-Text on Your MacBook
- 6 Ways Transcription Software Converts Audio to Text
- 8 Tips to Transcribe Speech to Text Like a Pro
- 6 Reasons IBM Watson Speech to Text is a Game-Changer
- 14 Powerful Ways Talk-to-Text Improves Your Workflow
- 12 Top Windows Speech-to-Text Software for Efficient Transcription
- 12 Game-Changing Benefits of Apple's Speech to Text Technology
- 9 Powerful Use Cases for AWS Speech to Text Technology
- 10 Easy Steps to Transcribe YouTube Videos to Text
- transcription audio en texte
- online audio transcription
- free audio file transcription
- free ai audio transcription
- audio transcription service
- audio transcription online free
- audio transcription free online
- audio to transcription software
- audio and transcript
- ai audio transcription free
- voice recording to text converter
- translate voice recording to text
- record voice to text
- audio recording to text converter
- voice recording and transcription
- chatgpt voice to text
- gmail voice to text
- speech to text reader
- speech to text ai free
- speech to talk
- How to Use AI Tools to Find Internal Linking Opportunities Across a Business Website
- Discover Your Perfect Haircut with AI Hairstyle Apps
- Free Reputation Calculator Tools: How They're Adapting to Score AI Visibility, Not Just Rankings
- Design Professional Flyers for Free on Your Phone
- Best Free Flyer Maker Apps for Android: Design Like a Pro
- How to Know If Your Business Is Ready for an AI Customer Service Agent
- Revolutionizing Storytelling: From Novels to Screenplays with AI
- Create Engaging Animated Explainer Videos with a Free AI Tool
- Stop Multi-Subscribing: Benchmark Top AI Visual Models in One Canvas
- Best Seedance 2.5 API Provider: Every Price on the Market, Checked at Source
- Top AI Social Media Management Tools: Automate Your Content Strategy
- Free AI Text to Video Generator: Create Stunning Videos from Text
- Discover 17 ChatGPT Alternatives: A Comprehensive Comparison
- Character.AI vs. Janitor AI: Which AI Chat Platform Reigns Supreme?
- Top Virtual Assistant Companies in 2026: Reviews, Pricing, and Plans Compared
- Unveiling FaceCheck.ID: Revolutionizing Reverse Image Searches with AI
- 11 Best AI Dialers in 2026: Features, Pricing, Pros and Cons
- How I Direct Consistent AI Clips: A Hands-On Guide to Multi-Model Generation
- A Realistic Review of the Photo Generator Image Tool
- Playwright MCP Server: Automated Web Testing with Agent Mode

Copyright ©2026 toolify