































Table of Contents
- Key Points
- Understanding the Easier UVM Code Generator
- A Step-by-Step Process to Use Easier UVM Code
- Easier UVM Code Generator: Pros and Cons
- Frequently Asked Questions
- Related Questions



Understanding the Easier UVM Code Generator
Inputs and Outputs Explained
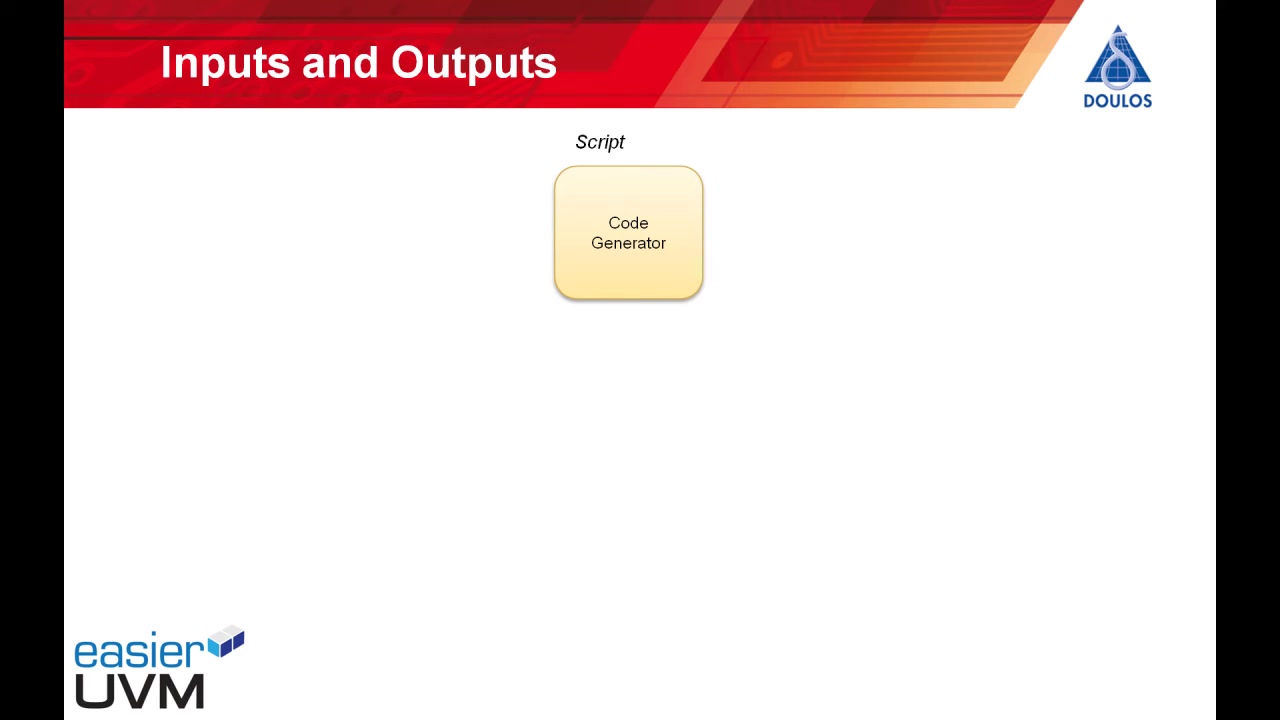
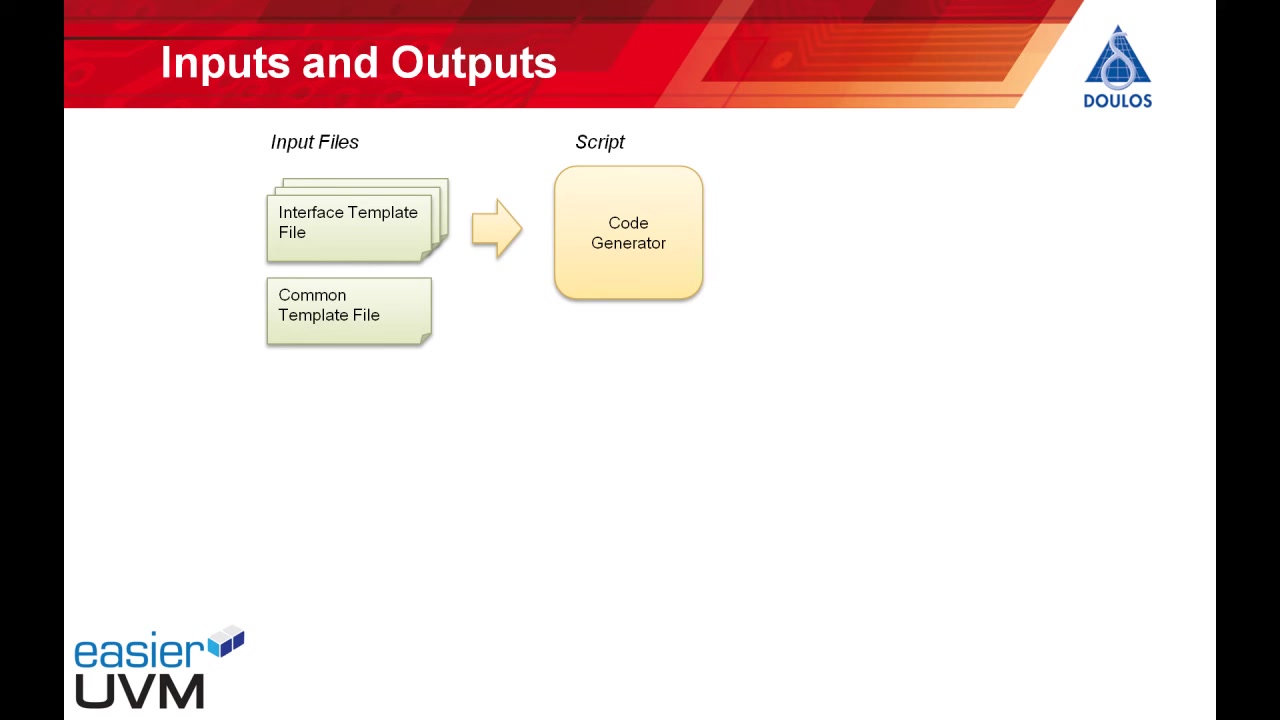
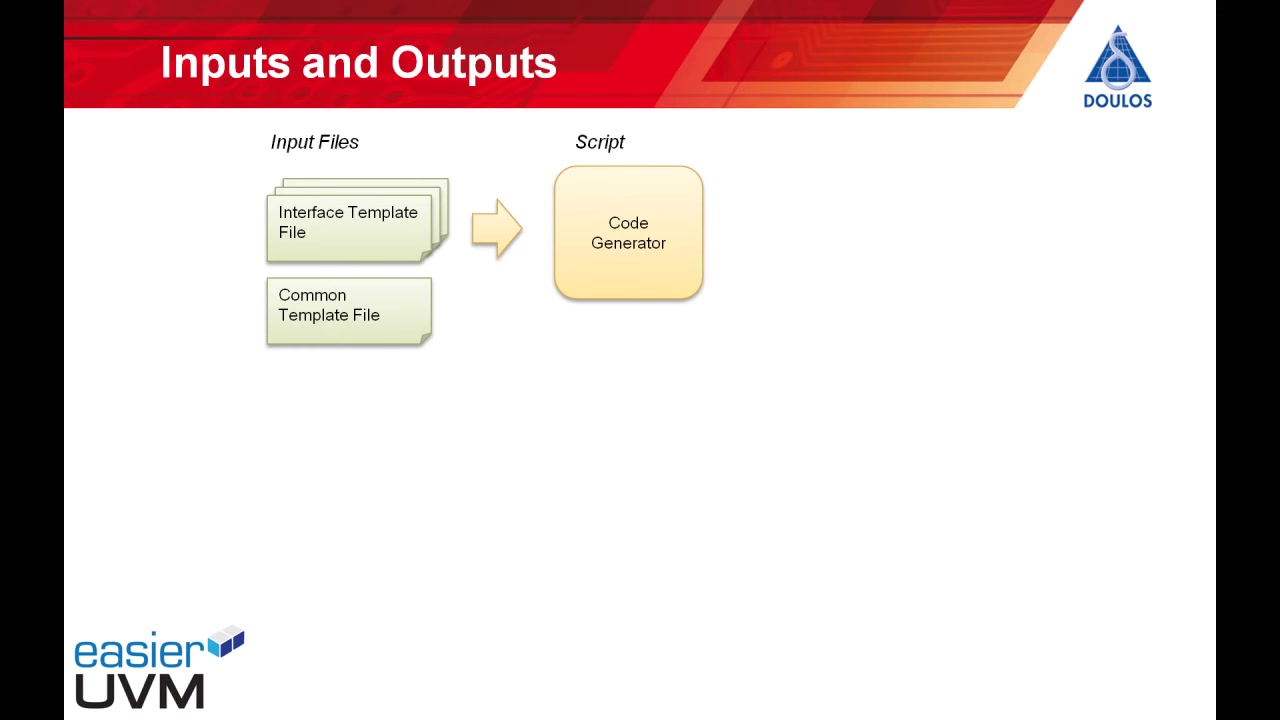
The Easier UVM Code Generator operates based on a well-defined set of inputs and outputs. Understanding these components is essential for effective use. The Code Generator consists of a single Perl script.
Input Files:
-
Interface Template Files: These files define the structure and behavior of each interface connected to the DUT (Device Under Test). Each interface that will be driven by an agent requires its own interface template file. These files contain directives and variables that the code generator uses to create the agent and its associated components.
-
Common Template File: This single file houses settings common to all interfaces. It holds settings for the top-level environment, tests, and modules.
-
Pin List File: This file maps signals within the interfaces to the pins on the DUT. It's crucial for connecting the generated UVM environment to the design under test. Accurately defining these mappings is key to successful verification.
-
DUT Directory: Contains all the design files (Verilog, VHDL) for the device being tested. The code generator needs to locate DUT files. It will be looking for a 'files.f' file inside the 'DUT directory'. This files.f contains the file lists needed for simulation.
-
Include Directory: This directory houses any user-defined code fragments that you want to incorporate into the generated UVM code. This is a key customization point, as it allows you to add project-specific logic and functionality to the testbench.
Output Files:
The code generator produces a directory containing all the generated testbench files. The directory name defaults to 'generated_tb', but can be configured. The single directory has the following contents:
- Design Under Test (DUT): A full copy of all DUT's files from 'DUT directory'.
- Simulation Scripts: The simulation script runs the simulation and compiles the generated codes.
- Testbench (TB) Directory: This is where all of the testbench source code is generated, including agents, env, tests and top level files.
- Include Directory: Complete copy of user defined files (user-defined code fragments inserted into generated code).
Interface Template Files: Defining Agent Behavior
The heart of the Easier UVM Code Generator lies in the interface template files.
Each file describes the characteristics of a single interface, including the signals and variables that the agent will drive. These files allow you to control what parts are automatically inserted in the generated code.
By modifying the files, you can:
- Customize the driver sequences on your design interface.
- Insert specific code fragments for particular tasks.
It's important to remember that you are creating a template, and not directly writing the final UVM code. The generator is the final code producer. This allows code to be reusable for all team members as long as they conform to the interfaces.
Each interface template file is responsible for instantiating agent components such as drivers, sequencers, and monitors, and test-specific source code.
Customization through User-Defined Code Fragments
A powerful feature of the Easier UVM Code Generator is its ability to incorporate user-defined code fragments into the generated code.
This is accomplished through the use of the 'Include Directory', which contains source files with the code fragments. These files are inserted into the appropriate places within the generated components.
The most important aspects of these files is that it's important to write reusable code that is easy to follow.
By modifying these files, you can:
- Customize the Driver Logic: Override code portions for the agent interface with your custom driver.
- Connect your UVM components to third-party solutions: Integrate UVM codes with third-party components that has been validated in the past.
This ensures that any manual modifications you make to the generated code are preserved when the code generator is re-run, providing a stable and maintainable verification environment.
Generating Multiple Instances with Distinct Type Sets
To achieve truly unique agents with different sets of types, you'll need to create separate interface template files for each. This approach ensures that each agent and its associated classes are generated with different class types and code.
Here's a scenario on how to differentiate multiple instances using two distinct typesets:
- Have multiple instances to create different interface template files.
- Write different include files for the interface.
- The generate the code where each agent has its own interface design.
Simulation Scripts Generation
There is a simulation directory created that contains all of the files required to execute the SystemVerilog UVM simulation. This means you won't need to manually write any of the simulation files, that makes the process much easier.
- Compile the design You can add flags in the compile option for each interface.
- Connect The interface test maps the signals to the pins on DUTs.
With the use of this function, you can verify that codes are generated correctly!








Most people like


































Report
Please select a reason for reporting
- 13 Reasons to Switch from Snapchat to Text Messaging
- 7 Powerful Speech to Text Apps to Boost Productivity
- 10 Best Speech to Text Tools for Effortless Transcription
- 13 Free Tools to Easily Transcribe Audio to Text
- 15 Surprising Ways Google's Speech-to-Text Boosts Productivity
- 7 Best Free Online Audio to Text Transcription Tools
- 9 Tips to Transcribe Speech to Text Faster and Better
- 13 Best Speech to Text Software for Windows 10 in 2023
- 7 Tips for Choosing the Best Transcriber for Audio to Text
- 11 Reasons Why Dragon Speech-to-Text Apps are Game-Changers
- 6 Secrets to Enhance Your Speech to Text Transcription
- 6 Brilliant Ways to Boost Productivity with Talk-to-Text on Your MacBook
- 6 Ways Transcription Software Converts Audio to Text
- 8 Tips to Transcribe Speech to Text Like a Pro
- 6 Reasons IBM Watson Speech to Text is a Game-Changer
- 14 Powerful Ways Talk-to-Text Improves Your Workflow
- 12 Top Windows Speech-to-Text Software for Efficient Transcription
- 12 Game-Changing Benefits of Apple's Speech to Text Technology
- 9 Powerful Use Cases for AWS Speech to Text Technology
- 10 Easy Steps to Transcribe YouTube Videos to Text
- transcription audio en texte
- online audio transcription
- free audio file transcription
- free ai audio transcription
- audio transcription service
- audio transcription online free
- audio transcription free online
- audio to transcription software
- audio and transcript
- ai audio transcription free
- voice recording to text converter
- translate voice recording to text
- record voice to text
- audio recording to text converter
- voice recording and transcription
- chatgpt voice to text
- gmail voice to text
- speech to text reader
- speech to text ai free
- speech to talk
- How SEO and Marketing Dashboards Empower Agencies to Drive Results
- How to Use AI Tools to Find Internal Linking Opportunities Across a Business Website
- Discover Your Perfect Haircut with AI Hairstyle Apps
- Free Reputation Calculator Tools: How They're Adapting to Score AI Visibility, Not Just Rankings
- Design Professional Flyers for Free on Your Phone
- Best Free Flyer Maker Apps for Android: Design Like a Pro
- How to Know If Your Business Is Ready for an AI Customer Service Agent
- Revolutionizing Storytelling: From Novels to Screenplays with AI
- Create Engaging Animated Explainer Videos with a Free AI Tool
- Stop Multi-Subscribing: Benchmark Top AI Visual Models in One Canvas
- My Brand New Logo: AI-Powered Logo Design for Startups
- Create Stunning Logos with Free AI Logo Generator!
- AI Logo Maker: Design a Stunning Logo in Minutes
- Elevate Your Zoom Experience with Enhanced Name Tags by Warmly
- Top 5 AI Logo Makers in 2025: Design a Stunning Brand
- Creative Fabrica's AI Tools: Flow, Studio, and Font Generator
- Create Stunning Logos with Canva's Free AI Logo Generator
- Create Professional and Memorable Logos with LogoMaker.ai
- Design Your Own Font: A Step-by-Step Guide with Vectornator Pro
- AI Font Generator: Revolutionizing Typeface Design with AI

Copyright ©2026 toolify