































Table of Contents
- Key Points
- Understanding AI-Powered Video Editing
- Tools for AI-Powered Object Removal
- Step-by-Step Guide to Removing Objects
- Advantages and Disadvantages
- Frequently Asked Questions
- Related Questions


Understanding AI-Powered Video Editing
The Evolution of Video Editing Techniques
Video editing has transformed significantly over the years, evolving from rudimentary cuts and splices to sophisticated digital enhancements. Early techniques required extensive manual labor and specialized equipment. Today, advancements in artificial intelligence (AI) offer new avenues for simplifying and automating complex tasks, including object removal. The integration of AI not only reduces the time and effort involved but also enhances the quality and precision of the final product. This shift empowers content creators to focus more on creative aspects and less on tedious manual editing, making the overall workflow more efficient and accessible. This article will explore AI Tools to further simplify object removal in video editing using practical tools like Photoshop Beta and VideoProc Vlogger.
Why AI Object Removal is a Game-Changer
AI-driven object removal stands out as a pivotal advancement in video editing because it addresses a common and often frustrating challenge—unwanted distractions in footage. Traditional methods such as cloning, masking, and manual tracking demand significant time and skill, frequently producing imperfect results. AI streamlines this process by automatically identifying and replacing unwanted objects with contextual and realistic fill, saving hours of manual editing. This capability is particularly valuable for vloggers, marketers, and filmmakers who need to maintain high production values without sacrificing efficiency. AI not only improves workflow but also unlocks new creative possibilities by enabling editors to easily refine and enhance visual storytelling.
Furthermore, AI object removal can be particularly helpful in situations where reshooting footage is not an option. In live events or when working with archival material, the ability to seamlessly remove distractions can significantly enhance the viewer experience and maintain the integrity of the content.
Tools for AI-Powered Object Removal
Adobe Photoshop Beta: Generative Fill
Adobe Photoshop Beta introduces a revolutionary feature called Generative Fill, which leverages AI to remove unwanted elements from images and videos. This tool allows users to select an object, instruct Photoshop to remove it, and then intelligently fill the space with realistic, context-aware content. The Generative Fill feature not only saves time but also provides high-quality results that blend seamlessly with the surrounding environment. To get started with the Photoshop Beta you need to have the Creative Cloud app installed on your computer. This is done by:
-
Open the browser: enter this website: https://creativecloud.adobe.com/apps/download/creative-cloud
-
Download and install Creative Cloud
-
Click on Beta Apps: Find Photoshop Beta
-
Click try to download and install it (you will have a seven day free trial period).
VideoProc Vlogger: Your Video Editing Companion
VideoProc Vlogger is an easy-to-use video editing software designed for vloggers and content creators. It offers various features for cutting, trimming, adding effects, and enhancing videos. Although it doesn’t directly have an AI object removal tool, it’s an excellent complement to Photoshop Beta. By integrating the AI-processed frames from Photoshop into VideoProc Vlogger, editors can create polished, distraction-free videos efficiently. With its user-friendly interface and powerful editing capabilities, VideoProc Vlogger streamlines the video editing workflow, allowing creators to focus on storytelling and content creation. It stands as a robust tool to have in your arsenal for creating professional-looking videos with ease.
Step-by-Step Guide to Removing Objects
Capturing the Initial Frame
Before embarking on the object removal process, ensure your footage meets a critical prerequisite – a stationary camera. The steadier the shot, the more effectively the AI will perform its task.
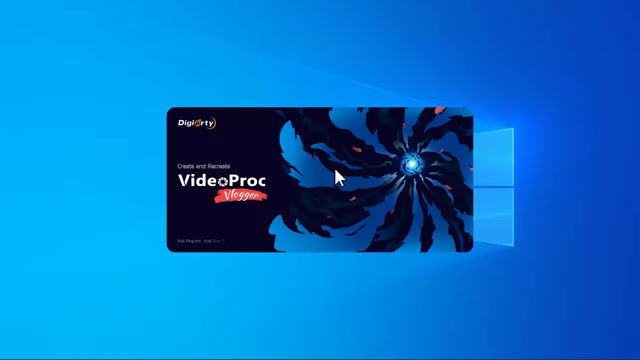
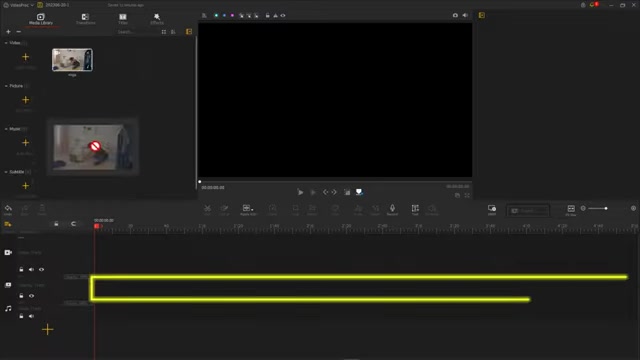
- Launch VideoProc Vlogger: Initiate the software to kick-start your video editing process.
- Create a New Project: Begin a new project in VideoProc Vlogger to prepare for importing your video.
- Import Your Video: Drag and drop your video file into the overlay track within the editor.
- Adjust Fit to Screen: Fit the video into your screen for perfect alignment.
- Frame Selection: Set the timeline to the first frame, then click the screenshot button to save a static frame for editing in Photoshop.
Refining with Photoshop Beta's Generative Fill
With your screenshot saved, you'll now employ the power of Photoshop Beta to surgically remove any unwanted elements from the video.
- Launch Photoshop Beta: Open Photoshop Beta on your computer to prepare for image editing.
- Open the Screenshot: Click File then Open to upload the screenshot you took.
- Select the Lasso Tool: Select the Lasso tool to edit your image.
- Generative Fill: Click 'Generative fill' to remove the object . Wait for the AI to do its job and select the most appropriate image, and if you feel the need to improve the Prompt, add text to the input box and wait for the AI to generate.
- Export The Image: After selecting the best option, click file, click export, then click “Quick Export as PNG” to export the image.
Finalizing in VideoProc Vlogger
With your frame meticulously cleaned in Photoshop Beta, it’s time to reintroduce it to VideoProc Vlogger and blend it seamlessly into your video.
- Import the Processed Image: Import the new image into VideoProc Vlogger
- Add Image to Timeline: Import it to the video track.
- Adjust Duration: Adjust the duration of the layer.
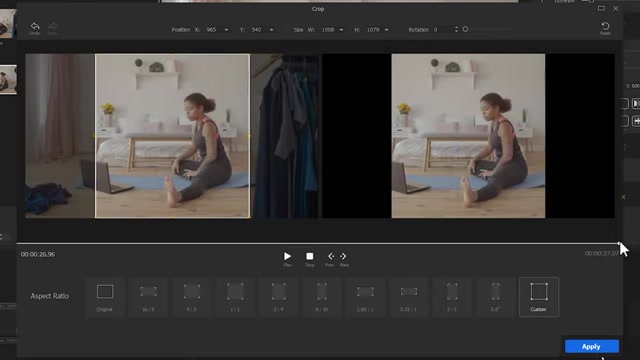
- Overlay Track: Select the material to overlap in order to edit the material with a crop.
- Crop and Blend: Track the border to remove the cluttered parts.
- Fine-Tune Alignment: Adjust the opacity to 0.5 to merge it seamlessly to the initial layer and then realign to original layer. Restore Opacity. Set the opacity back to 1 and check the entire video by dragging the playhead across the screen to test the result





Most people like


































Report
Please select a reason for reporting
- 13 Reasons to Switch from Snapchat to Text Messaging
- 7 Powerful Speech to Text Apps to Boost Productivity
- 10 Best Speech to Text Tools for Effortless Transcription
- 13 Free Tools to Easily Transcribe Audio to Text
- 15 Surprising Ways Google's Speech-to-Text Boosts Productivity
- 7 Best Free Online Audio to Text Transcription Tools
- 9 Tips to Transcribe Speech to Text Faster and Better
- 13 Best Speech to Text Software for Windows 10 in 2023
- 7 Tips for Choosing the Best Transcriber for Audio to Text
- 11 Reasons Why Dragon Speech-to-Text Apps are Game-Changers
- 6 Secrets to Enhance Your Speech to Text Transcription
- 6 Brilliant Ways to Boost Productivity with Talk-to-Text on Your MacBook
- 6 Ways Transcription Software Converts Audio to Text
- 8 Tips to Transcribe Speech to Text Like a Pro
- 6 Reasons IBM Watson Speech to Text is a Game-Changer
- 14 Powerful Ways Talk-to-Text Improves Your Workflow
- 12 Top Windows Speech-to-Text Software for Efficient Transcription
- 12 Game-Changing Benefits of Apple's Speech to Text Technology
- 9 Powerful Use Cases for AWS Speech to Text Technology
- 10 Easy Steps to Transcribe YouTube Videos to Text
- transcription audio en texte
- online audio transcription
- free audio file transcription
- free ai audio transcription
- audio transcription service
- audio transcription online free
- audio transcription free online
- audio to transcription software
- audio and transcript
- ai audio transcription free
- voice recording to text converter
- translate voice recording to text
- record voice to text
- audio recording to text converter
- voice recording and transcription
- chatgpt voice to text
- gmail voice to text
- speech to text reader
- speech to text ai free
- speech to talk
- How to Use AI Tools to Find Internal Linking Opportunities Across a Business Website
- Discover Your Perfect Haircut with AI Hairstyle Apps
- Free Reputation Calculator Tools: How They're Adapting to Score AI Visibility, Not Just Rankings
- Design Professional Flyers for Free on Your Phone
- Best Free Flyer Maker Apps for Android: Design Like a Pro
- How to Know If Your Business Is Ready for an AI Customer Service Agent
- Revolutionizing Storytelling: From Novels to Screenplays with AI
- Create Engaging Animated Explainer Videos with a Free AI Tool
- Stop Multi-Subscribing: Benchmark Top AI Visual Models in One Canvas
- Best Seedance 2.5 API Provider: Every Price on the Market, Checked at Source
- Top AI Social Media Management Tools: Automate Your Content Strategy
- Free AI Text to Video Generator: Create Stunning Videos from Text
- Discover 17 ChatGPT Alternatives: A Comprehensive Comparison
- Character.AI vs. Janitor AI: Which AI Chat Platform Reigns Supreme?
- Top Virtual Assistant Companies in 2026: Reviews, Pricing, and Plans Compared
- Unveiling FaceCheck.ID: Revolutionizing Reverse Image Searches with AI
- 11 Best AI Dialers in 2026: Features, Pricing, Pros and Cons
- How I Direct Consistent AI Clips: A Hands-On Guide to Multi-Model Generation
- A Realistic Review of the Photo Generator Image Tool
- Playwright MCP Server: Automated Web Testing with Agent Mode

Copyright ©2026 toolify