Python Checkers Game Tutorial: Build AI with Pygame

Updated on Oct 08,2025

Table of Contents

Embark on an exciting journey into game development with Python and Pygame! This tutorial series will guide you through building a fully functional checkers game and implementing an AI opponent using advanced techniques. Perfect for intermediate Python developers looking to expand their skills and delve into the world of game creation. Let’s explore how to build an interactive checkers game with an AI that challenges your strategic thinking.

Key Points

Learn to use Pygame for 2D game development in Python.

Build a complete checkers game with interactive features.

Implement an AI opponent using the Minimax algorithm (covered in a separate series).

Understand advanced Python techniques for game design.

Create a strategic game that's both fun to play and educational to build.

Setting the Stage for a Python Checkers Game

What is Pygame?

Pygame
is a free and open-source cross-platform library for making multimedia applications like games. It includes computer graphics and sound libraries designed to be used with the Python programming language. Pygame makes it incredibly easy to handle graphics, animations, and user input, making it an ideal choice for creating 2D games. Its simplicity and extensive documentation allow developers to quickly prototype and develop games without getting bogged down in complex code. Whether you are a beginner or an experienced developer, Pygame provides a robust environment to bring your Game ideas to life.

Pygame’s features include:

  • Surface Handling: Creating and manipulating display windows and drawing surfaces.
  • Event Handling: Managing user input like keyboard presses, mouse clicks, and joystick movements.
  • Graphics Primitives: Drawing basic shapes, lines, and polygons.
  • Image Loading: Loading and displaying images in various formats.
  • Sound and Music: Playing sound effects and background Music.
  • Collision Detection: Detecting collisions between game objects.

This Tutorial will take advantage of these features to build the checkers game. The focus is on the implementation of the game logic, the graphical representation, and the creation of a simple AI that uses the Minimax algorithm (to be covered later). Understanding these concepts will provide a solid foundation for creating more complex and engaging games in the future.

Why Build a Checkers Game?

Building a checkers game is an excellent way to practice fundamental game development skills. Checkers has relatively simple rules, yet it requires strategic thinking and problem-solving. This makes it a great project for understanding:

  • Game Logic: Implementing the rules of checkers, such as moving pieces, capturing opponents, and determining when a player wins.
  • User Interface: Creating an intuitive and visually appealing interface for players to interact with the game.
  • AI Implementation: Developing an AI opponent that can play the game strategically.
  • Event Handling: Managing user input and game events, such as piece selection and movement.

By building a checkers game, you’ll reinforce your understanding of these key concepts and gain valuable experience in game development. Plus, it’s a fun and engaging project that you can proudly showcase in your portfolio.

Project Overview: Checkers Game with AI

In this project, we’ll walk you through building a checkers game using Python and Pygame. The game will include:

  • Graphical Representation: A visually appealing checkers board with pieces.
  • Interactive Gameplay: Players can select and move their pieces on the board.
  • Rule Enforcement: The game enforces the rules of checkers, such as valid moves and captures.
  • AI Opponent: An AI that uses the Minimax algorithm to make strategic moves.

We’ll break down the project into manageable steps, starting with setting up the Pygame environment and creating the game board. Then, we’ll implement the game logic, handle user input, and finally, develop the AI opponent. Each step will be explained in detail, so you can follow along and understand the underlying concepts.

The journey will be a step by step guide which will lead you up to another series talking about the Minimax algorithm
to actually make an AI that we can play checkers against.

Prerequisites: What You Need to Get Started

Before diving into the project, ensure you have the following prerequisites:

  • Python Installation: Python 3.6 or later should be installed on your system. You can download the latest version from the official Python website.
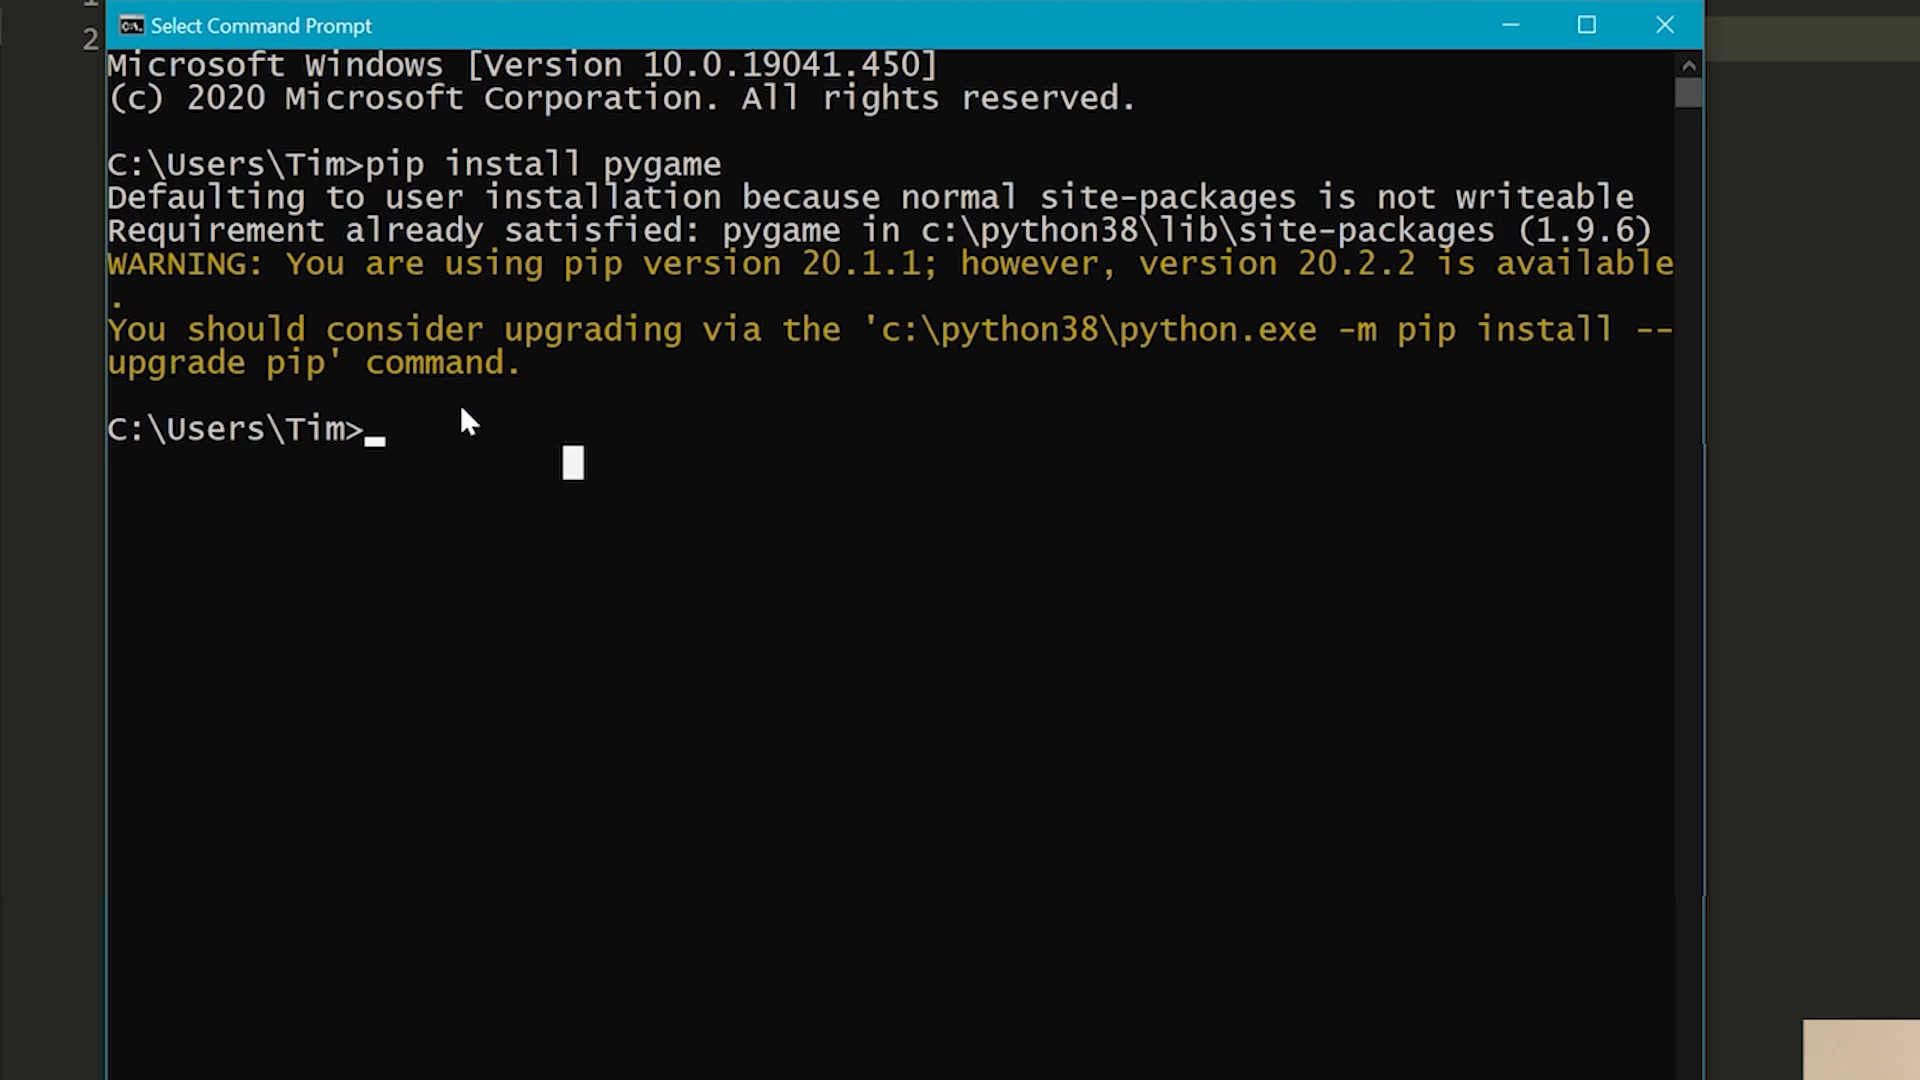
  • Pygame Installation: Install Pygame using pip, the Python package installer. Open your command Prompt or terminal and type the following command:

    pip install pygame

    Alternatively, if you are on Linux or Mac, you might need to use:

    pip3 install pygame
  • Integrated Development Environment (IDE): Use an IDE like Visual Studio Code (VS Code), PyCharm, or any other Python-friendly editor. VS Code is recommended for its simplicity and powerful features.

Once you have these prerequisites, you’re ready to start building the checkers game. The steps will be straightforward, and the explanations will help you understand each part of the development process. Let's begin by setting up your coding environment and importing the necessary modules.

Setting Up the Development Environment

Installing Pygame

Before we can begin coding, we need to ensure that Pygame is installed. Pygame provides all the necessary tools for creating 2D games, including functions for handling graphics, sound, and user input.

To install Pygame, open your command prompt or terminal and enter the following command:

pip install pygame

If you're using Linux or macOS, you might need to use pip3 instead of pip:

pip3 install pygame

This command will download and install the latest version of Pygame from the Python Package Index (PyPI). Once the installation is complete, you can verify it by opening a Python interpreter and typing:

import pygame
pygame.init()
print("Pygame initialized!")

If no errors occur and you see the message "Pygame initialized!", then Pygame has been installed correctly.

Creating the Project Directory and Main File

To keep our project organized, let's create a new directory for our checkers game. You can name it something like checkers_tutorial.

Inside this directory, create a new Python file named main.py. This file will serve as the entry point for our game and will contain the main game loop and logic.

In VS Code, you can create a new file by:

  1. Opening the checkers_tutorial directory in VS Code.
  2. Clicking on the "New File" icon in the Explorer panel.
  3. Naming the file main.py.

Now, let's add some initial code to main.py to import the Pygame library:

import pygame

# Initialize Pygame
pygame.init()

# Set up the display
width, height = 800, 600
screen = pygame.display.set_mode((width, height))
pygame.display.set_caption("Checkers Game")

# Game loop
running = True
while running:
    for event in pygame.event.get():
        if event.type == pygame.QUIT:
            running = False

    # Fill the background
    screen.fill((255, 255, 255))  # White background

    # Update the display
    pygame.display.flip()

# Quit Pygame
pygame.quit()

This code initializes Pygame, sets up the display window, and creates a simple game loop that handles events and updates the screen. You can run this code to ensure that Pygame is working correctly and that a window opens and displays a white screen.

Downloading and Organizing Assets

To enhance the visual appeal of our game, we'll use some pre-made assets, such as images for the board and pieces. These assets can be downloaded from the following URL (mentioned in video): https://techwithtim.net/wp-content/uploads/2020/09/assets.zip

Once you've downloaded the assets.zip file, extract its contents into a new folder named assets inside your checkers_tutorial directory.

The assets folder should contain images for the board, the red and white pieces, and any other visual elements you want to use in your game.

Organizing your project directory is crucial for maintaining a clean and manageable codebase. Your directory structure should look like this:

checkers_tutorial/
├── main.py
└── assets/
    ├── board.png
    ├── red_piece.png
    └── white_piece.png

With our development environment set up and our assets ready, we can now move on to creating the checkers board and displaying the pieces.

Step-by-Step: Creating the Checkers Board

Loading and Displaying the Board Image

The first step in creating the checkers board is to load the board image from the assets folder and display it on the screen. This involves using Pygame’s image loading and blitting functions.

Add the following code to your main.py file:

import pygame

# Initialize Pygame
pygame.init()

# Set up the display
width, height = 800, 600
screen = pygame.display.set_mode((width, height))
pygame.display.set_caption("Checkers Game")

# Load the board image
board = pygame.image.load("assets/board.png")

# Game loop
running = True
while running:
    for event in pygame.event.get():
        if event.type == pygame.QUIT:
            running = False

    # Draw the board
    screen.blit(board, (0, 0))

    # Update the display
    pygame.display.flip()

# Quit Pygame
pygame.quit()

Here’s what the code does:

  • pygame.image.load("assets/board.png"): Loads the board image from the assets folder.
  • screen.blit(board, (0, 0)): Draws the board image onto the screen at the top-left corner (0, 0).

Make sure that the board.png file exists in the assets folder and that the path is correct. When you run the code, you should see the checkers board displayed on the screen. The position (0, 0) ensures that the board starts from the top-left corner of the game window.

Drawing the Checkers Pieces

Now that we have the board displayed, let’s add the checkers pieces. We'll load the red and white piece images and position them on the board according to the initial setup of a checkers game.

Add the following code to your main.py file:

import pygame

# Initialize Pygame
pygame.init()

# Set up the display
width, height = 800, 600
screen = pygame.display.set_mode((width, height))
pygame.display.set_caption("Checkers Game")

# Load the board and piece images
board = pygame.image.load("assets/board.png")
red_piece = pygame.image.load("assets/red_piece.png")
white_piece = pygame.image.load("assets/white_piece.png")

# Define the size of each square on the board
square_size = 100

# Initial positions for the red pieces
red_positions = [
    (100, 0), (300, 0), (500, 0), (700, 0),
    (0, 100), (200, 100), (400, 100), (600, 100),
    (100, 200), (300, 200), (500, 200), (700, 200)
]

# Initial positions for the white pieces
white_positions = [
    (0, 500), (200, 500), (400, 500), (600, 500),
    (100, 600), (300, 600), (500, 600), (700, 600),
    (0, 700), (200, 700), (400, 700), (600, 700)
]

# Game loop
running = True
while running:
    for event in pygame.event.get():
        if event.type == pygame.QUIT:
            running = False

    # Draw the board
    screen.blit(board, (0, 0))

    # Draw the red pieces
    for pos in red_positions:
        screen.blit(red_piece, pos)

    # Draw the white pieces
    for pos in white_positions:
        screen.blit(white_piece, pos)

    # Update the display
    pygame.display.flip()

# Quit Pygame
pygame.quit()

This code loads the red_piece.png and white_piece.png images, defines the initial positions for each piece, and then draws them on the board. The positions are set to match the standard checkers setup. Notice the way to import the images and then draw the images in the game loop using screen.blit() . The square size is set to 100 pixels, which is the individual square dimension of the game board. Run this code to see the board with the pieces properly placed.

Enhancing Piece Display: Centering and Scaling

To improve the appearance of the pieces, you can center them within each square and scale them if necessary. This involves calculating the center position and resizing the images.

Modify the piece-drawing part of your game loop:

    # Draw the red pieces
    for pos in red_positions:
        # Calculate the center position
        x = pos[0] + (square_size - red_piece.get_width()) // 2
        y = pos[1] + (square_size - red_piece.get_height()) // 2
        screen.blit(red_piece, (x, y))

    # Draw the white pieces
    for pos in white_positions:
        # Calculate the center position
        x = pos[0] + (square_size - white_piece.get_width()) // 2
        y = pos[1] + (square_size - white_piece.get_height()) // 2
        screen.blit(white_piece, (x, y))

This code calculates the center position for each piece based on the square size and the dimensions of the piece images. It then draws the pieces at the calculated center positions, ensuring they are neatly placed within each square. You can also add scaling using pygame.transform.scale() if your pieces are too large or too small.

Pros and Cons of Using Pygame for Game Development

👍 Pros

Simple and easy to learn, making it great for beginners.

Extensive documentation and a supportive community.

Cross-platform compatibility, allowing games to run on various operating systems.

Provides all the necessary tools for 2D game development.

Free and open-source.

👎 Cons

Limited to 2D game development.

Not as efficient as lower-level languages like C++ for complex games.

Can be challenging to scale for large projects.

Frequently Asked Questions (FAQ)

What version of Python is recommended for this tutorial?
Python 3.6 or later is recommended. This ensures compatibility with the Pygame library and the code examples provided in the tutorial.
How do I resolve import errors for Pygame?
Ensure Pygame is correctly installed using pip. If you still encounter errors, check that your IDE is using the correct Python environment with Pygame installed.
What are the basic concepts I need to know before starting?
Familiarity with Python syntax, basic programming concepts, and an understanding of game loops and event handling will be helpful.
How can I improve the performance of my Pygame checkers game?
Optimize your code by minimizing unnecessary calculations, using efficient data structures, and scaling images to appropriate sizes. Also, consider using hardware acceleration if available.

Related Questions

What are some advanced techniques that can be used to improve the AI in the checkers game?
Enhancing the AI in a checkers game involves several advanced techniques that can lead to more strategic and challenging gameplay. Here are some of the most effective methods: Minimax Algorithm with Alpha-Beta Pruning: Description: The Minimax algorithm is a decision-making algorithm used in AI to determine the best move for a player, assuming the opponent plays optimally. Alpha-beta pruning is an optimization technique that reduces the number of nodes evaluated in the Minimax algorithm by discarding branches that cannot possibly influence the final decision. How it works: The algorithm explores all possible game states up to a certain depth, assigning a score to each state based on a heuristic evaluation function. The AI then chooses the move that maximizes its score while minimizing the opponent's score. Benefits: Improves the AI's decision-making by allowing it to look ahead and consider the consequences of its moves. Alpha-beta pruning significantly speeds up the search process, allowing for deeper exploration of the game tree. Heuristic Evaluation Function: Description: A heuristic evaluation function assigns a score to each game state, representing how favorable that state is for the AI. A well-designed heuristic is crucial for the AI's performance. How it works: The heuristic considers various factors such as the number of pieces, the position of pieces, the presence of kings, and potential threats. The AI uses this score to compare different game states and choose the best move. Benefits: Allows the AI to make informed decisions without exploring the entire game tree, making it more efficient. Example Heuristic Factors: Piece Count: Assign higher scores for having more pieces than the opponent. King Pieces: Assign higher scores for having king pieces, as they can move in any direction and are more valuable. Positioning: Assign higher scores for pieces in strategic positions, such as the center of the board or protected squares. Threats: Assign lower scores for positions where the AI's pieces are under threat of capture. Transposition Tables: Description: Transposition tables store the results of previously evaluated game states to avoid redundant calculations. This is particularly useful in games with many repeated positions. How it works: When the AI encounters a game state, it first checks the transposition table to see if the state has already been evaluated. If so, it retrieves the stored result instead of recomputing it. Benefits: Significantly reduces computation time, allowing the AI to explore deeper into the game tree and make more informed decisions. Endgame Databases: Description: Endgame databases contain precomputed optimal moves for all possible endgame positions. These databases are typically used when the number of pieces on the board is small enough to make exhaustive computation feasible. How it works: When the game reaches an endgame position, the AI consults the database to determine the optimal move. This ensures perfect play in the endgame. Benefits: Allows the AI to play perfectly in endgame situations, increasing its chances of winning. Machine Learning Techniques: Description: Machine learning techniques, such as reinforcement learning, can be used to train the AI to play checkers more effectively. The AI learns from its experiences and gradually improves its decision-making. How it works: The AI plays many games against itself or other opponents, adjusting its strategy based on the outcomes. Reinforcement learning algorithms, such as Q-learning or SARSA, can be used to update the AI's evaluation function. Benefits: Allows the AI to adapt to different playing styles and improve its performance over time. Monte Carlo Tree Search (MCTS): Description: MCTS is a search algorithm used in AI decision-making, particularly in games with large state spaces. It combines random sampling with tree search to explore the most promising moves. How it works: The algorithm builds a game tree by repeatedly simulating random games from the current state. The tree is expanded by adding nodes corresponding to promising moves, and the results of the simulations are used to update the scores of the nodes. Benefits: Effective in games with large state spaces and can handle imperfect information. Implementing these advanced techniques can significantly enhance the AI in your checkers game, making it more strategic, challenging, and engaging for players.

Most people like