































Table of Contents
- Key Points
- Building a QR Code Generator with Web Technologies
- Step-by-Step Development Process
- FAQ
- Related Questions



Building a QR Code Generator with Web Technologies
What is a QR Code Generator?
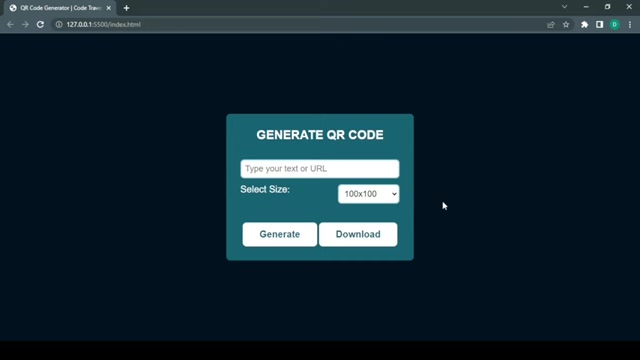
A QR (Quick Response) code generator is a tool that converts text or URLs into a scannable barcode. These codes are widely used for various purposes, from sharing website links to facilitating mobile payments. Building your own QR Code Generator is a great way to delve into the practical aspects of web development and understand how different technologies work together. Using HTML, CSS, and Javascript, this project will allow users to input text and generate QR codes based on the input dynamically
.
By learning the underlying technologies needed to build this app, you are also learning more about creating websites that have user interaction and require elements on the page to be dynamic.
Key Benefits:
- Practical application of HTML, CSS, and JavaScript
- Dynamic content creation
- Customizable QR code sizes
- Downloadable QR code images
Project Overview: QR Code Generator
The QR code generator will feature the following components:
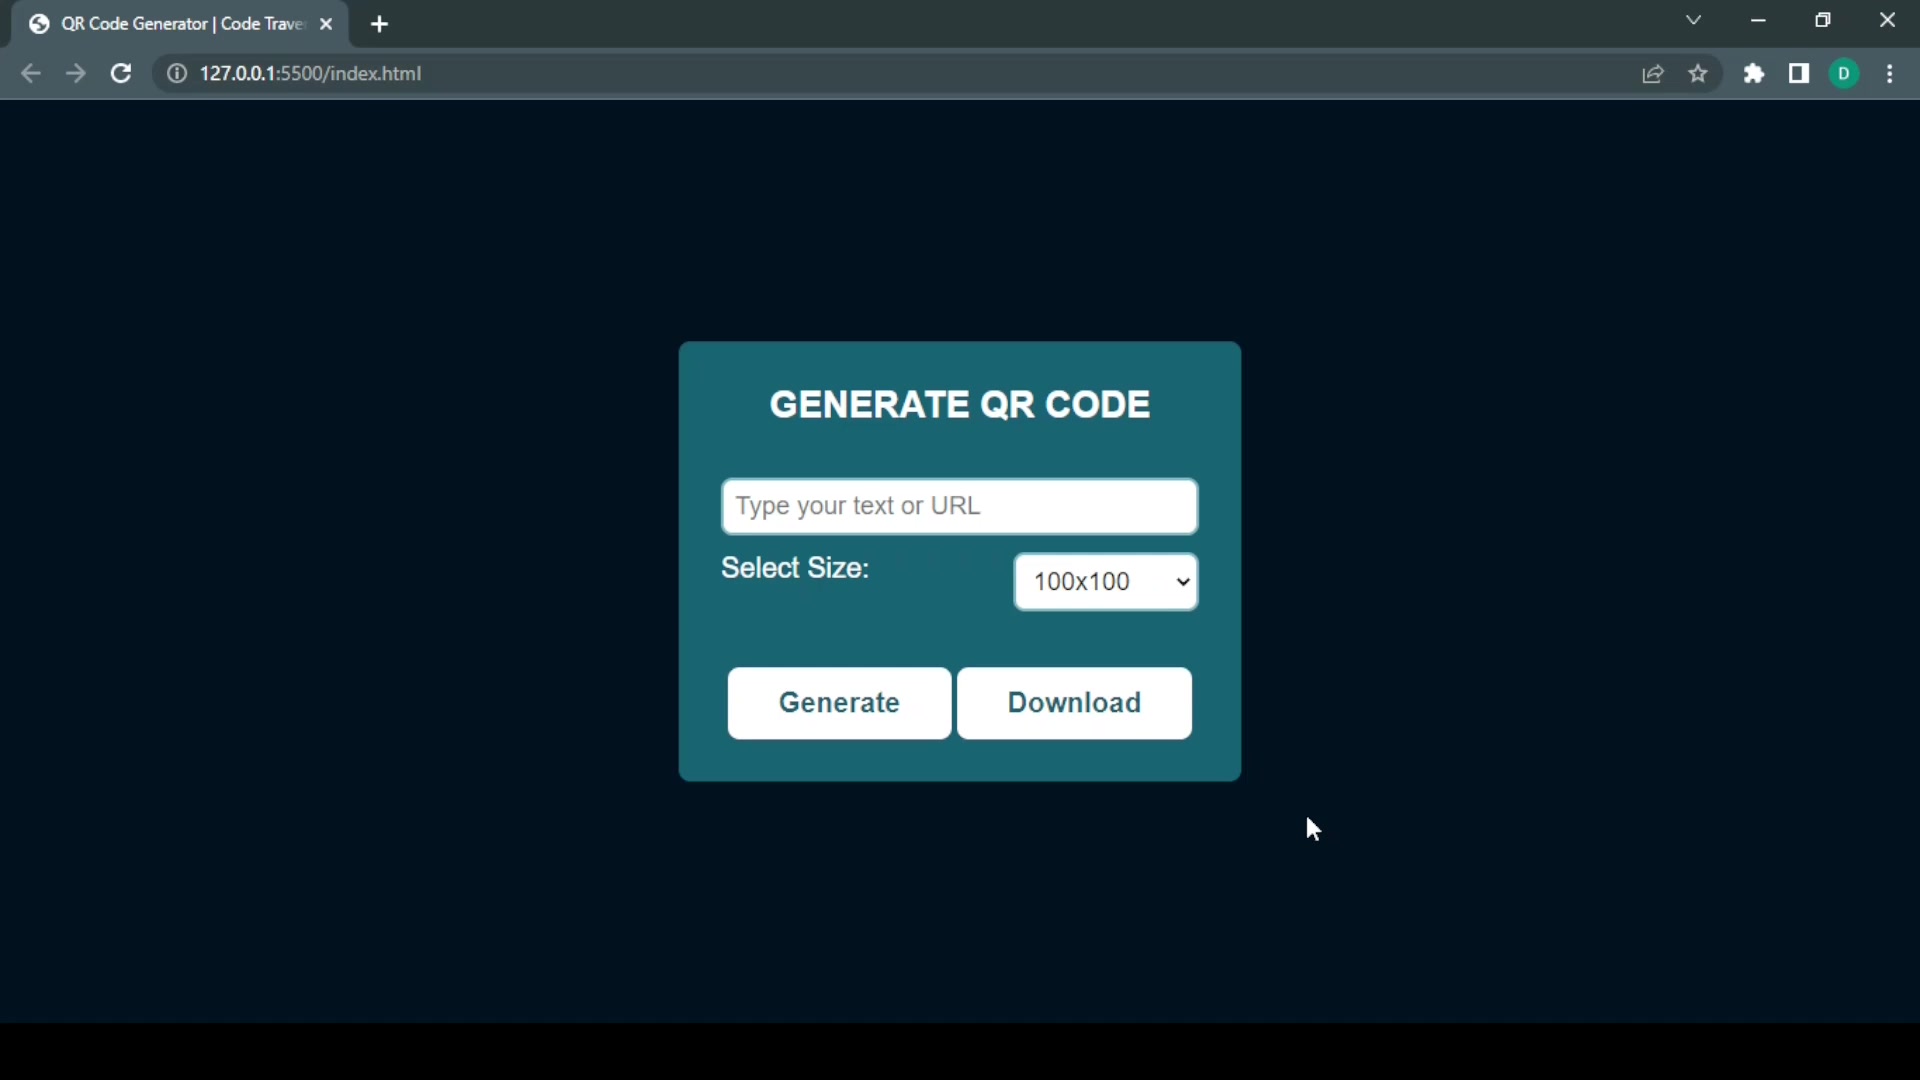
- Input Field: A text area where users can enter the text or URL they want to encode. This allows the user to provide important data that would then be rendered on the screen
.
- Size Selection: A dropdown menu to select the desired size of the QR code. Users can customize size of the QR code to fit their needs, especially for branding purposes .
- Generate Button: Triggers the QR code generation process. This kicks off the processes of user input and uses that input to display something dynamically on the page .
- Download Button: Allows users to download the generated QR code as an image file .
Technology Stack:
- HTML: For structuring the user interface and defining form elements.
- CSS: For styling the generator, enhancing user experience.
- JavaScript: For handling user input, generating QR codes, and providing download functionality.
Let's start creating our first files to lay out the architecture of this project.
Step-by-Step Development Process
HTML Structure: Laying the Foundation
The initial step is to set up the HTML structure
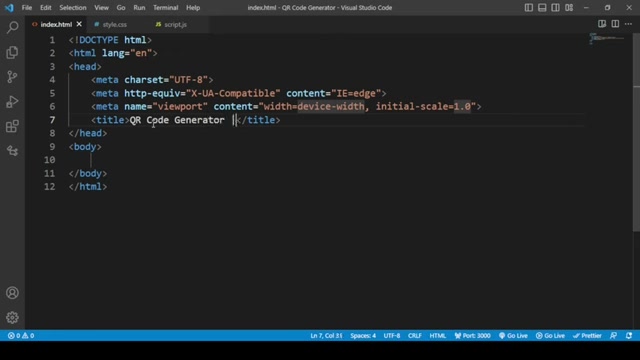
. This involves creating the necessary form elements and structuring the layout. We'll create separate files for HTML, CSS, and JavaScript to keep the code organized.
- Create HTML File:
index.htmlwill contain the basic structure . - Add Boilerplate Code: Include the basic HTML structure (doctype, html, head, body) .
- Set Title: Give your project a descriptive title (e.g., "QR Code Generator | Code Traversal") .
- Create the Main Container: Use a
divwith the class "box" to hold all the elements . - Header, Body, and Footer: Within the main container, create
divelements for the header (input and size selection), body (QR code display), and footer (generate and download buttons) .
<!DOCTYPE html>
<html lang="en">
<head>
    <meta charset="UTF-8">
    <meta name="viewport" content="width=device-width, initial-scale=1.0">
    <title>QR Code Generator | Code Traversal</title>
    <link rel="stylesheet" href="style.css">
</head>
<body>
    <div class="box">
        <div class="qr-header">
            <h1>Generate QR Code</h1>
        </div>
        <div class="qr-body">
        </div>
        <div class="qr-footer">
        </div>
    </div>
    <script src="script.js"></script>
</body>
</html>
CSS Styling: Enhancing the User Interface
Styling is essential for creating an appealing and user-friendly interface. The CSS file will handle the visual aspects of the generator. We are able to give the background a solid color, as well as Stylize the internal text
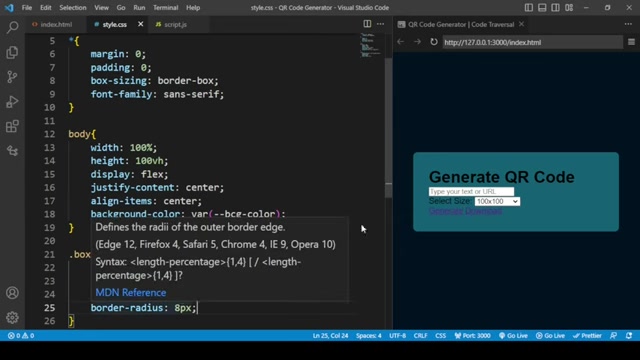
. Here are the following steps to take:
- Create CSS File: Create a file named
style.css. - Basic Reset: Reset default browser styles by setting margin and padding to zero for all elements .
- Body Styling: Style the
bodyto occupy the full viewport and center content using Flexbox (e.g., Height: 100vh, display: flex, justify-content: center, Align-items: center) . - Box Styling: Style the main container (
.box) by setting the primary colors, giving padding, a static width and also a border-radius . - QR Header Styling: Style the header, and Font inside to generate header text with CSS .
- Set CSS Variables: Use a :root element to set all CSS values as variables, this way it is easy to change the theme and adjust all colors .
This CSS code sets up the foundation for the generator's layout and appearance. Remember to link this CSS file in your HTML document within the <head> tag .
JavaScript: Generating the QR Code and Adding Functionality
JavaScript is the backbone of this project, handling user input, dynamic content generation, and download functionality. Let’s dive into the code.
- Create JavaScript File: Create a file named
script.js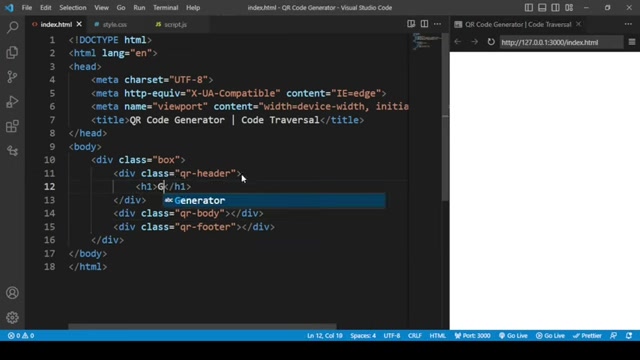
.
- Access Elements: Use JavaScript to grab the form elements of the HTML using const and getElementById() .
- Handle the Generate Button: You may need to prevent the default refresh behavior with the code
e.preventDefault()in order to keep the page from refresh when creating a QR Code on the page. This is useful since we are creating dynamic page and do not want a browser refresh to prevent the code being generated . - Code Function: You can insert the information for the data of the QR Code (like the height, width, and text) so it displays that dynamically .
- File Management: Use the code
a.href = document.querySelector('.qr-body img').getAttribute('src');to download and get the source files that are created . - Function Control:: Use the control
function isEmptyInput(){}to verify if the input field is empty or the code generation will cause an error in the program . - Use Event Listeners: Create code to listen for an event so the site will respond to specific user input and trigger certain processes when user input occurs .
With that users can then enjoy a fully built website that produces fully functioning QR codes!





Most people like





































Report
Please select a reason for reporting
- 13 Reasons to Switch from Snapchat to Text Messaging
- 7 Powerful Speech to Text Apps to Boost Productivity
- 10 Best Speech to Text Tools for Effortless Transcription
- 13 Free Tools to Easily Transcribe Audio to Text
- 15 Surprising Ways Google's Speech-to-Text Boosts Productivity
- 7 Best Free Online Audio to Text Transcription Tools
- 9 Tips to Transcribe Speech to Text Faster and Better
- 13 Best Speech to Text Software for Windows 10 in 2023
- 7 Tips for Choosing the Best Transcriber for Audio to Text
- 11 Reasons Why Dragon Speech-to-Text Apps are Game-Changers
- 6 Secrets to Enhance Your Speech to Text Transcription
- 6 Brilliant Ways to Boost Productivity with Talk-to-Text on Your MacBook
- 6 Ways Transcription Software Converts Audio to Text
- 8 Tips to Transcribe Speech to Text Like a Pro
- 6 Reasons IBM Watson Speech to Text is a Game-Changer
- 14 Powerful Ways Talk-to-Text Improves Your Workflow
- 12 Top Windows Speech-to-Text Software for Efficient Transcription
- 12 Game-Changing Benefits of Apple's Speech to Text Technology
- 9 Powerful Use Cases for AWS Speech to Text Technology
- 10 Easy Steps to Transcribe YouTube Videos to Text
- transcription audio en texte
- online audio transcription
- free audio file transcription
- free ai audio transcription
- audio transcription service
- audio transcription online free
- audio transcription free online
- audio to transcription software
- audio and transcript
- ai audio transcription free
- voice recording to text converter
- translate voice recording to text
- record voice to text
- audio recording to text converter
- voice recording and transcription
- chatgpt voice to text
- gmail voice to text
- speech to text reader
- speech to text ai free
- speech to talk
- How SEO and Marketing Dashboards Empower Agencies to Drive Results
- How to Use AI Tools to Find Internal Linking Opportunities Across a Business Website
- Discover Your Perfect Haircut with AI Hairstyle Apps
- Free Reputation Calculator Tools: How They're Adapting to Score AI Visibility, Not Just Rankings
- Design Professional Flyers for Free on Your Phone
- Best Free Flyer Maker Apps for Android: Design Like a Pro
- How to Know If Your Business Is Ready for an AI Customer Service Agent
- Revolutionizing Storytelling: From Novels to Screenplays with AI
- Create Engaging Animated Explainer Videos with a Free AI Tool
- Stop Multi-Subscribing: Benchmark Top AI Visual Models in One Canvas
- 5 Data Problems That Stall AI Projects in Financial Compliance
- Master Storyboard Drawing: Expert Tips for Non-artists
- The Future of Smart Glasses: Explained & Assembling Guide
- DeepL Translator: The AI-Powered Translation Tool
- AI Video Upscaling: Top Tools Compared for Enhanced Quality
- Bridging the Gap: How One Indie Developer Solved the "Art Asset Nightmare" Using AI Style Transfer
- How I Direct Consistent AI Clips: A Hands-On Guide to Multi-Model Generation
- My Honest Review of VideoAI: The Ultimate Character Voice Generator I've Been Using Lately
- Why do so many AI tools underdeliver for online stores?
- My Brand New Logo: AI-Powered Logo Design for Startups

Copyright ©2026 toolify