Démontage complet de l'Acer Aspire XC-1660G
Table of Contents
- Introduction
- Unboxing the Acer Aspire XC 1660G
- Removing the Optical Drive
- Removing the Front Cover
- Removing the Hard Drive Cage
- Removing the SSD
- Removing the RAM
- Disconnecting Power Supply and CPU Power
- Disconnecting Front USB Ports and Power Switch
- Disconnecting the Video Card
- Removing the Wireless Card
- Removing the CPU
- Summary and Conclusion
📦 Unboxing the Acer Aspire XC 1660G
Ladies and gentlemen, welcome to this unique unboxing experience of the Acer Aspire XC 1660G. Today, we will take a deep dive into the inner workings of this brand new PC. With a price tag of 569 euros, or around 600 euros with taxes, the Acer Aspire XC 1660G promises to deliver power and performance. So, without further ado, let's get started with the teardown.
📀 Removing the Optical Drive
The first step in our teardown adventure is the removal of the optical drive. To access it, we need to remove the front cover. But before that, we must detach the drive itself. With a trusty Phillips head screwdriver in HAND, we unscrew the single screw that holds the optical drive in place. Once removed, we gently slide the drive to the right and disconnect the SATA power cable. Now that the optical drive is free, we can proceed to remove the front cover.
🎛 Removing the Front Cover
Removing the front cover is a breeze. With the optical drive out of the way, we lift the front cover gently, revealing its all-plastic construction. Be cautious when handling the cover to avoid any damage. Now that we have access to the inner components, it's time to move on to the next step.
💺 Removing the Hard Drive Cage
The hard drive cage, responsible for securely housing your precious data, is our next target. This cage is held in place by a series of screws, five to be precise. We carefully remove each screw, making sure not to misplace them. Additionally, there is one screw in the middle that requires special attention. Once all the screws are removed, we lift the cage and detach the SATA cable connected to the hard drive. Don't forget to disconnect the 3.5-inch hard drive as well. Gently slide the cage to the left, and it will come off effortlessly.
💾 Removing the SSD
Next up, we have the SSD, a crucial component for lightning-fast storage. Removing the SSD is a simple task. We locate the small screw holding it in place and use a smaller Phillips head screwdriver to remove it. With the screw removed, we lift the SSD gently and pull it towards the top of the PC. It should come off smoothly, revealing the wonders it holds.
🖥 Removing the RAM
Now, let's turn our attention to the RAM. This vital component plays a significant role in ensuring smooth multitasking capabilities. To remove the RAM, we disconnect the power supply from the motherboard and locate the CPU power connector in the corner. Be mindful of not damaging any other parts while performing this step. Once the power is disconnected, we can proceed to remove the RAM modules as needed.
⚡️ Disconnecting Power Supply and CPU Power
Before we proceed further, it is necessary to disconnect the power supply and CPU power. This ensures the safety of the components during the teardown process. Take a moment to double-check and disconnect all the necessary cables and connectors to guarantee a smooth journey ahead.
🖥 Disconnecting Front USB Ports and Power Switch
The front USB ports and power switch also need to be disconnected. These small yet essential components are responsible for the seamless operation of your PC. To remove them, you may need a flathead screwdriver to release the plastic clips holding them in place. Gently detach them, ensuring that no wires are left connected to the motherboard.
🎮 Disconnecting the Video Card
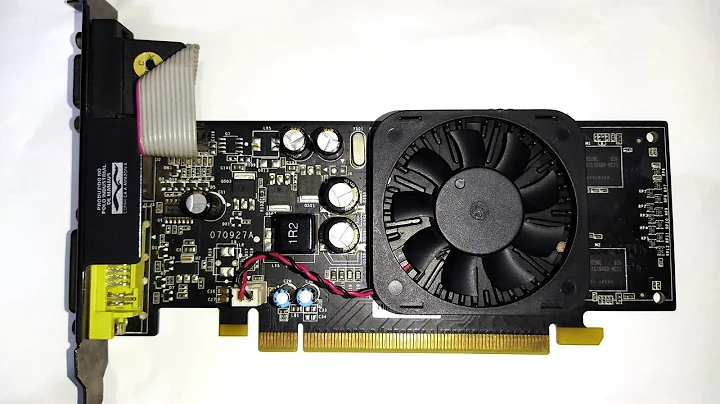
Now, it's time to bid farewell to the mighty video card. This powerful graphic component elevates your gaming and multimedia experiences to new heights. We locate the screws connecting the video card to the power supply and unscrew them. Be careful not to misplace any tiny screws during this step. Additionally, there is a small clip on the corner of the video card that needs to be pressed to release it. With a gentle touch, the video card should come off smoothly.
📡 Removing the Wireless Card
The wireless card, a convenient feature for staying connected, also deserves our attention. By removing a few screws, we can easily detach the wireless card from the motherboard. This step ensures that we have full access to the motherboard for the upcoming stages of our teardown.
💻 Removing the CPU
We have come to a crucial moment in our journey, the removal of the CPU. This Intel Core i5 11th gen processor, the brain of the computer, requires delicate handling. With pristine care, we gently lift the CPU upwards until it slips out of its socket. Marvel at its technological prowess as it is revealed before your eyes.
📝 Summary and Conclusion
Congratulations! You have successfully witnessed the complete teardown of the Acer Aspire XC 1660G. We have explored every nook and cranny of this impressive PC, from removing the optical drive to unveiling the mighty CPU. Remember to handle all components with care and store the screws in a safe place. Now you have the knowledge and power to upgrade and customize your Acer Aspire XC 1660G as you see fit.
如果您在文章中提到任何网站URL,请将它们作为资源列在最后。
Highlights
- Unboxing the Acer Aspire XC 1660G
- Step-by-step teardown process
- Detailed explanations for each component removal
- Tips for handling and storing screws
- Customization and upgrades possibilities
Frequently Asked Questions
Q: Can I upgrade the RAM on the Acer Aspire XC 1660G?
A: Yes, the RAM on the Acer Aspire XC 1660G is upgradeable. You can easily remove the existing RAM modules and replace them with higher capacity ones to enhance your PC's performance.
Q: Does removing the warranty sticker void the warranty?
A: Yes, removing the warranty sticker typically voids the warranty on the PC. It is advisable to consult the manufacturer or a certified technician before making any modifications that might impact the warranty.
Q: Can I install additional storage drives in the Acer Aspire XC 1660G?
A: Yes, the Acer Aspire XC 1660G has additional slots for storage drives. You can install extra hard drives or solid-state drives to increase the storage capacity of your PC.
Q: Is it difficult to remove and replace the CPU?
A: Removing and replacing the CPU requires careful handling and attention to detail. It is recommended to Seek professional assistance or consult the manufacturer's guidelines before attempting to remove or replace the CPU.
Q: Are there any specific precautions to take during the teardown process?
A: Yes, it is crucial to handle all components with care to avoid any damage. Make sure to disconnect the power supply and follow proper grounding techniques to prevent static electricity from harming the delicate internals of the PC.
 WHY YOU SHOULD CHOOSE TOOLIFY


