Step-by-Step Guide: Installing Threadripper CPU with Wraith Ripper Cooler
Table of Contents
- Introduction
- Unboxing and Overview
- Installing the Motherboard
- 3.1 Disassembling the Socket Retainer
- 3.2 Inserting the CPU
- 3.3 Securing the Socket Retainer
- 3.4 Applying Thermal Paste
- Installing the Cooler
- 4.1 Using the Pre-Applied TIM
- 4.2 Applying Viscous TIM
- 4.3 Installing the Cooler
- Conclusion
- FAQs
Introduction
Welcome to this guide on installing the MS I Meg Emmy GX 399 Creation motherboard for the new thread Ripper CPUs. In this Tutorial, we will walk you through the step-by-step process of installing the motherboard, CPU, and cooler. Whether you're using an air cooler or a water cooler, we've got you covered. So let's get started!
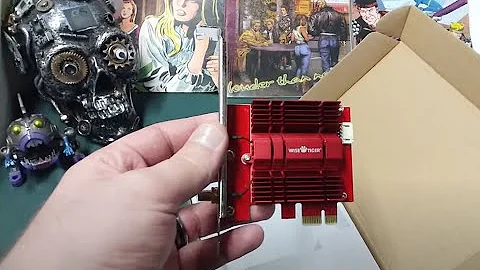
Unboxing and Overview
Before we dive into the installation process, let's take a moment to unbox and get acquainted with the MS I Meg Emmy GX 399 Creation motherboard.
Once you open the box, you'll find the motherboard neatly packed along with a set of accessories including screws, cables, and documentation. Take a moment to familiarize yourself with the layout and components of the motherboard.
Installing the Motherboard
3.1 Disassembling the Socket Retainer
To begin the installation process, we need to disassemble the socket retainer of the motherboard. This will allow us to access the CPU socket. Locate the exposed screws fasteners on the motherboard labeled as 1, 2, and 3. Using the provided tool, turn each screw backwards until you hear a click. Once all three screws are turned, the socket retainer will be loose and can be lifted up.
3.2 Inserting the CPU
Now that the socket retainer is loose, we can proceed to insert the CPU. Carefully lift the Ryzen Threadripper CPU out of its packaging. Take note of the two little detents on the arms of the carrier, as these need to slide in under the corresponding detents on the socket. Hold the CPU and Align it with the carrier, making sure the pins on the CPU match with the holes on the socket. Slide the CPU into place, and you should feel it click into position.
3.3 Securing the Socket Retainer
With the CPU correctly inserted, it's time to secure the socket retainer back into place. Start with screw number one and use the provided tool to turn it backwards until it clicks. Repeat this process for screws number two and three. You'll want to ensure that all three screws have started threading before tightening them further. Be cautious not to overtighten, as that may damage the socket.
3.4 Applying Thermal Paste
Now that the CPU is installed, we need to apply thermal paste before attaching the cooler. Depending on the type of thermal paste you have, the application method may vary. If you're using the pre-applied thermal paste that comes with the cooler, you can skip this step. However, if you prefer to use your own thermal paste or need to reapply it, continue with the following steps.
First, use a Lint-free cloth and isopropyl alcohol to clean the surface of the CPU. Make sure there are no particles or residue left on it. Then, apply a small amount of thermal paste on the center of the CPU using your preferred method. Spread it evenly using a credit card or razor blade, making sure not to use too much paste. Remember, less is more when it comes to thermal paste.
Installing the Cooler
4.1 Using the Pre-Applied TIM
If you're using the CoolerMaster Wraith Ripper cooler, it comes with pre-applied thermal paste. This makes installation quick and easy. Simply position the cooler over the CPU, aligning the mounting holes with the posts on the motherboard. Gently press down on the cooler until it sits securely in place.
4.2 Applying Viscous TIM
If you prefer to use your own thermal paste or need to reapply it, follow these steps. Start by placing a small dot of thermal paste on the two active dies of the CPU. You can use a credit card or razor blade to spread the paste evenly, ensuring it covers the surface of the dies. This method allows for better heat transfer and provides adequate coverage for the active cores.
Once the thermal paste is applied, position the cooler over the CPU as Mentioned earlier and secure it using the provided screws. Tighten the screws in a crisscross pattern, making sure not to overtighten them. This will ensure even pressure distribution and a secure fit for optimal cooling performance.
4.3 Installing the Cooler
Whether you're using the pre-applied thermal paste or applying your own, the installation process for the CoolerMaster Wraith Ripper cooler is the same. Start by aligning the mounting holes of the cooler with the posts on the motherboard. Carefully lower the cooler onto the CPU, making sure it sits evenly. Use a Phillips head screwdriver to tighten the four screws that secure the cooler in place.
Tighten the screws in a diagonal pattern, applying equal pressure to each corner. This will ensure a secure installation and proper contact between the cooler and the CPU. Once all screws are tightened, the cooler should be firmly attached to the motherboard, ready to keep your CPU cool during operation.
Conclusion
Congratulations! You have successfully installed the MS I Meg Emmy GX 399 Creation motherboard, Ryzen Threadripper CPU, and CoolerMaster Wraith Ripper cooler. Followed step by step, the installation process is straightforward and should result in a well-performing system. Remember to take your time, apply thermal paste correctly, and securely tighten all screws for optimal results. Now you can enjoy the powerful performance of your AMD Threadripper CPU!
FAQs
Q: Can I use the pre-applied thermal paste that comes with the cooler?
A: Yes, the pre-applied thermal paste is perfectly fine to use. However, if you prefer to use your own thermal paste or need to reapply it, you can do so following the instructions provided in this guide.
Q: Is it necessary to clean the CPU surface before applying thermal paste?
A: Yes, it is highly recommended to clean the CPU surface before applying thermal paste. This ensures proper adhesion and improves heat transfer between the CPU and cooler.
Q: How tight should I tighten the screws when installing the cooler?
A: It's important not to overtighten the screws when installing the cooler. Tighten them until they are snug, but avoid applying excessive pressure, as this may damage the CPU or motherboard.
Q: Can I use different cooling solutions with the MS I Meg Emmy GX 399 Creation motherboard?
A: Yes, you can use different cooling solutions with the motherboard, such as liquid coolers or alternative air coolers. Just make sure they are compatible with the thread Ripper CPUs and follow the manufacturer's instructions for installation.
Q: How can I ensure the best thermal performance for my CPU?
A: To ensure the best thermal performance, make sure to properly apply thermal paste, securely install the cooler, and maintain adequate airflow within your system. Regularly cleaning and dusting your components can also help in maintaining optimal thermal performance.
Resources:


 No difficulty


 WHY YOU SHOULD CHOOSE TOOLIFY