































Table of Contents
- Key Points
- Understanding the Importance of Thumbnail Quality
- Creating AI-Powered Thumbnails in Minutes
- Step-by-Step Guide to Ultra HD Thumbnails with PixelLab
- Ideogram AI for Thumbnail Creation: Pros and Cons
- Frequently Asked Questions
- Related Questions



Understanding the Importance of Thumbnail Quality
Why Thumbnail Quality Matters
In the vast ocean of YouTube videos, your thumbnail serves as the first impression. It's the visual bait that either hooks a viewer or lets them scroll by.
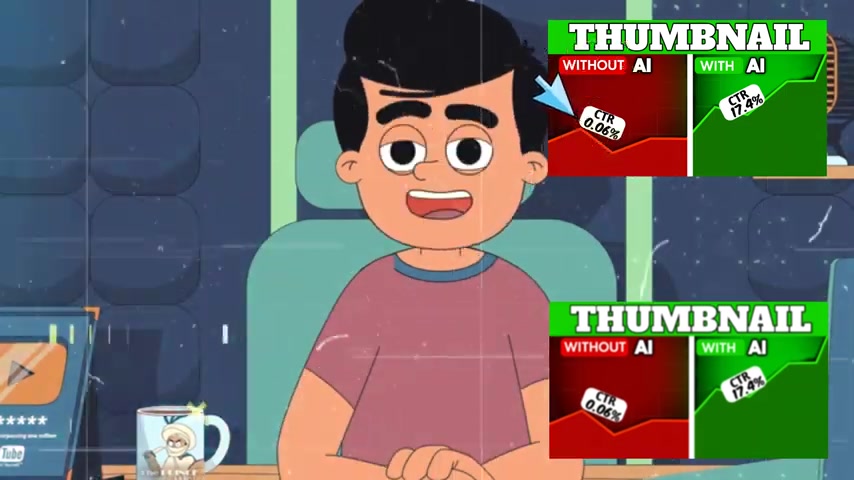
A high-quality thumbnail Instantly communicates professionalism, attention to detail, and the value your video offers. Conversely, a blurry, poorly designed thumbnail screams amateurism, deterring potential viewers and negatively impacting your CTR.
Think of it this way: would you click on a video with a pixelated thumbnail or one that looks crisp, vibrant, and engaging? The answer is obvious. That is the reason the quality is so important to start out with. Your thumbnail's quality is so important because, at the end of the day, it is the face of the video you are presenting.
A low CTR means your video is being shown to people, but they aren't interested in clicking. This directly affects YouTube's algorithm, which might interpret the lack of interest as a sign that your content isn't valuable, leading to lower rankings and fewer impressions. Therefore, investing in high-quality thumbnails is an investment in your YouTube channel's success. In today's fast-paced digital world, viewers make snap decisions, and a captivating thumbnail can be the difference between obscurity and virality. If you have a poor looking thumbnail, no one is going to click on your video.
The Impact of Low CTR and How to Improve It
A low click-through rate (CTR) can be a major roadblock to your YouTube success. It signals that your thumbnails aren't effectively grabbing attention or conveying the essence of your content. But don't despair! There are actionable steps you can take to improve your CTR and revitalize your Channel. To really understand the importance of thumbnails, you need to understand the definition and importance of the CTR.
- Analyze your current thumbnails: Take a hard look at your existing thumbnails. Are they visually appealing? Do they accurately reflect the content of your videos? Are the images clear and sharp? Are the colors vibrant and eye-catching? Are you sure that it shows the value of the video?
- Experiment with different styles: Try different thumbnail designs to see what resonates with your audience. Test various color combinations, fonts, images, and layouts. Use YouTube Analytics to track the CTR of each thumbnail and identify what works best.
- A/B test your thumbnails: Conduct A/B tests by creating two different thumbnails for the same video and tracking their performance. This allows you to directly compare the CTR of each thumbnail and determine which design is more effective. You can also use AI to generate the different styles you can then use to A/B test.
- Optimize for mobile: Most YouTube viewers watch videos on their mobile devices, so ensure your thumbnails look good on smaller screens. Use clear, legible fonts and avoid cluttering the thumbnail with too many details.
- Keep it consistent: Maintain a consistent thumbnail style across your channel to build brand recognition and make your videos easily identifiable. Viewers should be able to recognize your videos at a glance.
- Tell a story: Create thumbnails that spark Curiosity and hint at the content of your videos. Use images or text that create a sense of intrigue and make viewers want to learn more.
- Add a human element: Including a human face in your thumbnail can significantly increase CTR. People are naturally drawn to faces, so consider adding a close-up shot of yourself or a Relevant person in your video.
- Use contrasting colors: Using contrasting colors in your thumbnail can help it stand out from the crowd. Experiment with different color combinations to see what grabs attention most effectively.
- Embrace AI: Use AI tools to generate high-quality thumbnails that are optimized for CTR. AI can help you create visually appealing thumbnails quickly and efficiently, freeing up your time to focus on creating great content. The AI Tools are trained and designed to help people click on your content.
By implementing these strategies, you can significantly improve your thumbnail CTR, attract more viewers, and boost your YouTube channel's growth. Remember, a compelling thumbnail is the key to unlocking the potential of your content.
Creating AI-Powered Thumbnails in Minutes
Unlocking the Power of AI with ChatGPT and Ideogram
Ready to create professional-looking thumbnails in a fraction of the time?
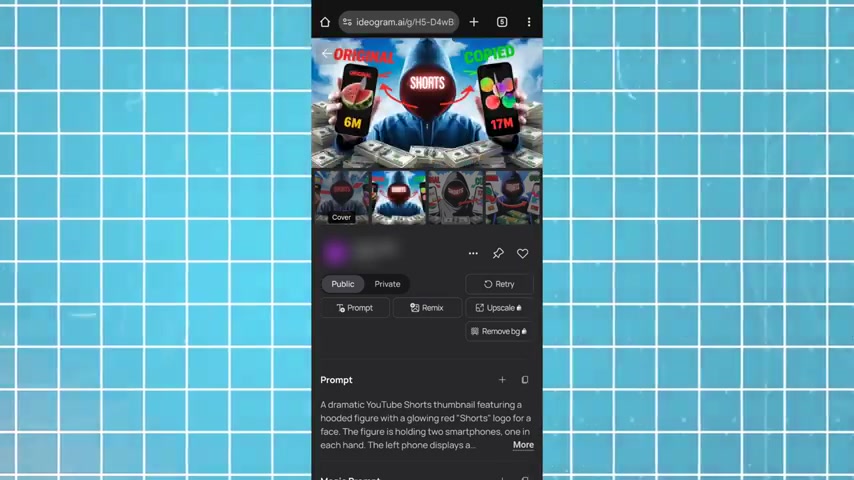
This section will guide you through using ChatGPT to generate effective prompts and Ideogram to bring those prompts to life, creating stunning thumbnails. There are only a few steps you need to get through, and it will change the way you are creating thumbnails forever. Make sure to follow each step and look at how easy it can be.
- Finding the Prompt: Find a thumbnail that you are interested in. Go to YouTube, search in your category, and save the video's link.
- Download the Thumbnail: Head over to an online thumbnail downloader like thumbnail-grabber.com and paste the link to the page, download it in the highest resolution that you can.
- Access ChatGPT: Launch ChatGPT and go to plus, then upload your thumbnail and then write "Give me the prompt of this image."
- Copy the Prompt: ChatGPT will give you a prompt that you can then use.
- Access Ideogram: Go to the website Ideogram, and sign up to make an account. It is free and has tons of possibilities.
- Paste Your Prompt: Paste the prompt that ChatGPT gave you into the prompt section. I recommend using all of my settings as well. Copy what I have and make sure everything is as close as possible.
- Generate the Image: Press generate and see what the AI generates. The process may take up to 30 seconds.
Here is the result:
| Features | Description |
|---|---|
| Prompt Input | Uses the ChatGPT generated to guide AI creation. |
| AI Generation | Create various thumbnails. |
| Fast and Efficient | Generates multiple thumbnails within seconds. |
These tools will change the way you create thumbnails because of how easy it is to have the AI create videos for you.
Step-by-Step Guide to Ultra HD Thumbnails with PixelLab
Optimizing Thumbnail Size in PixelLab
Did you know that a lot of people's thumbnails look low resolution when the upload them to YouTube? It's most likely because they have failed to change the resolution prior to creating the thumbnail.
To ensure your thumbnails are crystal clear and visually appealing, you need to configure the correct size settings. Here's a step-by-step guide on how to do it using PixelLab:
- Open PixelLab: Launch the PixelLab app on your Android device.
- Access Image Size Settings: Tap the three dots located in the top right corner of the screen.
- Select 'Image Size': From the dropdown menu, choose the 'Image Size' option.
- Enter Custom Dimensions: Input the following Dimensions to make sure that you are ready for 4k.
- Width: 2560 pixels
- Height: 1440 pixels
- Confirm Settings: Tap 'OK' to apply the new dimensions to your project. If you have already added text or an image, it may take some time to load. This is because the dimensions are being upscaled, so do not worry if you see a loading symbol.
By following these steps, you'll ensure your thumbnails are optimized for display on various devices, maintaining their Clarity and visual appeal. Using the correct aspect ratio and dimensions will help you generate videos that will get clicks.
A Key Step You Might Be Missing: Uploading Videos Before Adding Thumbnails
You need to make sure that you follow this step to a tee, because this is a very important step in maintaining the quality of your videos. The common mistake is, when most people upload their videos, they immediately upload the thumbnail, thinking this is the best move.
This is one of the biggest mistakes that you can make, because you are not letting YouTube process the video and see what would be the best format for the video. This is a crucial point that you must follow to increase your success rate. With that said, here is what you need to do:
- Initial Upload: Begin by uploading your video to YouTube, but do not add the thumbnail immediately.
- Title and Description: Include all of your information for the video (Title, Description, Tags etc).
- Set to Unlisted: To prevent public viewing before the video is fully ready, set the video's visibility to 'Unlisted.'
- Process the Video: Give YouTube time to do its thing, and process the video, which can take anywhere from 2 minutes to 2 hours, depending on the size and complexity of your video.
- Upload the Thumbnail: Once YouTube has processed the video, go back into the video to edit.
- Make Sure Your Work Is Saved: Before setting your video to public, make sure you save your settings and exit out of your video. This way, all your settings will be saved before you upload the thumbnail and set the video to public.
This strategic approach allows YouTube to fully process your video before the thumbnail is added, helping to maintain thumbnail quality and ensure optimal presentation. Make sure to follow this rule, so that you can maintain your image quality.





Most people like






































Report
Please select a reason for reporting
- 13 Reasons to Switch from Snapchat to Text Messaging
- 7 Powerful Speech to Text Apps to Boost Productivity
- 10 Best Speech to Text Tools for Effortless Transcription
- 13 Free Tools to Easily Transcribe Audio to Text
- 15 Surprising Ways Google's Speech-to-Text Boosts Productivity
- 7 Best Free Online Audio to Text Transcription Tools
- 9 Tips to Transcribe Speech to Text Faster and Better
- 13 Best Speech to Text Software for Windows 10 in 2023
- 7 Tips for Choosing the Best Transcriber for Audio to Text
- 11 Reasons Why Dragon Speech-to-Text Apps are Game-Changers
- 6 Secrets to Enhance Your Speech to Text Transcription
- 6 Brilliant Ways to Boost Productivity with Talk-to-Text on Your MacBook
- 6 Ways Transcription Software Converts Audio to Text
- 8 Tips to Transcribe Speech to Text Like a Pro
- 6 Reasons IBM Watson Speech to Text is a Game-Changer
- 14 Powerful Ways Talk-to-Text Improves Your Workflow
- 12 Top Windows Speech-to-Text Software for Efficient Transcription
- 12 Game-Changing Benefits of Apple's Speech to Text Technology
- 9 Powerful Use Cases for AWS Speech to Text Technology
- 10 Easy Steps to Transcribe YouTube Videos to Text
- transcription audio en texte
- online audio transcription
- free audio file transcription
- free ai audio transcription
- audio transcription service
- audio transcription online free
- audio transcription free online
- audio to transcription software
- audio and transcript
- ai audio transcription free
- voice recording to text converter
- translate voice recording to text
- record voice to text
- audio recording to text converter
- voice recording and transcription
- chatgpt voice to text
- gmail voice to text
- speech to text reader
- speech to text ai free
- speech to talk
- How SEO and Marketing Dashboards Empower Agencies to Drive Results
- How to Use AI Tools to Find Internal Linking Opportunities Across a Business Website
- Discover Your Perfect Haircut with AI Hairstyle Apps
- Free Reputation Calculator Tools: How They're Adapting to Score AI Visibility, Not Just Rankings
- Design Professional Flyers for Free on Your Phone
- Best Free Flyer Maker Apps for Android: Design Like a Pro
- How to Know If Your Business Is Ready for an AI Customer Service Agent
- Revolutionizing Storytelling: From Novels to Screenplays with AI
- Create Engaging Animated Explainer Videos with a Free AI Tool
- Stop Multi-Subscribing: Benchmark Top AI Visual Models in One Canvas
- Magic School AI: Revolutionizing Quiz & Assessment Generation
- Create Your Own Email Bot and Automate Your Email Tasks
- Beyond Pure Prompts: Optimizing Production with 'Text With Reference' Generation
- Stop Using Boring TTS: My Honest Deep Dive Into VideoAI and the Hunt for the Perfect Custom Voices
- AI & Elections: Defending Democracy Against Misinformation
- Navigating Political Discourse: AI, Deepfakes, and Reality Checks
- Detecting Political Bias in News Articles: A Powerful AI Algorithm
- AI Bias Unveiled: Political Leanings in ChatGPT & Beyond
- Revolutionize Learning: Discover Quizzes AI for Engaging Interactive Quizzes
- From AI-Generated to Audience-Ready: How Quillbot Humanize AI Is Changing the Content Editing Process

Copyright ©2026 toolify