































Table of Contents
- Key Points
- Understanding Automated Report Card Generation
- Preparing Your System for Automated Report Card Generation
- Step-by-Step Guide to Using the Automated Report Card Generator
- Pricing and Availability of Report Card Generators
- The Pros and Cons of Report Card Automation
- FAQ
- Related Questions


Understanding Automated Report Card Generation
What is Automated Report Card Generation?
Automated report card generation involves utilizing software or tools to automatically create student report cards. This method reduces manual data entry, minimizes errors, and saves time for educators. Key benefits include standardization of report card formats, improved data accuracy, and increased efficiency. The process typically involves importing student data, setting grading parameters, and generating individualized report cards with minimal manual intervention.
This article focuses on the automation process to improve output using efficient tools, while the key is efficiency, accuracy and standardization.
Why Use Automated Report Card Generators?
Choosing automated report card generators offers numerous advantages:
- Time Efficiency: Automate repetitive tasks, freeing up time for teaching and student interaction.
- Accuracy: Reduce the risk of human error in data entry and calculations.
- Standardization: Ensure consistency in report card formats and grading criteria.
- Customization: Many tools allow for customization to fit specific school or district requirements.
- Accessibility: Digital report cards can be easily distributed and accessed by parents and guardians.
The use of an automated system is a good example of modernizing traditional school report generation process.
Preparing Your System for Automated Report Card Generation
Ensuring System Readiness
Before diving into report card automation, make sure that your system is well-prepared. Begin by ensuring your laptop or computer is formatted correctly and that you have the correct Excel Template installed.

Proper formatting is essential for seamless operation and prevents errors during the generation process.
Date Formatting Considerations
Date formatting is crucial for accurate calculations and data input. Most automated tools require a specific date format, such as MM/DD/YYYY. It is a MUST that you follow that format, especially when you need to compute their age. Configure your system to use the appropriate format by adjusting the date settings.
- Go to Control Panel > Region > Change date, time, or number formats.
- Select 'Additional settings.'
- Choose the correct date format in the 'Date' tab.
Downloading Necessary Files and Templates
Make sure you have downloaded all necessary files and templates required for the report card generator. This includes the student data sheets (SF1) and the report card templates (SF9, SF10). Double-check that these files are compatible with the automated tool you intend to use.
- Ensure files are downloaded from a trusted source.
- Verify that the file format matches the generator's requirements.
- Organize files in a structured folder for easy access.
Step-by-Step Guide to Using the Automated Report Card Generator
Step 1: Data Input from SF1 Form
Begin by inputting student data from the SF1 form into the designated Excel Template (or similar format required by your generator). Accuracy is crucial at this stage, so take your time and double-check all entries.
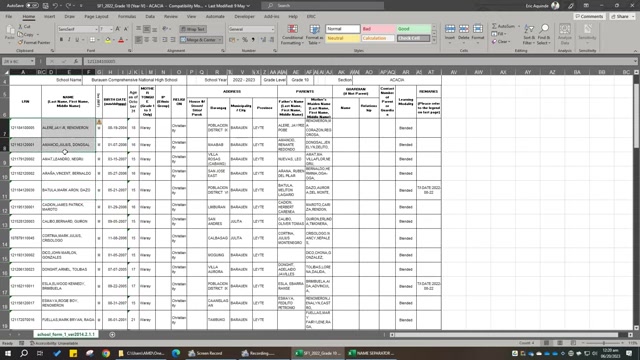
- Open the SF1 Form in Microsoft Excel.
- Copy all student data, from LRN to their Birthdays
- Open the ‘Name Separator’ or formatting generator
- Paste the data to designated are of the Formatter.
-
Always choose values option while pasting to preserve formattings
This step ensures that every subsequent calculation will be accurate, especially for functions like computing their age.
Step 2: Formatting Names and Date Formats
Next, use the name separator and date formatting tool to separate names and standardize date formats. This ensures that the report cards appear uniform and dates are correctly calculated.
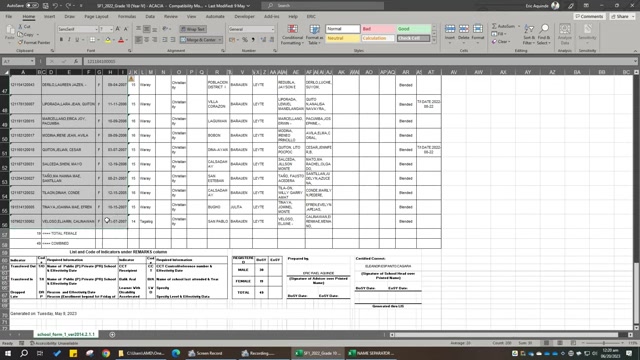
- Use name separators to divide full names into first name, middle name, and last name.
- Format date entries to MM/DD/YYYY.
- Verify that the output is clean and error-free.
Handling Name Extensions (Jr., Sr.)
Some names include extensions like 'Jr.' or 'Sr.' Make sure your automated tool can handle these extensions correctly. Proper handling of these extensions ensures accurate report card generation without compromising on format.
Step 3: Generating and Customizing the Report Cards
Once the data is correctly formatted, generate the report cards. Customize report cards to include additional data points, grades, and comments relevant to each student.
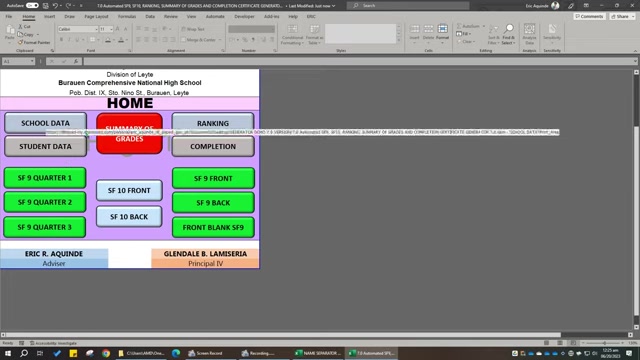
- Open the main report card generator file.
- Ensure the date settings on your system have been updated to the right format. See Section 1.
- Import the formatted student data.
- Select the appropriate settings for grade calculation and comments.
- Generate the report cards for each student or batch of students.
Step 4: Printing the Report Cards
Finally, print the report cards. Before printing, check the print preview to ensure everything looks correct. Use high-quality paper and ink for a professional appearance. Check out some essential tips here:
- Review the print preview for layout issues.
- Use high-quality paper to enhance appearance.
- Ensure printer settings are correct for proper printing.
With the proper set up you will now be able to print the student report cards.





Most people like


































Report
Please select a reason for reporting
- 13 Reasons to Switch from Snapchat to Text Messaging
- 7 Powerful Speech to Text Apps to Boost Productivity
- 10 Best Speech to Text Tools for Effortless Transcription
- 13 Free Tools to Easily Transcribe Audio to Text
- 15 Surprising Ways Google's Speech-to-Text Boosts Productivity
- 7 Best Free Online Audio to Text Transcription Tools
- 9 Tips to Transcribe Speech to Text Faster and Better
- 13 Best Speech to Text Software for Windows 10 in 2023
- 7 Tips for Choosing the Best Transcriber for Audio to Text
- 11 Reasons Why Dragon Speech-to-Text Apps are Game-Changers
- 6 Secrets to Enhance Your Speech to Text Transcription
- 6 Brilliant Ways to Boost Productivity with Talk-to-Text on Your MacBook
- 6 Ways Transcription Software Converts Audio to Text
- 8 Tips to Transcribe Speech to Text Like a Pro
- 6 Reasons IBM Watson Speech to Text is a Game-Changer
- 14 Powerful Ways Talk-to-Text Improves Your Workflow
- 12 Top Windows Speech-to-Text Software for Efficient Transcription
- 12 Game-Changing Benefits of Apple's Speech to Text Technology
- 9 Powerful Use Cases for AWS Speech to Text Technology
- 10 Easy Steps to Transcribe YouTube Videos to Text
- transcription audio en texte
- online audio transcription
- free audio file transcription
- free ai audio transcription
- audio transcription service
- audio transcription online free
- audio transcription free online
- audio to transcription software
- audio and transcript
- ai audio transcription free
- voice recording to text converter
- translate voice recording to text
- record voice to text
- audio recording to text converter
- voice recording and transcription
- chatgpt voice to text
- gmail voice to text
- speech to text reader
- speech to text ai free
- speech to talk
- How to Use AI Tools to Find Internal Linking Opportunities Across a Business Website
- Discover Your Perfect Haircut with AI Hairstyle Apps
- Free Reputation Calculator Tools: How They're Adapting to Score AI Visibility, Not Just Rankings
- Design Professional Flyers for Free on Your Phone
- Best Free Flyer Maker Apps for Android: Design Like a Pro
- How to Know If Your Business Is Ready for an AI Customer Service Agent
- Revolutionizing Storytelling: From Novels to Screenplays with AI
- Create Engaging Animated Explainer Videos with a Free AI Tool
- Stop Multi-Subscribing: Benchmark Top AI Visual Models in One Canvas
- Best Seedance 2.5 API Provider: Every Price on the Market, Checked at Source
- Top AI Social Media Management Tools: Automate Your Content Strategy
- Free AI Text to Video Generator: Create Stunning Videos from Text
- Discover 17 ChatGPT Alternatives: A Comprehensive Comparison
- Character.AI vs. Janitor AI: Which AI Chat Platform Reigns Supreme?
- Top Virtual Assistant Companies in 2026: Reviews, Pricing, and Plans Compared
- Unveiling FaceCheck.ID: Revolutionizing Reverse Image Searches with AI
- 11 Best AI Dialers in 2026: Features, Pricing, Pros and Cons
- How I Direct Consistent AI Clips: A Hands-On Guide to Multi-Model Generation
- A Realistic Review of the Photo Generator Image Tool
- Playwright MCP Server: Automated Web Testing with Agent Mode

Copyright ©2026 toolify