






















Build Intelligent Chatbots: Kony Visualizer & QnA Maker Tutorial

Updated on Aug 31,2025

Table of Contents

In today's digital age, chatbots are revolutionizing customer interaction, offering instant support and personalized experiences. This article will guide you through building an intelligent chatbot using the powerful combination of Kony Visualizer, for creating the user interface, and QnA Maker, for providing the chatbot's knowledge base. We'll cover setting up your development environment, connecting your app to Kony Fabric, importing and configuring the chatbot, and finally, publishing your AI-powered chatbot. Ready to enhance customer engagement? Let's dive in!

Key Points

Create a QnA Maker knowledge base with relevant FAQs.

Set up a Kony Visualizer project for designing the chatbot interface.

Connect your Kony Visualizer app to Kony Fabric for backend services.

Import a pre-built chatbot component into your Kony app.

Configure the chatbot to communicate with your QnA Maker knowledge base.

Adjust security settings to allow public access.

Build and publish your chatbot application for various platforms.

Setting Up Your Chatbot Development Environment

QnA Maker: Building Your Chatbot's Brain

The cornerstone of any intelligent chatbot is its Knowledge Base. QnA Maker is a Microsoft Azure service that allows you to create a robust FAQ system that your chatbot can query. To begin, navigate to the QnA Maker AI portal.

  1. My Knowledge Bases: Once logged in, you'll land on this section to see what knowledge bases are currently available to you.
  2. Create a Knowledge Base: Click on 'Create a Knowledge Base' to build the foundation of your chatbot. This will give your chatbot it's core intelligence.
  3. Connect to Azure: This step requires you to connect your QnA Maker service to an Azure subscription. This is essential for the service to function.
  4. Name your bot: Choose a suitable name. Ensure your name is SEO friendly by using keywords. For example, 'KonyDxQnAtest'.
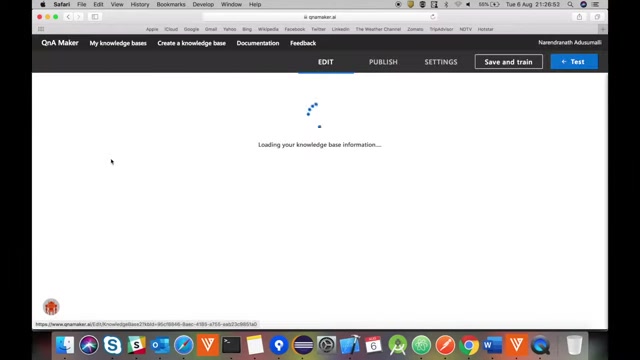
With this simple setup, your AI Chatbot brain will be online in a matter of minutes. Now you can populate it with your question and answer pairs so that it may actually serve a useful function.

Creating a Kony Visualizer App

Now we prepare to build out the front end component that will relay user input back and forth between the QnA Maker service.

  1. Open Kony Visualizer: Start by launching Kony Visualizer Enterprise to start a new project.
  2. New Project: Click on File>New Project, then choose 'Create Custom App'

  3. Name Project: Select “Kony Reference Architecture,” give it a name like 'KonyOXChatbot', and click create.

  4. Connect to Kony Fabric: To make the app functional, connect the app to Kony Fabric, using the Product Menu > Emulators and Device Configuration
Kony Fabric is where your app's data and logic reside. It will allow the user's queries to be translated and results rendered for viewing. With that in place, we are ready to move on to the next step.

Importing the Chatbot to the App

Now it's time to add a pre built component to speed up the process.

  1. Import: Use Project > Import > Local Project > Add to Current Project
  2. Chatbot Zip: Choose the chatbot zip file and import it to the current project.
  3. Add Chatbot: Open the forms folder, then open the responsive web desktop folder and then add the KonyQnA Chatbot App Group Form. This will pull in the front end and begin the setup of our user interface.
  4. Fabric: Select the Kony Fabric folder and open Kony Fabric
  5. Security Level: Select 'konympKonyClient' and change the security level from Authenticated App User to 'Public'

By setting the security level to 'Public', we are allowing the chatbot to be widely used without the constraints of authentication, thus improving the overall accessibility of the product.

Configuring the Chatbot

With the user interface elements set, it's now time to tie together QnA Maker and your Kony Fabric hosted application to make the magic happen.

  1. Open Build: Open the application and navigate to the build menu.
  2. Code Snippet: Find the qnaQnAIntentMap in the code, and copy what is between the curly braces
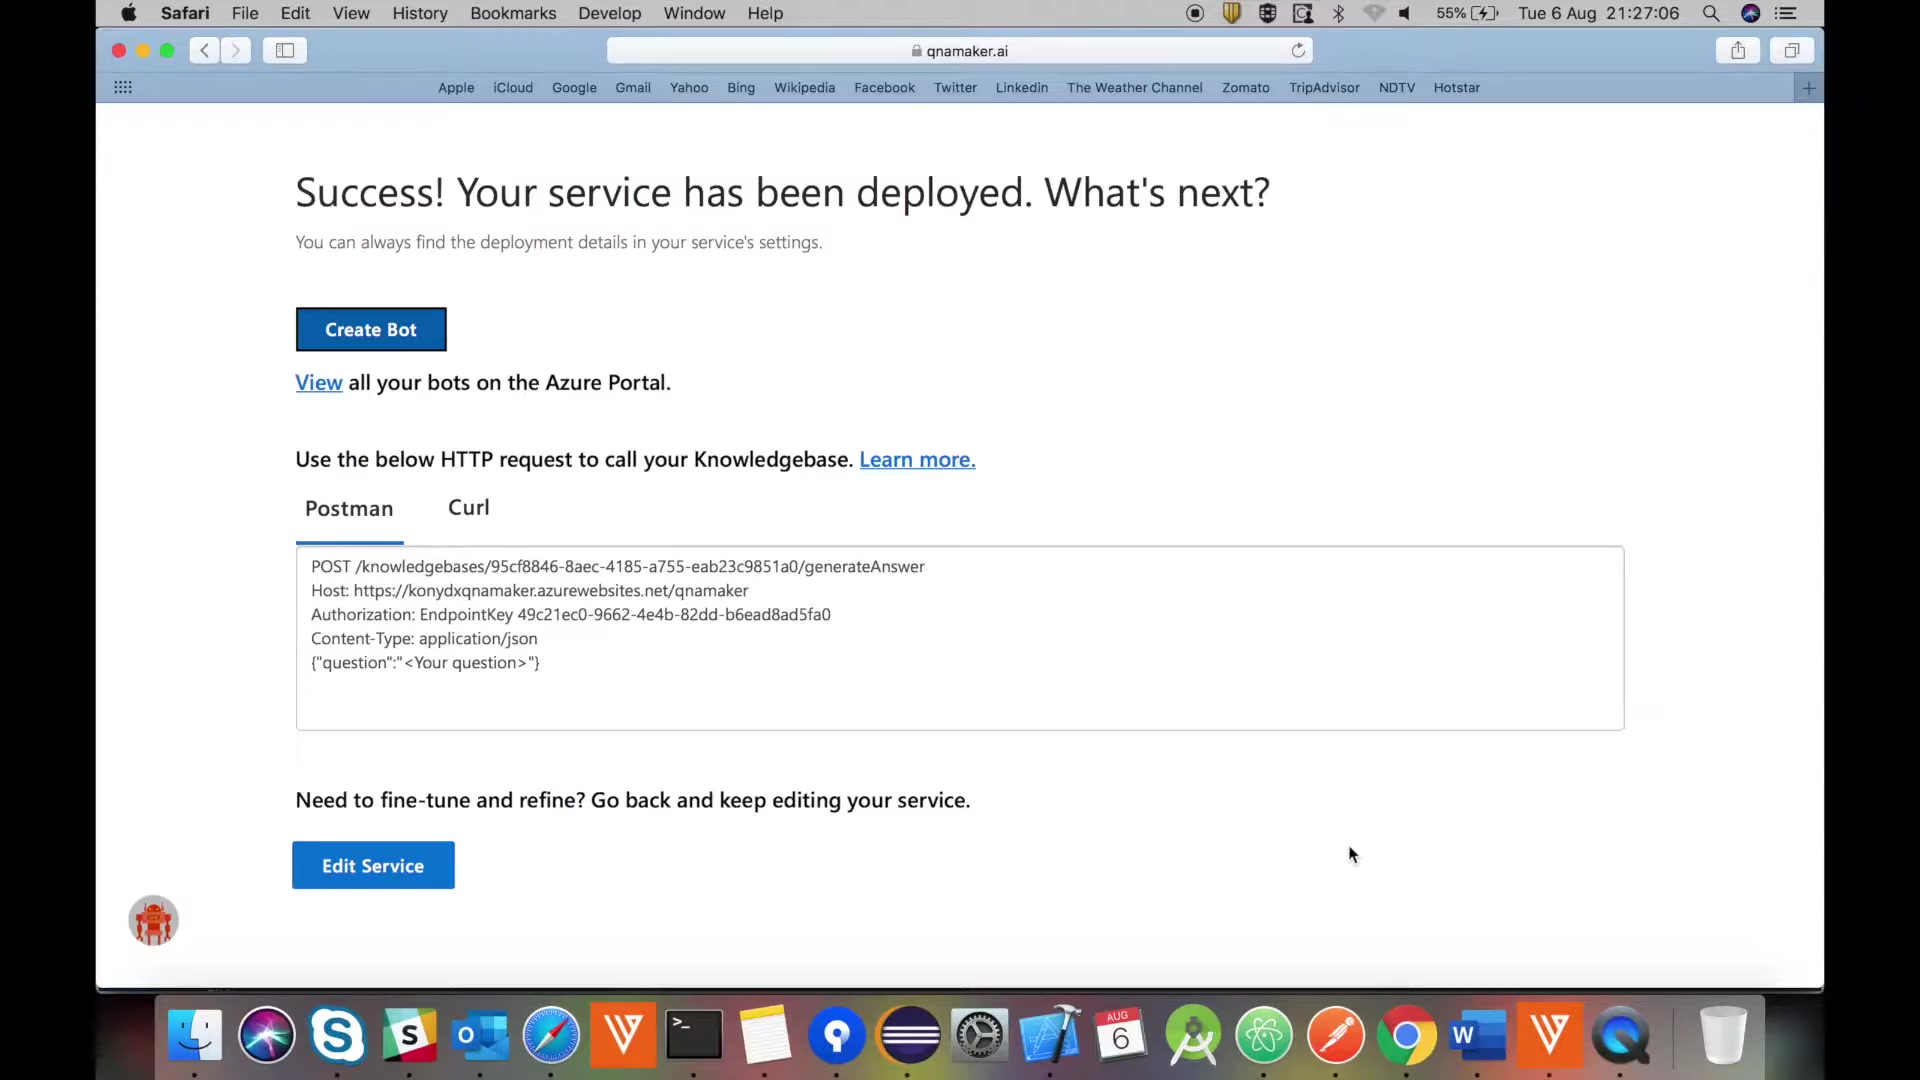
  3. Grab Knowledge Base Info: Grab your knowledge base code and endpoint key from QnA Maker to add to the code
  4. Go Back to Code Snippet: Paste the knowledge base info into the code snippet

By modifying these parameters, we are telling our user interface where to find the question and answer pairs, so that the application will work properly.

Publishing the Kony Fabric App

As the final step, we'll take this local application and make it publicly available.

  1. Publish to Kony Fabric: Select “Publish to Kony Fabric.”
  2. Configure and Publish: Select the Local Dev Env, then choose the “Configure and Publish” option
  3. Refresh: If changes weren't applied, select the refresh in web option to update them.
  4. Build: Finally, build and test your changes.

Now your chatbot has been published and is ready to go! You may now provide Customer Service, or build out a new intelligent application. This application is ready to be published to any OS.

Deeper Dive: QnA Maker Knowledge Base Considerations

Question and Answer Structure

QnA Maker operates on the basic premise of question and answer pairs. However, the way you structure these pairs significantly impacts the chatbot's effectiveness. Think about how users phrase their questions. Use natural language and consider variations. For example, instead of just "What is the refund policy?", also include "How do I get a refund?" and "Can I return this item?". The more variations you provide, the better QnA Maker can match user queries with the appropriate answers.

  • Use clear and concise answers. Long paragraphs are difficult to digest in a chat interface.
  • Incorporate keywords naturally within both questions and answers to improve search relevance.
  • Use metadata tagging to categorize your QnA pairs, enabling more precise searches and targeted responses. Metadata can include categories like product type, topic area, or department.

An effectively structured knowledge base reduces ambiguity and ensures users receive relevant and helpful responses.

Leveraging Multi-Turn Conversations

QnA Maker isn't limited to simple question-answer interactions; it supports multi-turn conversations, allowing your chatbot to guide users through complex processes. Utilize follow-up prompts to create these conversational flows. For instance, after answering a question about account creation, provide a follow-up Prompt like "Need help setting up your profile?" or "Learn about our security features." These prompts act as a guided path, leading users to related information and resolving issues more efficiently.

  • Plan your conversational flows ahead of time to ensure a smooth user experience.
  • Use clear and descriptive prompts that accurately reflect the content they lead to.
  • Regularly review and update your conversational flows based on user interactions and feedback.

By leveraging multi-turn conversations, you can transform your chatbot from a simple FAQ resource into a dynamic problem-solving tool.

Fine-Tuning and Refinement

Building a knowledge base is an iterative process. Continuous monitoring and refinement are essential to maintain accuracy and relevance. QnA Maker provides analytics that offer insights into user queries, including those that couldn't be matched with existing answers. Use this data to identify gaps in your knowledge base and add new QnA pairs accordingly. Regularly review existing answers for accuracy and update them as needed. Also, utilize QnA Maker's active learning feature, which suggests new QnA pairs based on user queries that didn't receive satisfactory answers. By actively participating in this learning process, you can continuously improve the chatbot's performance and user satisfaction.

  • Set up regular intervals for reviewing and updating your knowledge base.
  • Encourage user feedback to identify areas for improvement.
  • Monitor analytics to understand common user queries and pain points.

Consistent fine-tuning will ensure your chatbot remains a valuable resource and continues to meet user needs effectively.

Step-by-Step Guide: Using the Kony Visualizer Chatbot

Initiating a Chat Session

  1. Launch the App: Open the Kony Visualizer app on your mobile device or web browser.
  2. Access Chatbot Interface: Navigate to the chatbot interface within the app. This is typically represented by a chat icon or a designated 'Chat' section.
  3. Start Interaction: A welcome message or prompt will appear, inviting you to start the conversation. This may include introductory text like 'Hi, how can I help you?' or a simple input field labeled 'Type a message'.

With the app launched, the chatbot interface loaded, you will be ready to interact.

Submitting a Query

  1. Compose Your Question: Type your question or query into the input field. Be clear and concise to ensure the chatbot understands your intent.
  2. Send Your Message: Tap the send icon (usually a paper airplane or arrow) or press the Enter key to submit your message.

Here are the rules for submitting a query:

  • Use proper grammar and spelling to minimize misinterpretations.
  • If you are not receiving adequate feedback, simplify the prompt.
  • Avoid complex queries.

Reviewing the Chatbot Response

  1. Read the Response: The chatbot will analyze your query and display a response. This may be a direct answer, a suggestion, or a follow-up prompt.
  2. Evaluate Relevance: Assess whether the response addresses your question. If not, rephrase your query or try a different approach.
  3. Follow-Up (If Necessary): If the chatbot offers follow-up prompts, select the one that aligns with your needs to continue the conversation. You can continue to refine the prompt for best results.
  4. End Session: End the session gracefully. At times, even if there is not a specific way to end the session, don't be afraid to end it anyway.

Understanding QnA Maker and Kony Visualizer Pricing

QnA Maker Pricing Tiers

Microsoft's QnA maker is a pay-as-you-go service, allowing it to scale with your user base. You will be responsible for hosting the service in a cloud, such as Azure.

  • Azure Cognitive Services Pricing: QnA Maker is part of Azure Cognitive Services. Refer to the Azure pricing page for the most current pricing details. Typically, pricing is based on the number of transactions (queries) processed.
  • Free Tier: Azure often offers a free tier for Cognitive Services, which includes a limited number of free transactions per month. This is suitable for testing and small-scale deployments.
  • Standard Tier: For production environments, you'll need a paid tier. Pricing varies based on the selected service tier, throughput requirements, and region.

It's essential to monitor your transaction usage to manage costs effectively. Azure provides tools to track your service consumption and set up alerts to prevent unexpected charges.

Kony Visualizer Licensing Options

Kony, now part of Temenos, offers different licensing options based on your development needs. However, the most important takeaway is that you will be paying a per seat fee.

  • Kony Visualizer Free: This is the free version and great for testing.
  • Kony Visualizer Enterprise: You must contact Temenos for a quote for this product.

Determine how many people will be working on the application. Depending on the number of seats and the support needed, your quote will vary.

Advantages and Disadvantages of Kony Visualizer and QnA Maker

👍 Pros

Rapid UI design with Kony Visualizer's drag-and-drop interface.

Cross-platform deployment reduces development time and costs.

QnA Maker's NLP enables intelligent and relevant responses.

Active learning continuously improves chatbot accuracy.

Multi-turn conversations support complex user interactions.

👎 Cons

Kony Visualizer Enterprise requires a commercial license.

QnA Maker usage costs can add up depending on transaction volume.

Integration requires technical expertise and Azure setup.

Knowledge base maintenance demands continuous effort.

Dependency on cloud services (Azure) for QnA Maker.

Key Features of Kony Visualizer and QnA Maker

Kony Visualizer: Design and Development Features

  • Drag-and-Drop Interface: Kony Visualizer offers a drag-and-drop interface for designing the chatbot's UI, making it easy to create visually appealing and user-friendly interfaces without extensive coding.
  • Cross-Platform Compatibility: Develop your chatbot once and deploy it across multiple platforms, including web, mobile (iOS and Android), and desktop, ensuring broad accessibility.
  • Extensibility: Leverage a rich set of APIs, SDKs, and pre-built components to extend the chatbot's functionality and integrate with other systems.
  • Live Preview: Preview changes in real time as you develop, allowing for quick iterations and design adjustments.
  • Theming and Styling: Customize the chatbot's appearance with themes and styles to match your brand identity.

By leveraging these design and development features, you can create a chatbot that is both functional and aesthetically pleasing, enhancing user engagement and satisfaction.

QnA Maker: Natural Language Processing and Knowledge Management

  • Natural Language Processing (NLP): QnA Maker uses NLP to understand user queries and extract relevant information, even if the queries are phrased differently.
  • Knowledge Base Management: Easily create, manage, and update your knowledge base through a user-friendly portal, ensuring your chatbot always has the most current information.
  • Active Learning: QnA Maker learns from user interactions and suggests new QnA pairs, continuously improving its accuracy and relevance.
  • Multi-Turn Conversations: Support complex conversations with follow-up prompts, guiding users through multi-step processes and providing comprehensive support.
  • Analytics: Gain insights into user queries, identify gaps in your knowledge base, and measure the chatbot's performance with built-in analytics.

With these features, QnA Maker ensures your chatbot can understand and respond to user needs effectively, providing a seamless and helpful experience.

Frequently Asked Questions

What are the prerequisites for using Kony Visualizer with QnA Maker?
To use Kony Visualizer with QnA Maker, you need an Azure subscription for QnA Maker, Kony Visualizer Enterprise installed, and a basic understanding of chatbot concepts and web services.
Is there a free version of Kony Visualizer?
Yes, Kony Visualizer has a free version, but it's feature-limited. For full capabilities and enterprise support, you'll need a commercial license.
Can QnA Maker handle multiple languages?
Yes, QnA Maker supports multiple languages. You can create separate knowledge bases for each language to provide localized support.

Related Questions

How can I improve the accuracy of my QnA Maker knowledge base?
To enhance your QnA Maker accuracy, regularly update your knowledge base, add diverse phrasings of questions, and use active learning to incorporate suggested QnA pairs. Additionally, use metadata tags for categorization and fine-tune the confidence score threshold for responses.

Most people like













