































Table of Contents
- Key Points
- Getting Started with Android Animation
- Step-by-Step Guide to Creating Animation in FlipaClip
- How to Use FlipaClip Effectively
- FlipaClip Pricing
- Pros and Cons of Using FlipaClip
- Core Features of FlipaClip
- Use Cases for FlipaClip
- FAQ
- Related Questions


Getting Started with Android Animation
Why Animate on Android?
Android devices offer a versatile and accessible platform for animation. With a plethora of apps designed for animation, users can create impressive content directly on their smartphones or tablets. This accessibility eliminates the need for expensive hardware or desktop software, making animation more democratic and available to a wider audience. Key advantages include portability (animate anywhere, anytime), cost-effectiveness (many free or low-cost animation apps), and ease of use (intuitive interfaces designed for touchscreens).
Moreover, Android animation apps support a wide range of styles and techniques, from simple frame-by-frame animations to more sophisticated motion graphics and character animations. This versatility empowers artists and content creators to explore their creativity and produce high-quality animated content, be it for social media, educational purposes, or professional projects.
This guide will walk you through all the essential steps to start your animation journey on Android, providing practical tips and insights to help you create engaging and visually appealing animations.
Choosing the Right Animation App
Selecting the right animation app is the foundation for a successful animation project. Several Android apps cater to different skill levels and animation needs. Among the top contenders is FlipaClip, a popular choice for beginners and experienced animators alike. Other notable apps include:
- Animation Desk: Known for its user-friendly interface and robust set of features.
- RoughAnimator: Preferred by professionals for its powerful drawing tools and frame manipulation capabilities.
- Toontastic 3D: Ideal for creating story-driven animations with 3D characters and environments.
Each app offers unique strengths, so it's worth exploring several options to find one that aligns with your animation goals and preferences. For this guide, we'll focus on FlipaClip because of its intuitive interface and comprehensive features, making it an excellent choice for learning the basics of Android animation.
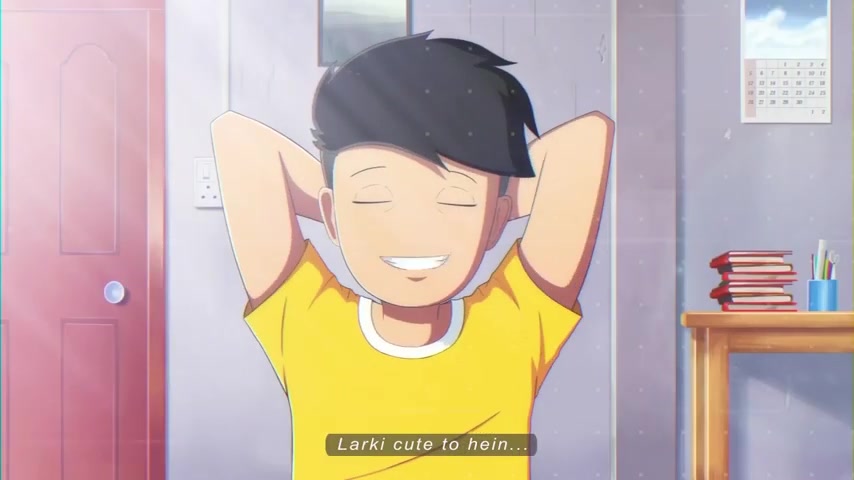
FlipaClip offers an intuitive interface and is perfect for beginners and those who want to learn how to animate. With easy to use tools and a great starting platform, you can draw color shade and do highlights in each of the frames.
Step-by-Step Guide to Creating Animation in FlipaClip
Project Setup
The first step is to set up your animation project in FlipaClip. This involves creating a new project, naming it, and configuring the basic settings like canvas size and frames per Second (FPS). A well-configured project ensures that your animation meets the desired quality and performance standards. This is the animation project name.
-
Open FlipaClip: Launch the FlipaClip app on your Android device.

-
Create a New Project: Tap the plus (+) button to start a new project.
-
Name Your Animation: Enter a descriptive name for your project, such as “My First Animation” or “Character Walk Cycle.” This helps in organizing your projects.
-
Configure Canvas Size: Adjust the canvas size to match your animation's intended resolution. For YouTube videos, 1920x1080 (1080p) is recommended for high quality. If you want a lower resolution choose 1280x720 for 720p.
-
Set Frames Per Second (FPS): Choose an appropriate frame rate. 12 FPS is a good starting point for basic animations, while 24 FPS provides smoother motion for more complex scenes.
-
Background Color: Select a background color for your animation. You can choose a solid color or import an image as a background. FlipaClip includes many different colors , you can also upload your own image to the background.
-
Create Project: Tap “Create Project” to finalize the setup.
These settings form the foundation of your animation, so it’s crucial to get them right before proceeding.
Drawing the Rough Structure
The rough structure forms the skeleton of your animation, providing a basic Outline of the characters and movements. Focus on defining the key poses and actions without getting bogged down in details. This stage is about planning and visualizing the overall flow of your animation. These first steps help to simplify animation creation as you go along.
-
Add a New Layer: Access the layers panel and add a new layer for your rough sketches. Using layers helps keep your work organized and allows for easier editing.
-
Select the Pen Tool: Choose the pen tool and adjust the size and color to your preference. A thin line works well for rough sketches.
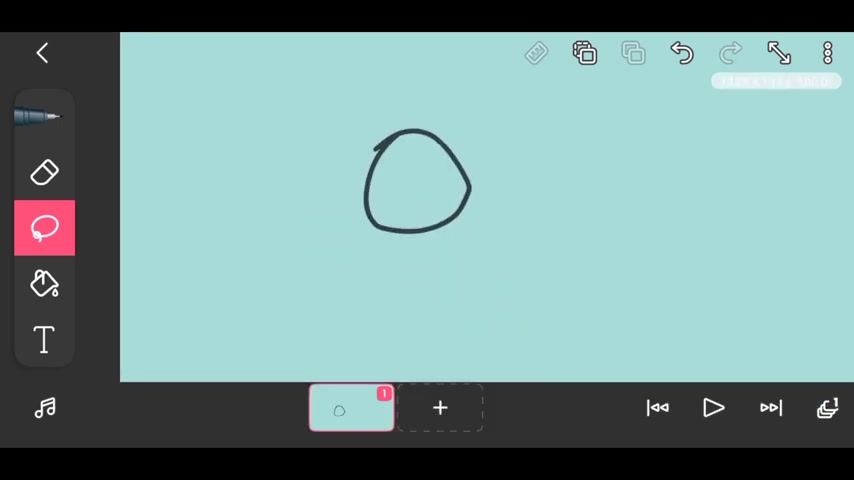
-
Draw Key Poses: Start by drawing the key poses of your character. For example, if you're animating a walk cycle, draw the contact pose, the down pose, the passing pose, and the up pose.
-
Connect the Poses: Fill in the gaps between the key poses with additional frames to create a sense of movement. These in-between frames are less detailed and serve to transition smoothly between the key poses.
-
Use Onion Skinning: Enable onion skinning to see a faint outline of the previous and next frames. This feature helps maintain consistency and fluidity in your animation.
This phase helps you to organize your rough structures to understand the overall flow for the animation. With onion skinning feature you can see how each of the frames are flowing into one another.
Fair Drawing for Cleaner Animations
Once you have a rough structure in place, the next step is to refine your drawings for a cleaner and more polished look. This involves creating a new layer on top of your rough sketches and tracing over the key poses with more detail. Fair drawings add definition and Clarity to your animation. Once you have drawn your key poses, you can use a smaller pixel for outlining. Follow these steps:
-
Add a New Layer: Create a new layer above your rough sketches layer. This is where you’ll do your fair drawings.
-
Reduce Opacity: Lower the opacity of the rough sketches layer so you can easily see your new drawings.
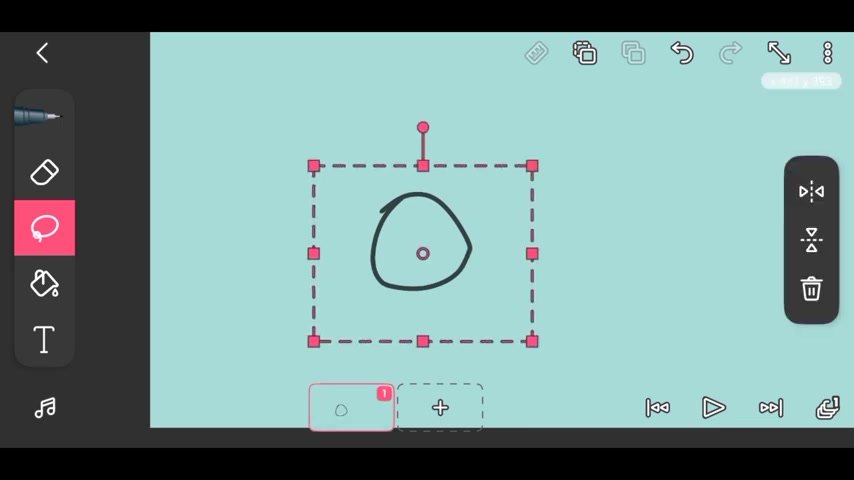
-
Select a Drawing Tool: Use the pen or Pencil tool with a slightly thicker line than your rough sketches. Choose a color that contrasts well with your background.
-
Trace the Key Poses: Carefully Trace over the key poses from your rough sketches, adding details like facial features, clothing, and other important elements.
-
Refine In-Between Frames: Smooth out the transitions between key poses by refining the in-between frames. Pay attention to the flow of movement and make adjustments as needed.
-
Hide or Delete Rough Sketches: Once you’re satisfied with your fair drawings, hide or delete the rough sketches layer to reveal your clean animation.
The purpose of fair drawings is to refine the sketch so you have a crisp animation. At this stage in the animation, focus more on polishing the drawings.
Adding Color
Color can dramatically enhance your animation, bringing characters and scenes to life. FlipaClip offers a variety of coloring tools and techniques to add depth and visual interest to your creations. When adding color, use complementary colors to bring the animation to life. Keep the colors consistent throughout the animation, adding color to enhance visual appeal.
- Create a New Layer: Add a new layer beneath your fair drawings layer. This ensures that your colors don’t overlap your line art.
- Select the Paint Bucket Tool: Choose the paint bucket tool and select a color from the color palette. FlipaClip allows you to create custom color palettes for your projects.
- Fill Closed Shapes: Tap inside closed shapes to fill them with color. Ensure that your line art has no gaps, or the color will bleed into the surrounding areas.
- Use the Brush Tool for Details: For smaller details and areas, use the brush tool to manually apply color. Adjust the brush size and opacity for different effects.
- Add Shading and Highlights: Use darker and lighter shades of your base colors to add shading and highlights. This creates depth and dimension in your animation.
Using consistent colors and being accurate with the tools helps to polish up the drawings. For smaller details use the brush tool, adjust opacity and brush size accordingly.
Adding Shadows and Highlights
Shadows and highlights add depth and dimension to your animation, making it look more dynamic and professional. By simulating the effects of light and shadow, you can create a sense of volume and form. When using highlights and shading, think of the lighting angles and add the shading to the opposite sides of the animation.
- Create a New Layer: Add a new layer above your color layer for shadows and highlights.
- Select a Darker Color: Choose a darker shade of your base color for shadows. Use the brush tool with low opacity.
- Apply Shadows: Identify the areas where shadows would naturally fall based on the light source. Apply the darker color to these areas, such as the underside of a character’s chin or the folds of clothing.
- Select a Lighter Color: Choose a lighter shade of your base color for highlights. Use the brush tool with low opacity.
- Apply Highlights: Apply the lighter color to areas where light would directly hit, such as the top of a character’s head or the edges of objects.
- Adjust Opacity: Fine-tune the opacity of your shadow and highlight layers to achieve the desired effect. Subtle shadows and highlights often look more natural.
The subtle addition of shades and highlight can give a sense of depth and make the drawings look 3D.
Creating an Animation
Now that you have the basics of animation set, here are a few tips on how to create your animation.
- Plan the Animation: Consider the story or actions that will be animated. With good planning, you can create a smooth animation that has a good story.
- Consistent Drawings: For each of the drawings and frames, keep the drawings consistent to have a seamless look.
- Good Transitions: Smooth and seamless transitions of your drawings helps to keep the viewers engaged.
By following the tips, you can create a great animation that provides great enjoyment to your viewers.







Most people like


































Report
Please select a reason for reporting
- 13 Reasons to Switch from Snapchat to Text Messaging
- 7 Powerful Speech to Text Apps to Boost Productivity
- 10 Best Speech to Text Tools for Effortless Transcription
- 13 Free Tools to Easily Transcribe Audio to Text
- 15 Surprising Ways Google's Speech-to-Text Boosts Productivity
- 7 Best Free Online Audio to Text Transcription Tools
- 9 Tips to Transcribe Speech to Text Faster and Better
- 13 Best Speech to Text Software for Windows 10 in 2023
- 7 Tips for Choosing the Best Transcriber for Audio to Text
- 11 Reasons Why Dragon Speech-to-Text Apps are Game-Changers
- 6 Secrets to Enhance Your Speech to Text Transcription
- 6 Brilliant Ways to Boost Productivity with Talk-to-Text on Your MacBook
- 6 Ways Transcription Software Converts Audio to Text
- 8 Tips to Transcribe Speech to Text Like a Pro
- 6 Reasons IBM Watson Speech to Text is a Game-Changer
- 14 Powerful Ways Talk-to-Text Improves Your Workflow
- 12 Top Windows Speech-to-Text Software for Efficient Transcription
- 12 Game-Changing Benefits of Apple's Speech to Text Technology
- 9 Powerful Use Cases for AWS Speech to Text Technology
- 10 Easy Steps to Transcribe YouTube Videos to Text
- transcription audio en texte
- online audio transcription
- free audio file transcription
- free ai audio transcription
- audio transcription service
- audio transcription online free
- audio transcription free online
- audio to transcription software
- audio and transcript
- ai audio transcription free
- voice recording to text converter
- translate voice recording to text
- record voice to text
- audio recording to text converter
- voice recording and transcription
- chatgpt voice to text
- gmail voice to text
- speech to text reader
- speech to text ai free
- speech to talk
- Revolutionizing Storytelling: From Novels to Screenplays with AI
- Create Engaging Animated Explainer Videos with a Free AI Tool
- Stop Multi-Subscribing: Benchmark Top AI Visual Models in One Canvas
- Best Seedance 2.5 API Provider: Every Price on the Market, Checked at Source
- AI OnlyFans: How to Generate $30,000/Month (Legally)
- Transform Your Script into an Engaging Video with AI Video Maker!
- AI Marketing Automation: A Comprehensive Guide for Small Businesses
- Midjourney Alternative for Anime Art Creators: Why PixAI May Be Better for Character Workflows
- 10 Things Most People Get Wrong About AI Image Search
- AI Girlfriend Apps: Top Choices Redefining Relationships 2025
- Top 4 Face Swap Generator Tools to Transform Your Visual Content
- Master Canva's Video Background Remover with 5 Essential Tips
- Mastering Microsoft Stream: Video Management Tips & Tricks
- AI Video Generation: Extend AI Videos for Free
- Master Loom: Create and Share Professional Videos with AI
- Create Captivating AI News Videos: Step-by-Step Guide
- Create Your Own AI News Channel with AI-Powered News Video Generator and AI Lip Sync
- Unleash the Power of Heygen AI: Create Unlimited Videos for Free!
- Kapwing Smart Cut: AI Video Editing for Creators & Marketers
- Upscale Video Quality with UniFab Upscaler AI: A Complete Guide

Copyright ©2026 toolify