































Table of Contents
- Key Points
- Understanding the Power of AI in Code Editing
- MNIST Classifier Example: A Practical Application of Cursor
- Getting Started with Cursor: A Step-by-Step Guide
- Cursor Pricing: Free Version and Paid Plans
- Weighing the Benefits: Pros and Cons of Using Cursor
- Exploring Cursor's Core Features: An AI-Driven Coding Experience
- Frequently Asked Questions About Cursor
- Related Questions


Understanding the Power of AI in Code Editing
The Rise of AI-Powered Development Tools
The integration of Artificial Intelligence (AI) into development tools marks a significant shift in how software is created and maintained. AI-powered code editors are no longer a futuristic concept but a practical reality, offering capabilities that go beyond traditional code editing functionalities. These tools leverage machine learning models to understand code context, predict developer intent, and automate repetitive tasks, allowing developers to focus on higher-level problem-solving and creativity.
The convergence of AI and code editing brings about several advantages:
- Increased productivity: AI automates mundane tasks, allowing developers to write code faster and more efficiently.
- Reduced Errors: Intelligent error detection and debugging features minimize the likelihood of introducing bugs into the codebase.
- Improved Code Quality: AI-driven suggestions and refactoring tools help developers write cleaner, more maintainable code.
- Enhanced Collaboration: Real-time collaboration features with AI assistance facilitate seamless teamwork and knowledge sharing.
The impact of AI on code editing is not merely incremental; it represents a paradigm shift that promises to reshape the future of software development.
Introducing Cursor: An AI-Enhanced Code Editor
Cursor
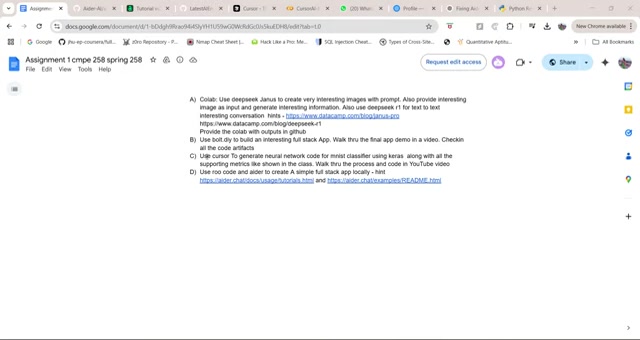
is an AI-first code editor designed to take advantage of AI's code generation capabilities. Built on top of Visual Studio Code, Cursor aims to enhance developer productivity through AI-powered functionalities. The goal is to streamline coding workflows by utilizing AI models to automate routine tasks, offer intelligent code suggestions, and assist with debugging. Installing Cursor is the first step and you can download directly from the website, which is relatively straightforward to do. The premise is to use advanced language models and AI code generation to accelerate your output and improve your coding experience. Cursor supports many programming languages like Python, JavaScript, C++, and Go. The integration with Visual Studio Code makes it easy for developers who are already familiar with that environment to switch over and start working with AI features immediately.
The key differentiators of Cursor include:
- AI-Powered Code Generation: Utilizes advanced AI models to generate code snippets, complete functions, and even write entire programs based on simple prompts.
- Intelligent Code Completion: Provides context-aware code suggestions and completions, reducing typing and improving code accuracy.
- Smart Error Detection and Debugging: Identifies potential errors and bugs in real-time and offers intelligent debugging assistance.
- Seamless Integration: Builds upon the Visual Studio Code platform, ensuring compatibility with existing extensions and workflows.
With its robust AI capabilities and user-friendly design, Cursor is poised to become an indispensable tool for developers looking to elevate their coding Game.
MNIST Classifier Example: A Practical Application of Cursor
Generating a Neural Network Classifier with Cursor
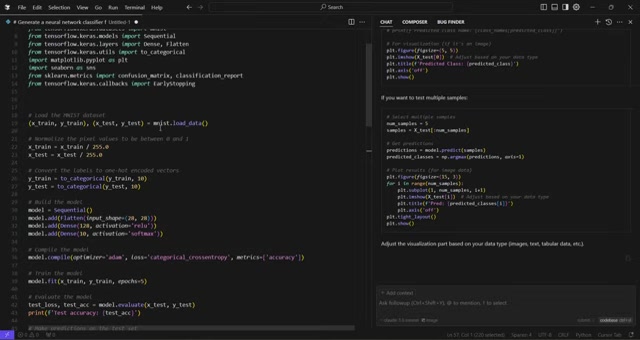
One practical application of Cursor is to generate a neural network classifier for the MNIST dataset, using Keras. MNIST
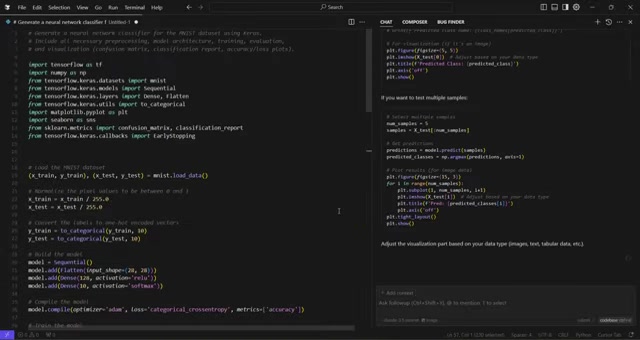
is a widely used dataset in machine learning for handwritten digit recognition. Using Cursor, we can quickly generate the code needed to build, train, and evaluate a neural network model for this task.
The process involves the following steps:
- Prompting Cursor: Provide a Prompt to Cursor describing the task: "Generate a neural network classifier for the MNIST dataset using Keras. Include all necessary preprocessing, model architecture, training, evaluation, and visualization (confusion matrix, classification report, accuracy/loss plots)."
- Reviewing the Generated Code: Review the code generated by Cursor and make any necessary adjustments.
- Running the Code: Execute the code in Cursor or copy it to a Jupyter Notebook for further experimentation.
Here’s a simplified example of the generated code:
import tensorflow as tf
from tensorflow.keras.datasets import mnist
from tensorflow.keras.models import Sequential
from tensorflow.keras.layers import Dense, Flatten
import matplotlib.pyplot as plt

# Load the MNIST dataset
(x_train, y_train), (x_test, y_test) = mnist.load_data()

# Normalize pixel values
x_train = x_train / 255.0
x_test = x_test / 255.0

# Build the model
model = Sequential([
    Flatten(input_shape=(28, 28)),
    Dense(128, activation='relu'),
    Dense(10, activation='softmax')
])

# Compile the model
model.compile(optimizer='adam',
              loss='sparse_categorical_crossentropy',
              metrics=['accuracy'])

# Train the model
model.fit(x_train, y_train, epochs=5)

# Evaluate the model
test_loss, test_acc = model.evaluate(x_test, y_test)
print('Test accuracy:', test_acc)

# Make predictions
predictions = model.predict(x_test)

# Visualize results
# (Code for plotting confusion matrix, classification report, etc.)

plt.show()
By leveraging Cursor’s AI code generation, developers can quickly create and deploy machine learning models for various tasks, significantly accelerating the development process.
Analyzing the MNIST Classifier Code Generated by Cursor
Let's dive deeper into the components of the neural network classifier code for MNIST
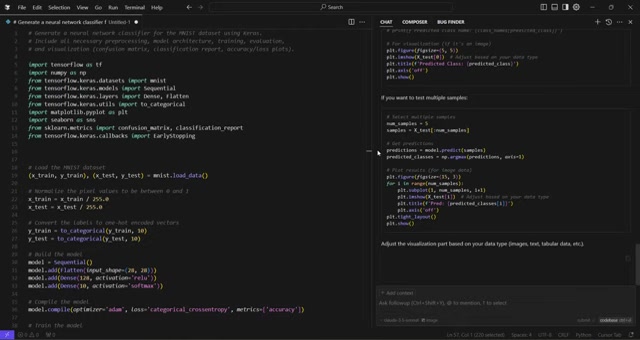
that Cursor intelligently generates. Cursor provides a structured and complete implementation with just a prompt, dramatically simplifying the model development process.
-
Import Necessary Libraries:
The generated code begins by importing the necessary libraries for building and training the neural network. This includes TensorFlow and Keras, which provide the framework for creating the model, and Matplotlib, which is used for plotting the results.
import tensorflow as tf from tensorflow.keras.datasets import mnist from tensorflow.keras.models import Sequential from tensorflow.keras.layers import Dense, Flatten import matplotlib.pyplot as plt -
Load and Preprocess the MNIST Dataset:
The MNIST dataset is loaded, and the pixel values are normalized to be between 0 and 1. This preprocessing step ensures that the model trains more effectively.
# Load the MNIST dataset (x_train, y_train), (x_test, y_test) = mnist.load_data() # Normalize pixel values x_train = x_train / 255.0 x_test = x_test / 255.0 -
Define the Model Architecture:
A sequential model is defined with three layers. The first layer flattens the 28x28 images into a 1D array. The second layer is a dense layer with 128 units and ReLU activation. The third layer is a dense layer with 10 units (one for each digit) and softmax activation.
# Build the model model = Sequential([ Flatten(input_shape=(28, 28)), Dense(128, activation='relu'), Dense(10, activation='softmax') ]) -
Compile the Model:
The model is compiled with the Adam optimizer, sparse categorical crossentropy loss, and accuracy metrics.
# Compile the model model.compile(optimizer='adam', loss='sparse_categorical_crossentropy', metrics=['accuracy']) -
Train the Model:
The model is trained using the training data for 5 epochs.
# Train the model model.fit(x_train, y_train, epochs=5) -
Evaluate the Model:
The model is evaluated using the test data, and the test accuracy is printed.
# Evaluate the model
test_loss, test_acc = model.evaluate(x_test, y_test)
print('Test accuracy:', test_acc)
By providing this complete code structure, Cursor makes it easy for developers to get started with machine learning projects, even if they have limited experience with neural networks.
Addressing Errors and Improving the Code
While Cursor's AI-generated code is generally accurate, you may encounter errors or want to improve the code to better suit your needs. Cursor's chat interface
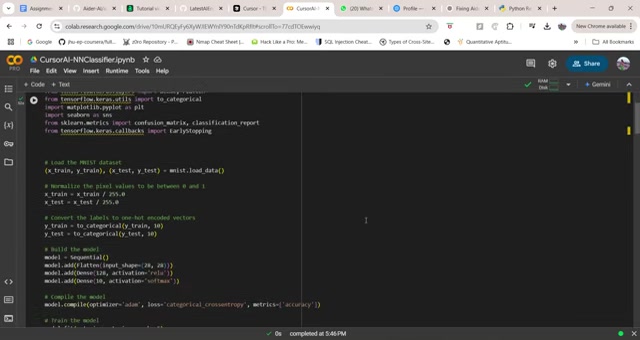
can be used to fix some of these errors. In that case, Cursor can provide suggestions and help guide you through the process.
Common issues that may arise include:
- Configuration errors
- Metric format
- Compatibility issues
However, Cursor provides multiple prompts for these issues. It will ask you:
- If you are performing multi-class classification.
- If you are performing multi-label classification
- You can print the shapes and types of your labels
# Make predictions on the test set
predictions = model.predict(x_test)

# Convert predictions to class labels
predicted_labels = np.argmax(predictions, axis=1)

# Generate a confusion matrix
conf_matrix = confusion_matrix(y_test, predicted_labels)
print(conf_matrix)
Here is a summary of how to fix errors and customize your code.
| Task | Description |
|---|---|
| Debug Errors | Use Cursor's intelligent error detection to identify and fix issues. |
| Customize the Model | Modify the model architecture to improve performance (e.g., add more layers, change activation functions). |
| Fine-Tune Hyperparameters | Experiment with different values for hyperparameters such as learning rate, batch size, and number of epochs. |
| Add Validation | To use the training history. |
By using cursor, you can quickly generate robust and accurate machine learning code.
Getting Started with Cursor: A Step-by-Step Guide
Step 1: Installing Cursor
The first step to leveraging the power of Cursor is to download and install the editor. You can find the installer on the official Cursor website.
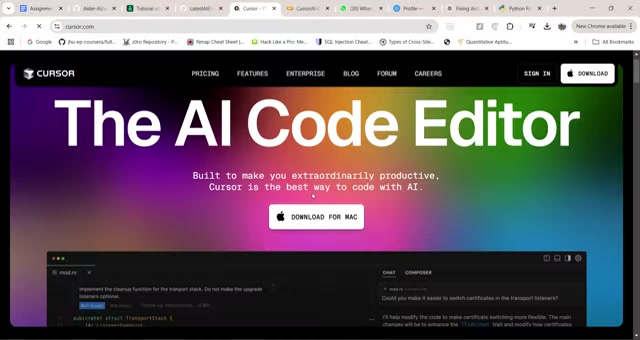
Make sure to select the appropriate version for your operating system (Windows, macOS, or Linux).
- Visit the Cursor Website: Open your web browser and go to the Cursor.sh.
- Download the Installer: Click on the download button corresponding to your operating system.
- Run the Installer: Locate the downloaded file and run the installer, following the on-screen instructions.
Once the installation is complete, launch Cursor to begin your AI-powered coding journey.
Step 2: Setting Up Your Project
After installing Cursor, the next step is to set up your development project. You can either open an existing project or create a new one.
-
Opening an Existing Project:
- Launch Cursor: Open the Cursor application.
- Open Folder: Click on “File” > “Open Folder” and select the directory containing your project files.
-
Creating a New Project:
- Launch Cursor: Open the Cursor application.
- New Folder: Click on “File” > “New Folder” to create a new directory for your project.
- Open Folder: Click on “File” > “Open Folder” and select the newly created directory.
Once your project is set up, you can start exploring Cursor’s AI features.
Step 3: Utilizing AI Code Generation
To use Cursor’s AI code generation feature
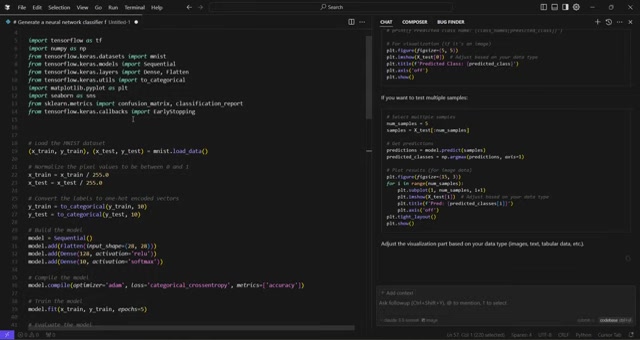
, you need to provide a prompt that describes what you want the code to do. Cursor will then generate code snippets based on your prompt.
- Open a Code File: Create or open a code file in Cursor.
- Enter a Prompt: Type a comment in the code file describing what you want the code to do (e.g., “// function to calculate the factorial of a number”).
- Generate Code: Use the shortcut key to trigger the AI code generation (typically Ctrl+Shift+P or Cmd+Shift+P) and select “Cursor: Generate Code”.
- Review and Accept: Review the generated code and accept it if it meets your requirements.
For example, to generate a function to calculate the factorial of a number in Python, you would type:
# function to calculate the factorial of a numberCursor will generate the following:
def factorial(n):
    if n == 0:
        return 1
    else:
        return n * factorial(n-1)
Use the generated code as a starting point and modify it as needed to fit your project.
Step 4: Debugging with AI Assistance
When you encounter an error in your code, Cursor can provide intelligent debugging assistance
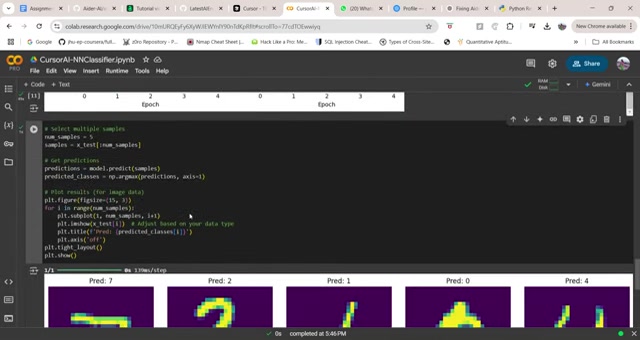
.
- Identify the Error: Cursor will highlight the line of code containing the error.
- View Suggestions: Hover over the highlighted line to see suggestions from the AI model.
- Apply Fixes: Apply the suggested fixes or use them as a guide to debug the code.
For example, if you have a syntax error, Cursor will show you the correct syntax and explain why the original code was incorrect.
print(Hello, World!) # SyntaxError: invalid syntaxCursor will suggest:
print("Hello, World!") # Correct syntaxBy providing immediate feedback and suggestions, Cursor helps you resolve errors quickly and efficiently.
Exploring Cursor's Core Features: An AI-Driven Coding Experience
AI-Powered Code Generation
Cursor's AI-powered code generation is a standout feature that allows developers to write code with minimal effort
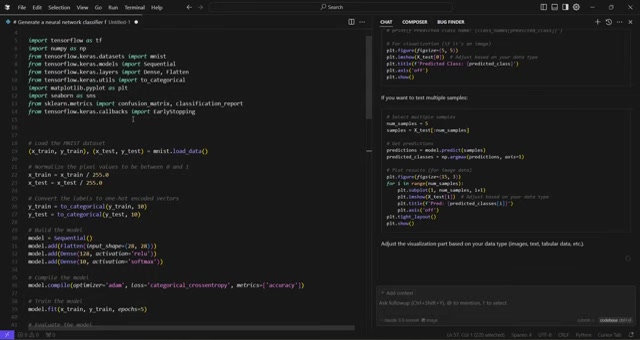
. By simply providing a prompt or a high-level description of what you want the code to do, Cursor can generate code snippets, complete functions, or even construct entire programs.
This feature is particularly useful for:
- Rapid Prototyping: Quickly generate initial code structures and test out ideas without having to write everything from scratch.
- Automating Repetitive Tasks: Automatically generate code for common patterns and routines, freeing up developers to focus on more complex problems.
- Learning New Languages and Frameworks: Generate code examples and templates to quickly get up to speed with unfamiliar technologies.
For instance, if you want to create a function that sorts an array of numbers, you can simply type in the prompt, “sort an array of numbers in ascending order,” and Cursor will generate the corresponding code for you. The AI model takes into account the context of your project and the programming language you’re using to provide accurate and relevant code.
Here’s a simple example using Python:
def sort_array(arr):
    return sorted(arr)
Cursor's AI code generation is a valuable tool that can significantly reduce the time and effort required to write code, making it an essential feature for modern developers.
Intelligent Code Completion
Intelligent Code Completion
in Cursor goes beyond traditional code completion by providing context-aware suggestions that are tailored to your project. The AI model analyzes the code you’ve already written, the libraries you’re using, and the overall structure of your project to offer highly relevant code completions.
This feature helps developers by:
- Reducing Typing: Minimize the amount of manual typing needed to write code.
- Improving Code Accuracy: Ensuring that code suggestions are syntactically correct and semantically appropriate.
- Discovering New APIs and Methods: Highlighting available methods and functions that developers might not be aware of.
For example, if you are working with a data frame in Python using pandas, Cursor can suggest available methods for data manipulation based on the context of your code. The code completion feature extends to providing parameters and documentation, making it easier to work with unfamiliar APIs.
import pandas as pd

data = {'col1': [1, 2], 'col2': [3, 4]}
df = pd.DataFrame(data)

df. # Cursor suggests methods like 'head', 'describe', 'fillna'
Cursor's Intelligent Code Completion significantly enhances coding speed and accuracy, providing a seamless and efficient development experience.
Smart Error Detection and Debugging
Identifying and fixing errors can often be the most time-consuming part of software development. Cursor's Smart Error Detection and Debugging feature addresses this pain point by identifying potential errors and bugs in real-time and offering intelligent debugging assistance. The AI model analyzes your code for common mistakes, such as syntax errors, type mismatches, and logical flaws, and provides suggestions on how to fix them.
The feature aids developers by:
- Detecting Errors Early: Identifying issues before they lead to runtime problems.
- Providing Contextual Suggestions: Offering specific solutions tailored to the identified problem.
- Simplifying Debugging: Making the debugging process more intuitive and less frustrating.
For instance, if you are using the wrong data type in a function call, Cursor will flag the error and suggest the correct type. Similarly, if you have a syntax error, the editor will highlight the problematic line and offer corrections.
In Python, a common error is using the wrong index for a list:
arr = [1, 2, 3]
print(arr[3]) # Cursor flags 'IndexError: list index out of range'
Cursor’s Smart Error Detection and Debugging allows developers to catch and resolve issues quickly, leading to more robust and reliable code.
Seamless Integration with VS Code
Cursor is built on top of the popular Visual Studio Code platform, which means it seamlessly integrates with existing VS Code extensions, settings, and workflows. Developers who are already familiar with VS Code can easily switch to Cursor without having to learn a new editor from scratch. This integration also ensures compatibility with a wide range of programming languages, frameworks, and tools.
The benefits of seamless integration include:
- Easy Transition: Minimal learning curve for existing VS Code users.
- Extension Compatibility: Access to thousands of VS Code extensions to enhance functionality.
- Customization: Ability to customize the editor to suit your preferences and workflows.
Here's how Cursor can be utilized along with VS Code extensions:
- Install Cursor: Download and install Cursor from the official website.
- Open Existing Projects: Open any existing VS Code projects in Cursor.
- Use Existing Extensions: Continue using favorite VS Code extensions without any compatibility issues.
The integration with Visual Studio Code makes Cursor a versatile and powerful tool that can be seamlessly incorporated into any development environment.






Most people like

































Report
Please select a reason for reporting
- 13 Reasons to Switch from Snapchat to Text Messaging
- 7 Powerful Speech to Text Apps to Boost Productivity
- 10 Best Speech to Text Tools for Effortless Transcription
- 13 Free Tools to Easily Transcribe Audio to Text
- 15 Surprising Ways Google's Speech-to-Text Boosts Productivity
- 7 Best Free Online Audio to Text Transcription Tools
- 9 Tips to Transcribe Speech to Text Faster and Better
- 13 Best Speech to Text Software for Windows 10 in 2023
- 7 Tips for Choosing the Best Transcriber for Audio to Text
- 11 Reasons Why Dragon Speech-to-Text Apps are Game-Changers
- 6 Secrets to Enhance Your Speech to Text Transcription
- 6 Brilliant Ways to Boost Productivity with Talk-to-Text on Your MacBook
- 6 Ways Transcription Software Converts Audio to Text
- 8 Tips to Transcribe Speech to Text Like a Pro
- 6 Reasons IBM Watson Speech to Text is a Game-Changer
- 14 Powerful Ways Talk-to-Text Improves Your Workflow
- 12 Top Windows Speech-to-Text Software for Efficient Transcription
- 12 Game-Changing Benefits of Apple's Speech to Text Technology
- 9 Powerful Use Cases for AWS Speech to Text Technology
- 10 Easy Steps to Transcribe YouTube Videos to Text
- transcription audio en texte
- online audio transcription
- free audio file transcription
- free ai audio transcription
- audio transcription service
- audio transcription online free
- audio transcription free online
- audio to transcription software
- audio and transcript
- ai audio transcription free
- voice recording to text converter
- translate voice recording to text
- record voice to text
- audio recording to text converter
- voice recording and transcription
- chatgpt voice to text
- gmail voice to text
- speech to text reader
- speech to text ai free
- speech to talk
- How to Use AI Tools to Find Internal Linking Opportunities Across a Business Website
- Discover Your Perfect Haircut with AI Hairstyle Apps
- Free Reputation Calculator Tools: How They're Adapting to Score AI Visibility, Not Just Rankings
- Design Professional Flyers for Free on Your Phone
- Best Free Flyer Maker Apps for Android: Design Like a Pro
- How to Know If Your Business Is Ready for an AI Customer Service Agent
- Revolutionizing Storytelling: From Novels to Screenplays with AI
- Create Engaging Animated Explainer Videos with a Free AI Tool
- Stop Multi-Subscribing: Benchmark Top AI Visual Models in One Canvas
- Best Seedance 2.5 API Provider: Every Price on the Market, Checked at Source
- Top AI Social Media Management Tools: Automate Your Content Strategy
- Free AI Text to Video Generator: Create Stunning Videos from Text
- Discover 17 ChatGPT Alternatives: A Comprehensive Comparison
- Character.AI vs. Janitor AI: Which AI Chat Platform Reigns Supreme?
- Top Virtual Assistant Companies in 2026: Reviews, Pricing, and Plans Compared
- Unveiling FaceCheck.ID: Revolutionizing Reverse Image Searches with AI
- 11 Best AI Dialers in 2026: Features, Pricing, Pros and Cons
- How I Direct Consistent AI Clips: A Hands-On Guide to Multi-Model Generation
- A Realistic Review of the Photo Generator Image Tool
- Playwright MCP Server: Automated Web Testing with Agent Mode

Copyright ©2026 toolify