































Table of Contents
- Key Points
- Introduction to GitHub Copilot CLI
- Supported Platforms and Prerequisites
- How to Use GitHub Copilot CLI
- Understanding GitHub Copilot CLI Pricing
- Pros and Cons of GitHub Copilot CLI
- Frequently Asked Questions About GitHub Copilot CLI
- Related Questions


Introduction to GitHub Copilot CLI
What is GitHub Copilot CLI?
GitHub Copilot CLI is a groundbreaking tool designed to bring the power of AI directly into your terminal. This tool, developed by GitHub, acts as an AI coding agent that runs within your command-line interface, providing real-time assistance for various coding tasks. It's like having an AI collaborator right at your fingertips, ready to help you write, test, and debug code with unprecedented speed and accuracy.
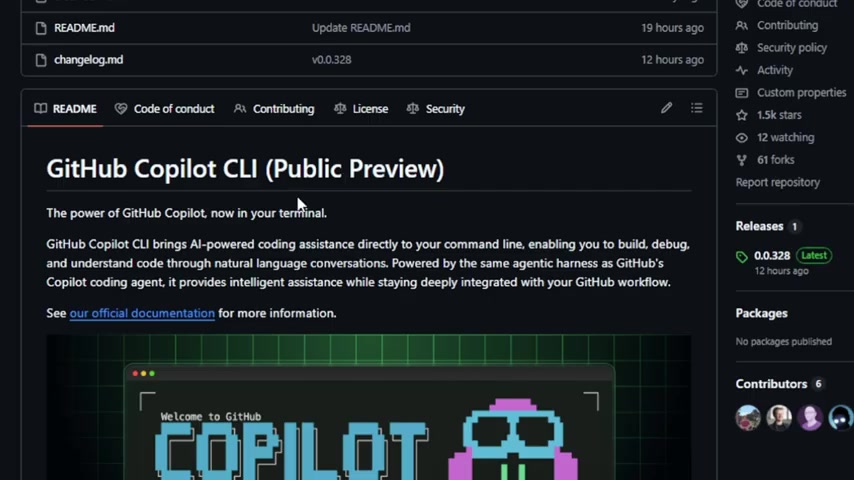
The primary goal of GitHub Copilot CLI is to streamline the development process by making coding more intuitive and less time-consuming. By leveraging the capabilities of AI, this tool assists developers in understanding code, writing new code, debugging existing code, and performing tests, all through natural language interactions. This is particularly useful for developers who spend a significant portion of their time in the terminal, as it eliminates the need to switch between different environments and tools.
GitHub Copilot CLI represents a significant leap forward in AI-assisted coding. It empowers developers to focus on the creative aspects of their work, while AI handles many of the routine and repetitive tasks. As the software development landscape continues to evolve, tools like GitHub Copilot CLI will become essential for staying competitive and maximizing productivity.
Key Benefits of Using GitHub Copilot CLI:
- Increased Productivity: Automate repetitive coding tasks and streamline your workflow.
- Improved Code Quality: Leverage AI to identify and fix bugs, ensuring higher quality code.
- Enhanced Learning: Understand complex code structures through natural language explanations.
- Seamless Integration: Work directly within your terminal, eliminating context switching.
Why Use an AI Coding Agent in Your Terminal?
The shift towards using AI coding agents directly in the terminal marks a significant advancement in software development practices. Traditionally, developers have relied on IDEs (Integrated Development Environments) and external tools for coding assistance. However, integrating AI directly into the terminal offers several compelling advantages.
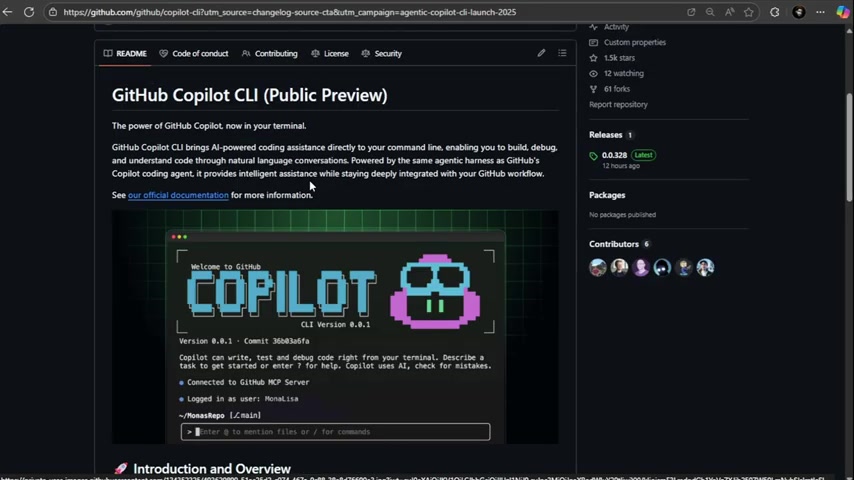
One of the primary benefits is enhanced efficiency. By bringing AI capabilities into the terminal, developers can avoid the context switching that often hampers productivity. Instead of moving between the terminal for command-line tasks and a separate IDE for coding assistance, developers can access AI-powered support without leaving their primary workspace.
Furthermore, an AI coding agent in the terminal can significantly improve code understanding. When faced with unfamiliar code or complex algorithms, developers can use natural language queries to understand the code's functionality and structure. This feature is particularly useful for debugging and maintenance tasks, where a deep understanding of the codebase is essential. The ability to quickly grasp the intent and operation of code reduces the time spent deciphering complex logic and accelerates the problem-solving process.
AI-driven assistance also plays a crucial role in reducing errors and improving code quality. By leveraging AI to identify potential bugs and vulnerabilities, developers can proactively address issues before they escalate into larger problems. The ability to test and debug code directly in the terminal, with AI providing real-time feedback, allows for more thorough and efficient quality assurance. This not only saves time but also leads to more robust and reliable software.
In summary, integrating AI coding agents into the terminal provides a more streamlined, efficient, and insightful coding experience. It empowers developers to write better code, faster, while minimizing distractions and maximizing productivity. As AI technology continues to advance, the adoption of AI-powered terminal tools is set to become a standard practice in modern software development.
Supported Platforms and Prerequisites
Supported Platforms
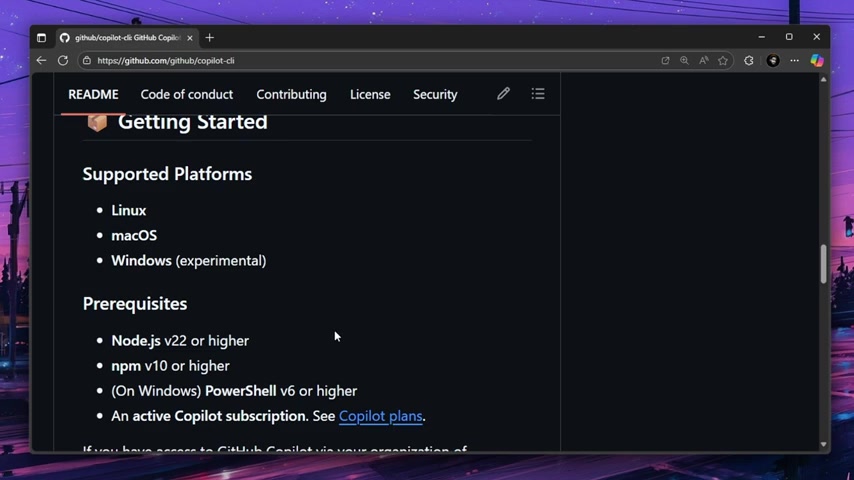
GitHub Copilot CLI aims to be versatile, it supports multiple platforms. Here's a list of the operating systems on which you can run GitHub Copilot CLI:
- Linux: A widely-used open-source operating system known for its flexibility and robustness.
- macOS: Apple's operating system, renowned for its user-friendly interface and Developer Tools.
- Windows (Experimental): Microsoft's operating system, with ongoing experimental support.
Users may need to consider running Copilot inside Windows Subsystem for Linux (WSL) for the best experience and to avoid potential issues.
Given the experimental nature of Windows support, users are encouraged to report any issues they encounter to help improve stability and functionality. Running Copilot inside WSL can mitigate many of these issues, providing a more consistent and reliable experience.
Prerequisites
Before installing and using GitHub Copilot CLI, ensure that your system meets the following prerequisites:
- Node.js v22 or higher: Node.js is a JavaScript runtime built on Chrome's V8 JavaScript engine. It is essential for running JavaScript-based command-line tools. Make sure you have Node.js version 22 or higher installed on your system. You can download it from the official Node.js website and follow the installation instructions for your operating system.
- npm v10 or higher: npm (Node Package Manager) is the default package manager for Node.js. It is used to install, manage, and update JavaScript packages. Ensure that you have npm version 10 or higher installed. npm is typically included with Node.js, so installing Node.js should automatically provide you with npm. You can check your npm version by running
npm -vin your terminal. - (On Windows) PowerShell v6 or higher: PowerShell is a command-line shell and scripting language developed by Microsoft. On Windows, you need to have PowerShell version 6 or higher installed to use GitHub Copilot CLI. PowerShell comes pre-installed on most modern Windows systems, but you can check and update it by following the instructions on the Microsoft website.
- Active Copilot Subscription: An active subscription to GitHub Copilot is required to use the CLI. See Copilot plans for details.
Meeting these prerequisites ensures that you have the necessary tools and environment to successfully install and use GitHub Copilot CLI. Make sure to verify each requirement before proceeding with the installation to avoid potential compatibility issues.
Installation Process
Installing GitHub Copilot CLI is straightforward, primarily utilizing npm (Node Package Manager). Here’s a step-by-step guide:
-
Open Your Terminal: Launch your preferred terminal application. This could be Command Prompt, PowerShell (on Windows), or Terminal (on macOS and Linux).
-
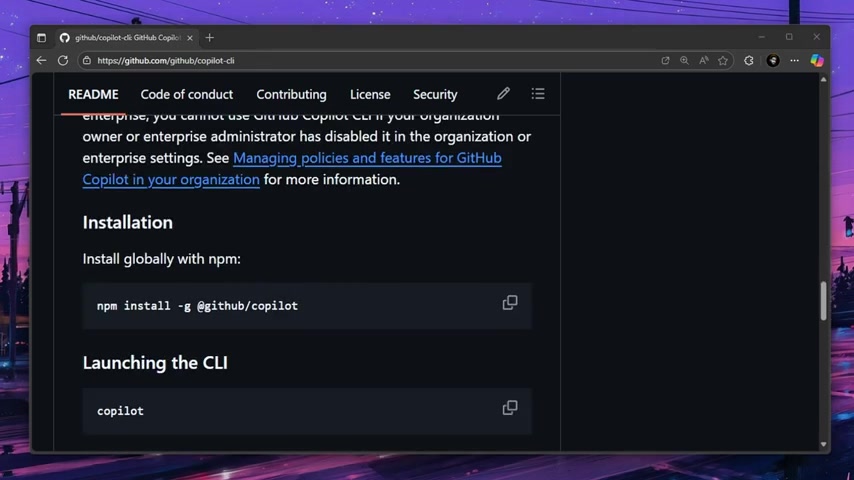
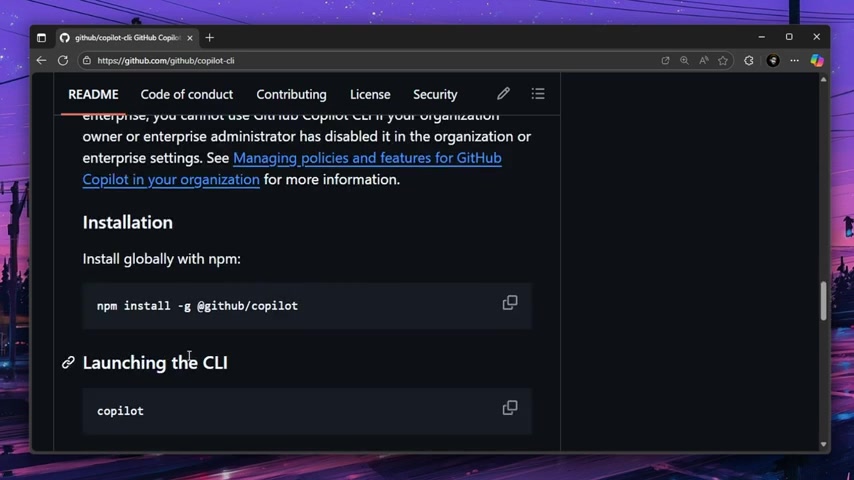
Install GitHub Copilot CLI Globally: Use the following command to install GitHub Copilot CLI globally. This allows you to access the
copilotcommand from any directory in your terminal:npm install -g @github/copilot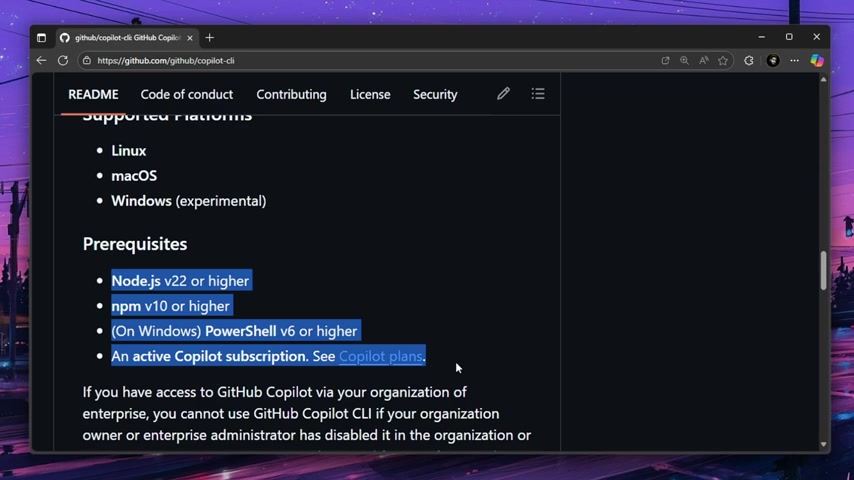
This command instructs npm to download and install the GitHub Copilot CLI package globally on your system. The
-gflag ensures that the package is installed in a global directory, making it accessible system-wide. -
Verify Installation: After the installation is complete, verify that GitHub Copilot CLI has been successfully installed by running the following command:
copilot --versionThis command displays the version number of GitHub Copilot CLI, confirming that the tool is installed and functioning correctly. If the version number is displayed, you have successfully installed GitHub Copilot CLI.
How to Use GitHub Copilot CLI
Launching and Interacting with Copilot CLI
Once GitHub Copilot CLI is installed, using it is designed to be intuitive. Here’s how you can launch and interact with the tool:
-
Open Your Terminal: Begin by opening your terminal or command-line interface. This is where you will interact with GitHub Copilot CLI.
-
Launch Copilot CLI: To start using GitHub Copilot CLI, simply type
copilotand press Enter: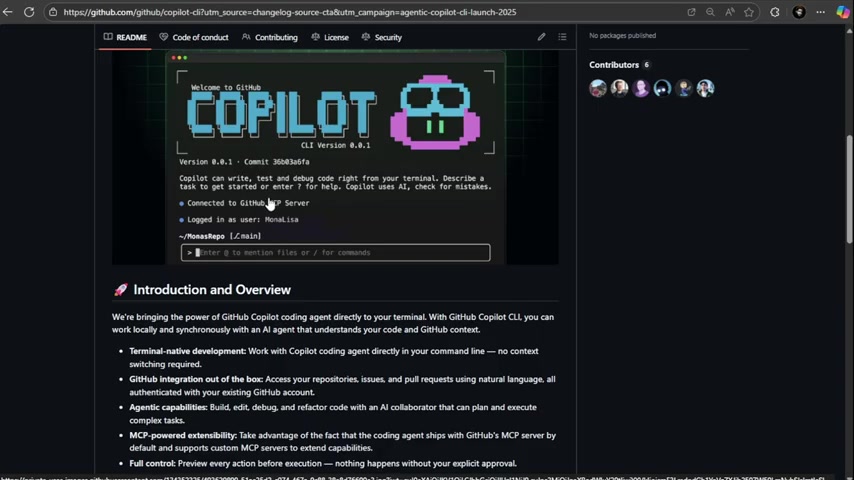
copilotThis command launches the CLI and initiates the AI coding agent. Once running, GitHub Copilot CLI connects to the GitHub MCP Server and authenticates your account. This connection is essential for accessing the AI-powered coding assistance features. After launching the CLI, you will see a prompt where you can enter commands or ask questions. The CLI typically displays a welcome message and indicates that it is ready to assist you with your coding tasks.
-
Enter Commands or Questions: After Copilot CLI is launched, you can interact with it by entering commands or questions at the prompt. GitHub Copilot CLI uses natural language processing to understand your queries, making it easy to ask for help with coding tasks, debugging, testing, and more.
Build me a simple Flappy Bird clone using only HTML, CSS, and JavaScript. -
View the Output: As soon as you hit Enter to run it, GitHub Copilot CLI processes your prompt and starts working towards fulfilling your request. This processing involves creating the necessary files and directories in your current working directory.
-
Approve and Run: As the files are created, GitHub Copilot CLI presents the code directly in the terminal, prompting you to approve each file operation, granting you complete control over the changes made. If satisfied, approve to proceed, or reject to halt the action and revise your approach.
-
Engage and Refine: Review each component for correctness, offering refinement cues when needed. This step ensures the generated Game aligns with your anticipations, transforming you from a mere user to an active co-creator in the development journey.
Building a Simple Flappy Bird Clone
Let’s walk through a practical example to illustrate how GitHub Copilot CLI can be used to build a simple game. In this example, we’ll create a Flappy Bird clone using HTML, CSS, and JavaScript.
-
Launch Copilot CLI: Open your terminal and enter the command:
copilot -
Enter the Prompt: At the prompt, provide the following instruction:
Build me a simple Flappy Bird clone using only HTML, CSS, and JavaScript. The bird should jump when I press the spacebar, pipes should scroll across the screen, and the score should increase when I pass pipes. Keep the code clean and easy to understand. -
Approve File Operations: GitHub Copilot CLI begins generating the necessary files (index.html, style.css, and script.js) and prompts you to approve each operation. Carefully review the proposed changes to ensure they align with your expectations.
You can approve each file by entering '1' in the terminal and pressing Enter.
-
Run the Game: After all files have been created and approved, GitHub Copilot CLI provides instructions on how to run the game. Typically, this involves opening the
index.htmlfile in your web browser. To do this you can use the command:Start-Process index.htmlThis command automatically opens the Flappy Bird clone in your default web browser. You can then play the game directly in your browser by pressing the spacebar to make the bird jump and navigating it through the scrolling pipes.
-
Review and Refine: As you play the game, you may notice aspects that you want to refine or improve. You can provide additional prompts to GitHub Copilot CLI to make changes to the code. For example, you can ask it to adjust the bird's jumping height, change the speed of the scrolling pipes, or add additional features to the game.
Creating a Personal Portfolio Website
In this example, we'll use GitHub Copilot CLI to build a personal portfolio website with a neon-glow design, switchable dark/light theme, and smooth animations. The website will have a hero section, an about me section, a skills section, a projects section, and a contact form. We'll use only HTML, CSS, and JavaScript, without any frameworks.
-
Launch Copilot CLI: Open your terminal and enter the command:
copilot -
Enter the Prompt: At the prompt, provide the following instruction:
Build me a personal portfolio website with a neon-glow design, switchable dark/light theme, and smooth animations. It should have a hero section, about me, skills, projects, and contact form. Use only HTML, CSS, and JavaScript-no frameworks. -
Approve File Operations: GitHub Copilot CLI begins generating the necessary files (index.html, style.css, and script.js) and prompts you to approve each operation. Carefully review the proposed changes to ensure they align with your expectations. You can approve each file by entering '1' in the terminal and pressing Enter.
-
Run the Website: After all files have been created and approved, GitHub Copilot CLI provides instructions on how to run the website. Typically, this involves opening the
index.htmlfile in your web browser. To do this you can use the command:Start-Process index.htmlThis command automatically opens the personal portfolio website in your default web browser. You can then view the website directly in your browser by clicking on each menu .








Most people like































Report
Please select a reason for reporting
- 13 Reasons to Switch from Snapchat to Text Messaging
- 7 Powerful Speech to Text Apps to Boost Productivity
- 10 Best Speech to Text Tools for Effortless Transcription
- 13 Free Tools to Easily Transcribe Audio to Text
- 15 Surprising Ways Google's Speech-to-Text Boosts Productivity
- 7 Best Free Online Audio to Text Transcription Tools
- 9 Tips to Transcribe Speech to Text Faster and Better
- 13 Best Speech to Text Software for Windows 10 in 2023
- 7 Tips for Choosing the Best Transcriber for Audio to Text
- 11 Reasons Why Dragon Speech-to-Text Apps are Game-Changers
- 6 Secrets to Enhance Your Speech to Text Transcription
- 6 Brilliant Ways to Boost Productivity with Talk-to-Text on Your MacBook
- 6 Ways Transcription Software Converts Audio to Text
- 8 Tips to Transcribe Speech to Text Like a Pro
- 6 Reasons IBM Watson Speech to Text is a Game-Changer
- 14 Powerful Ways Talk-to-Text Improves Your Workflow
- 12 Top Windows Speech-to-Text Software for Efficient Transcription
- 12 Game-Changing Benefits of Apple's Speech to Text Technology
- 9 Powerful Use Cases for AWS Speech to Text Technology
- 10 Easy Steps to Transcribe YouTube Videos to Text
- transcription audio en texte
- online audio transcription
- free audio file transcription
- free ai audio transcription
- audio transcription service
- audio transcription online free
- audio transcription free online
- audio to transcription software
- audio and transcript
- ai audio transcription free
- voice recording to text converter
- translate voice recording to text
- record voice to text
- audio recording to text converter
- voice recording and transcription
- chatgpt voice to text
- gmail voice to text
- speech to text reader
- speech to text ai free
- speech to talk
- Design Professional Flyers for Free on Your Phone
- Best Free Flyer Maker Apps for Android: Design Like a Pro
- How to Know If Your Business Is Ready for an AI Customer Service Agent
- Revolutionizing Storytelling: From Novels to Screenplays with AI
- Create Engaging Animated Explainer Videos with a Free AI Tool
- Stop Multi-Subscribing: Benchmark Top AI Visual Models in One Canvas
- Best Seedance 2.5 API Provider: Every Price on the Market, Checked at Source
- AI OnlyFans: How to Generate $30,000/Month (Legally)
- Transform Your Script into an Engaging Video with AI Video Maker!
- AI Marketing Automation: A Comprehensive Guide for Small Businesses
- Design Professional Flyers for Free on Your Phone
- Best Free Flyer Maker Apps for Android: Design Like a Pro
- Unleash Creativity: AI Coloring Pages with ColoringBook.ai
- Generate Stunning AI Photos with Google Gemini: A Guide
- Boost Your Etsy Sales with Stunning Digital Invitations!
- Revolutionize Your Etsy Listing with AI Text Generator
- Create Coloring Pages with AI: A Bing AI Tutorial
- Photo Lab App: Transform Your Photos with Stunning AI Effects
- Effortless Design: Rewriting Text with Microsoft Designer's AI
- Create & Sell Kids' Coloring Books with AI - KDP Guide

Copyright ©2026 toolify