































Table of Contents
- Key Points
- Leveraging AI in .NET with Microsoft Extensions AI
- Step-by-Step Guide to Building a .NET AI Chatbot
- GitHub Models Pricing
- Advantages and Disadvantages of Using GitHub Models with .NET
- Frequently Asked Questions
- Understanding AI in .NET: Related Questions


Leveraging AI in .NET with Microsoft Extensions AI
Why .NET Developers Should Explore AI
Today is the perfect moment for .NET developers to delve into the realm of Artificial Intelligence. The latest advancements in AI libraries and tools have made integrating powerful language models into .NET applications incredibly straightforward and accessible. The ability to create intelligent, context-aware chatbots and applications is no longer a distant dream but a practical reality. By harnessing the power of AI, .NET developers can unlock new possibilities and build cutting-edge solutions that enhance user experiences and solve complex problems. Integrating AI opens doors to a vast array of applications, from automated Customer Service to intelligent data analysis, revolutionizing how software interacts with users and data alike. Become a cutting edge AI developer!
Introducing Microsoft.Extensions.AI
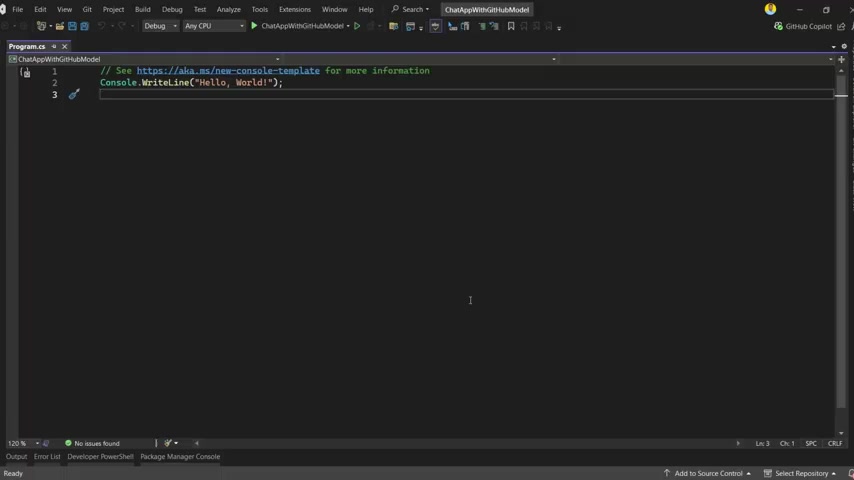
The cornerstone library enabling seamless AI integration is Microsoft.Extensions.AI. This library provides clean and consistent abstractions for working with different AI providers, simplifying the process of incorporating AI functionality into your .NET applications. The key benefit of this library is its consistent approach, allowing developers to switch between different AI providers with minimal code changes. By abstracting away the provider-specific details, it fosters a more modular and maintainable codebase. The library offers a unified interface for performing common AI tasks, such as natural language processing, sentiment analysis, and more. This abstraction promotes code reusability and reduces the complexity of integrating AI into your .NET projects. Key concepts include the IChatClient interface, which facilitates communication with Large Language Models (LLMs). This interface provides a consistent way to send prompts to the model and receive responses.
Microsoft.Extensions.AI is key to next gen .NET AI apps!
GitHub Models Integration: A Practical Approach
This article focuses on integrating GitHub Models with .NET, demonstrating the ease with which you can connect your .NET applications to pre-trained AI models. The process involves setting up an OpenAI adapter, configuring a chat client, and writing a few lines of code to establish communication with the selected model. GitHub Models offers a rich ecosystem of pre-trained AI models ready to be deployed. Integrating them into your .NET applications lets you harness advanced capabilities without the need for extensive training. This integration enables developers to focus on the core functionalities of their applications while relying on pre-built models for AI-driven tasks. Streamlining the development process.
Step-by-Step Guide to Building a .NET AI Chatbot
Prerequisites
Before you begin, ensure that you have the following:
- .NET 9 SDK installed
- Visual Studio or Visual Studio Code with the C# extension
- GitHub account
Step 1: Setting Up a .NET 9 Console App
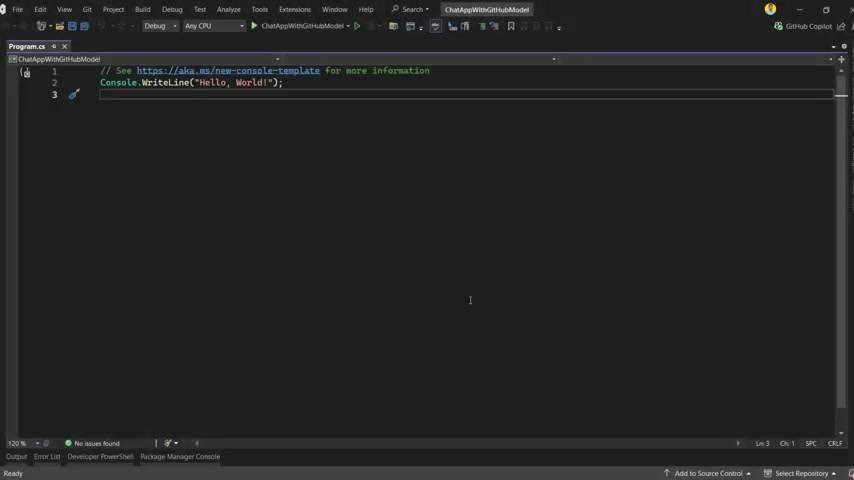
First, create a new .NET 9 console application. Open your terminal or command Prompt and run the following command:
dotnet new console -o ChatAppWithGithubModel
cd ChatAppWithGithubModel
This creates a new console application project named ChatAppWithGithubModel and navigates into the project directory.
Step 2: Adding Required Libraries via NuGet
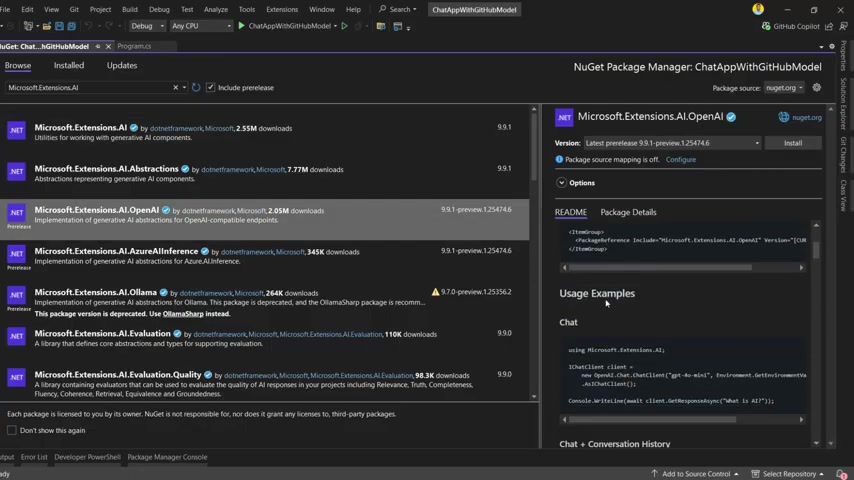
Next, add the necessary libraries using the NuGet package manager. This involves installing the Microsoft.Extensions.AI.OpenAI package, which handles communication with OpenAI-compatible endpoints, including GitHub Models. Open the NuGet Package Manager by right-clicking on your project in Visual Studio and selecting "Manage NuGet Packages." Alternatively, you can use the .NET CLI.
Search for Microsoft.Extensions.AI.OpenAI and install the latest stable version . This package provides the necessary components to interact with OpenAI-compatible AI models. It handles the communication and data serialization, allowing you to focus on implementing the core logic of your chatbot.
dotnet add package Microsoft.Extensions.AI.OpenAIStep 3: Implementing the Chat Client
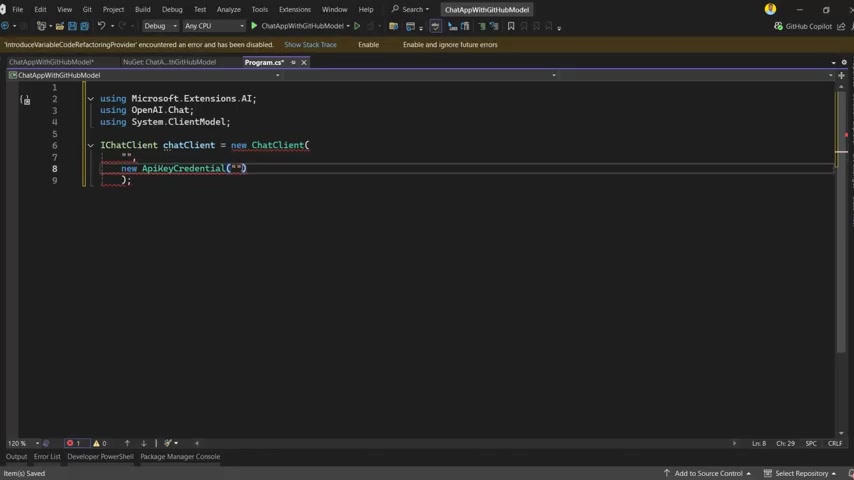
Now, let's implement the chat client using the IChatClient interface from the Microsoft.Extensions.AI library. This involves configuring the chat client and adding the necessary code to handle user input and model responses.
- Clear the
Program.csfile: Remove the default code inProgram.cs. - Add the Chat Client implementation: Add the following code to your
Program.csfile:
using Microsoft.Extensions.AI.Chat;
using OpenAI;

IChatClient chatClient = new ChatClient(
    new ApiKeyCredential("YOUR_GITHUB_API_KEY"),
    new OpenAIClientOptions
    {
        Endpoint = new Uri("https://models.github.ai/inference")
    }).AsChatClient();

Console.WriteLine("GPT 4.1 Mini Chat - Type 'exit' to quit");

while (true)
{
    Console.Write("You: ");
    string userInput = Console.ReadLine();

    if (string.IsNullOrEmpty(userInput))
    {
        continue;
    }

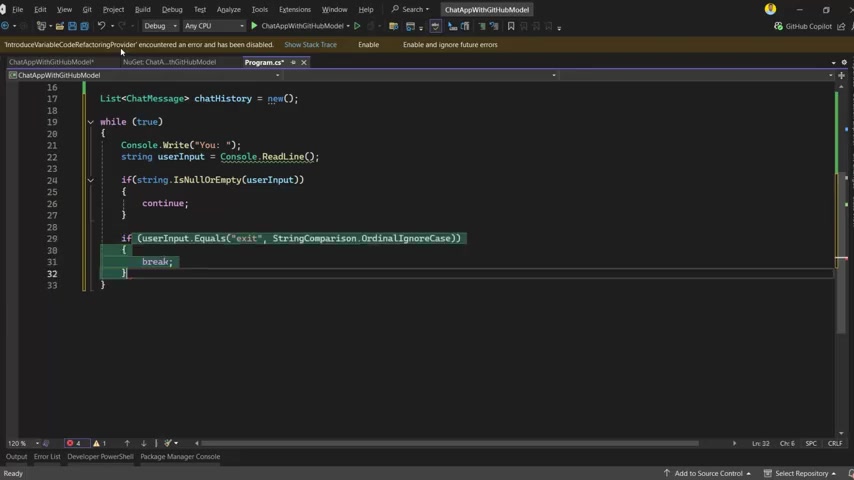
    if (userInput.Equals("exit", StringComparison.OrdinalIgnoreCase))
    {
        break;
    }

    var messages = new List<ChatMessage>();
    messages.Add(new ChatMessage(ChatRole.User, userInput));

    var chatCompletionsOptions = new ChatCompletionsOptions()
    {
        Messages = messages,
        MaxTokens = 1000,
        Temperature = 0.7f,
        TopP = 0.95f,
        N = 1,
        StopSequences = { "
User:", "
Assistant:" }
    };

    var response = await chatClient.GetChatCompletionsAsync(chatCompletionsOptions);
    var botMessage = response.Choices[0].Message;
    Console.WriteLine($"Assistant: {botMessage.Content}");
}
Replace YOUR_GITHUB_API_KEY with your actual GitHub API key.
Step 4: Generating Your GitHub API Key
To connect to GitHub Models, you'll need to generate a Personal Access Token (API Key). This token authenticates your application and grants access to the desired models.
- Navigate to GitHub Models Marketplace: Go to the GitHub Models marketplace.
- Select a Model: Choose a model that fits your project needs.
- Use this Model: Click the "Use this model" button.
- Create Personal Access Token: Click the "Create Personal Access Token" button and follow the instructions to generate your API key. The token will only be visible once, store it securely!
Step 5: Configuring the Model Name and Endpoint
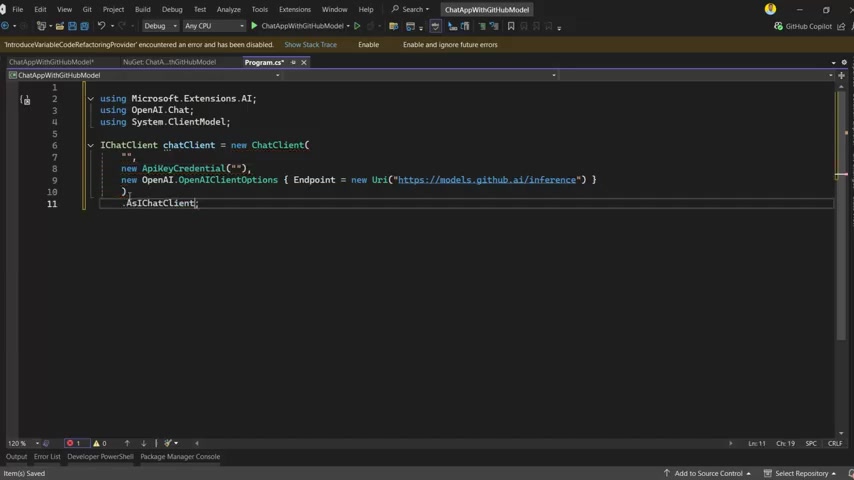
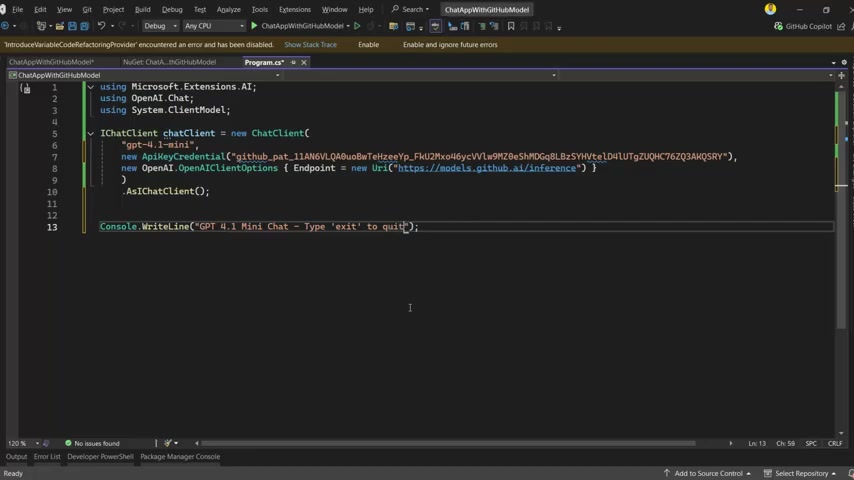
Modify the code to include the correct model name and endpoint for GitHub Models. In the example code, ensure that the Endpoint URI is set to https://models.github.ai/inference. The ModelId depends on which Model you choose.
Modify the IchatClient to new ChatClient and provide the right parameter
IChatClient chatClient = new ChatClient(
    new ApiKeyCredential("YOUR_GITHUB_API_KEY"),
    new OpenAIClientOptions
    {
        Endpoint = new Uri("https://models.github.ai/inference")
    }).AsChatClient();
Step 6: Running the Chat Application
Build and run the application to start interacting with the AI Chatbot. This involves executing the application and entering prompts to test the model's responses. Use the following command to run your application:
dotnet runThe application will start, and you can begin typing your messages. Type exit to quit the chat.
Step 7: Enhancing the Chat Experience (Optional)
To improve the user experience, you can customize the console's text color. This helps distinguish between user input and assistant responses. Modify the code to include the following lines:
Console.ForegroundColor = ConsoleColor.Green; // Assistant's response color
Console.WriteLine($"Assistant: {botMessage.Content}");
Console.ResetColor(); // Reset to default color
Additionally, you can store conversation history to provide context to the model, enabling it to remember previous interactions.
GitHub Models Pricing
GitHub Free Tier and Paid Options
GitHub Models offers a free tier that allows developers to start building AI applications with limited usage.
For higher limits and more advanced features, there are paid options available.
- Free Tier: Offers free access with simple rate limits, suitable for initial development and testing.
- Paid Tiers: Provide increased rate limits and additional features, catering to production-level applications and more demanding workloads.
It's important to review the pricing details on the GitHub Models marketplace to choose the tier that best aligns with your project requirements.





Most people like

































Report
Please select a reason for reporting
- 13 Reasons to Switch from Snapchat to Text Messaging
- 7 Powerful Speech to Text Apps to Boost Productivity
- 10 Best Speech to Text Tools for Effortless Transcription
- 13 Free Tools to Easily Transcribe Audio to Text
- 15 Surprising Ways Google's Speech-to-Text Boosts Productivity
- 7 Best Free Online Audio to Text Transcription Tools
- 9 Tips to Transcribe Speech to Text Faster and Better
- 13 Best Speech to Text Software for Windows 10 in 2023
- 7 Tips for Choosing the Best Transcriber for Audio to Text
- 11 Reasons Why Dragon Speech-to-Text Apps are Game-Changers
- 6 Secrets to Enhance Your Speech to Text Transcription
- 6 Brilliant Ways to Boost Productivity with Talk-to-Text on Your MacBook
- 6 Ways Transcription Software Converts Audio to Text
- 8 Tips to Transcribe Speech to Text Like a Pro
- 6 Reasons IBM Watson Speech to Text is a Game-Changer
- 14 Powerful Ways Talk-to-Text Improves Your Workflow
- 12 Top Windows Speech-to-Text Software for Efficient Transcription
- 12 Game-Changing Benefits of Apple's Speech to Text Technology
- 9 Powerful Use Cases for AWS Speech to Text Technology
- 10 Easy Steps to Transcribe YouTube Videos to Text
- transcription audio en texte
- online audio transcription
- free audio file transcription
- free ai audio transcription
- audio transcription service
- audio transcription online free
- audio transcription free online
- audio to transcription software
- audio and transcript
- ai audio transcription free
- voice recording to text converter
- translate voice recording to text
- record voice to text
- audio recording to text converter
- voice recording and transcription
- chatgpt voice to text
- gmail voice to text
- speech to text reader
- speech to text ai free
- speech to talk
- How to Use AI Tools to Find Internal Linking Opportunities Across a Business Website
- Discover Your Perfect Haircut with AI Hairstyle Apps
- Free Reputation Calculator Tools: How They're Adapting to Score AI Visibility, Not Just Rankings
- Design Professional Flyers for Free on Your Phone
- Best Free Flyer Maker Apps for Android: Design Like a Pro
- How to Know If Your Business Is Ready for an AI Customer Service Agent
- Revolutionizing Storytelling: From Novels to Screenplays with AI
- Create Engaging Animated Explainer Videos with a Free AI Tool
- Stop Multi-Subscribing: Benchmark Top AI Visual Models in One Canvas
- Best Seedance 2.5 API Provider: Every Price on the Market, Checked at Source
- Top AI Social Media Management Tools: Automate Your Content Strategy
- Free AI Text to Video Generator: Create Stunning Videos from Text
- Discover 17 ChatGPT Alternatives: A Comprehensive Comparison
- Character.AI vs. Janitor AI: Which AI Chat Platform Reigns Supreme?
- Top Virtual Assistant Companies in 2026: Reviews, Pricing, and Plans Compared
- Unveiling FaceCheck.ID: Revolutionizing Reverse Image Searches with AI
- 11 Best AI Dialers in 2026: Features, Pricing, Pros and Cons
- How I Direct Consistent AI Clips: A Hands-On Guide to Multi-Model Generation
- A Realistic Review of the Photo Generator Image Tool
- Playwright MCP Server: Automated Web Testing with Agent Mode

Copyright ©2026 toolify