Upgrade Your Gaming and Content Creation Experience with Asus Prime X399-A Build
Table of Contents:
- Introduction
- Building a New Streaming and Editing Rig
- Shopping at Micro Center
- Upgrading the Current Computer
- The Components for the New Build
- The Asus Prime X399-A Motherboard
- The Cooler Master MasterAir MA621P Cooler
- The AMD Threadripper 1950X CPU
- Unboxing and Installing the Motherboard
- Unboxing and Installing the Threadripper CPU
- Thermal Pasting and Water Cooler Installation
- Completing the Installation
- testing the Rig
- Conclusion
Building a New Streaming and Editing Rig
Are you a gaming enthusiast or a content creator looking to upgrade your computer system? In this article, we will guide you through the process of building a brand new streaming and editing rig. We will explore the components needed for the upgrade and take a trip to Micro Center, a well-known electronics store, to purchase the necessary parts. Let's dive into the world of PC gaming and content creation as we embark on this exciting journey.
Introduction
In today's digital age, having a powerful computer system is essential for gamers and content creators. Whether you are live streaming your favorite games on platforms like Xbox and YouTube, or editing videos for your YouTube Channel, having a reliable and efficient rig is crucial. In this article, we will focus on building a new streaming and editing rig to enhance your gaming and content creation experience.
Shopping at Micro Center
One of the best places to find all the necessary components for your new rig is Micro Center. Micro Center is a popular destination for PC enthusiasts, offering a wide range of electronics and computer parts. From high-end gaming hardware to affordable accessories, Micro Center can meet all your gaming and content creation needs. So, let's head to Micro Center and start our shopping spree.
Upgrading the Current Computer
Before we dive into the new build, let's take a moment to assess the current state of our computer. As we can see, it's in quite a mess. But don't worry, we'll guide you through the process of upgrading your system and organizing your workspace. Remember, keeping your computer clean and organized is vital for optimal performance. Now, let's get ready to upgrade to the brand new AMD Threadripper 1950X processor.
The Components for the New Build
For our new streaming and editing rig, we have carefully selected the following components:
-
The Asus Prime X399-A Motherboard: This motherboard offers essential features for our build. It supports the AMD Threadripper processor and comes with Aura Sync RGB lighting for added customizability.
-
The Cooler Master MasterAir MA621P Cooler: This open-air cooler is designed specifically for Threadripper processors and provides excellent cooling performance. With its six heat pipes and heat sink spreader, it ensures efficient heat dissipation.
-
The AMD Threadripper 1950X CPU: The Threadripper 1950X is a powerful processor that offers 16 cores and 32 Threads. With a TDP of 281 watts, it requires reliable cooling to unleash its full potential.
Unboxing and Installing the Motherboard
Let's start the installation process by unboxing and installing the Asus Prime X399-A motherboard. This motherboard offers a wide range of features, including support for quad-channel RAM and USB 3.1. With its Aura Sync RGB lighting, you can customize the aesthetics of your rig. Let's take a closer look at its specifications and get it installed.
Unboxing and Installing the Threadripper CPU
Now, it's time to unbox and install the star of our build, the AMD Threadripper 1950X CPU. This beast of a processor promises exceptional performance with its 16 cores and 32 threads. With features like Precision Boost and XFR, the Threadripper is a powerhouse for both gaming and content creation. Let's carefully handle the CPU and get it installed on the motherboard.
Thermal Pasting and Water Cooler Installation
To ensure efficient cooling for our Threadripper CPU, we'll apply thermal paste and install the Cooler Master MasterAir MA621P cooler. This open-air cooler offers excellent heat dissipation with its six heat pipes and dedicated heat sink spreader. Let's follow the instructions and get our cooling solution in place.
Completing the Installation
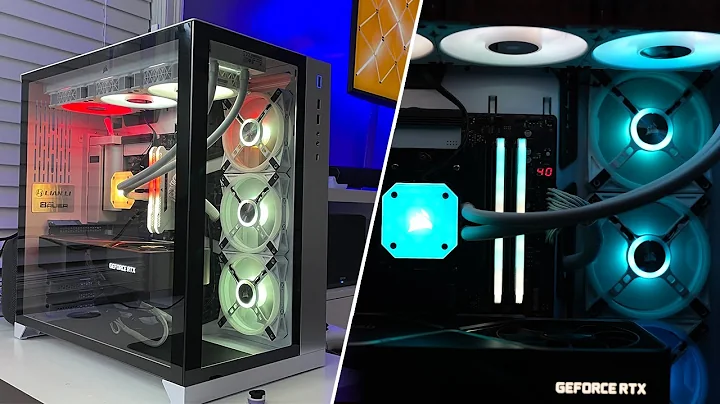
After a laborious installation process, we have finally completed the setup of our new rig. Although the wiring may not be perfect at the moment, it will suffice until we upgrade to a new case. With the CPU, cooler, and motherboard in place, we are just a few steps away from testing our new streaming and editing rig.
Testing the Rig
With our rig all set up, it's time to power it on and test its performance. We'll connect a monitor and eagerly wait for the system to boot up. This is an exciting moment, as we get to experience the enhanced capabilities of our newly built rig. Let's see how it performs in both gaming and content creation tasks.
Conclusion
Congratulations! You have successfully built a brand new streaming and editing rig. With advanced components like the AMD Threadripper 1950X CPU and the Asus Prime X399-A motherboard, your gaming and content creation experience is expected to reach new heights. Remember to keep your setup clean and well-organized for optimal performance. Enjoy your new rig and have fun exploring the world of gaming and content creation!
Highlights:
- Building a new streaming and editing rig for improved gaming and content creation experience.
- Shopping at Micro Center, a renowned electronics store, for all the necessary components.
- Upgrading the current computer to prepare for the new build.
- Selecting the Asus Prime X399-A motherboard, Cooler Master MasterAir MA621P cooler, and AMD Threadripper 1950X CPU as the key components.
- Unboxing and installing the motherboard, followed by the Threadripper CPU.
- Applying thermal paste and installing the water cooler for efficient cooling.
- Completing the installation process, despite some wiring challenges.
- Testing the rig's performance in gaming and content creation tasks.
FAQ:
Q: Where can I find the necessary components for building a new streaming and editing rig?
A: Micro Center is an excellent place to shop for all the required components.
Q: What are the key components for the new rig?
A: The key components include the Asus Prime X399-A motherboard, Cooler Master MasterAir MA621P cooler, and AMD Threadripper 1950X CPU.
Q: How important is cable management during the installation process?
A: Cable management is vital for optimal performance and a neat appearance. However, it can be improved later when upgrading to a new case.
Q: What factors should I consider when choosing a CPU for gaming and content creation?
A: Factors like the number of cores, threads, and clock speed are important for optimal performance in gaming and content creation tasks.
Q: Can I customize the lighting aesthetics of my rig?
A: Yes, the Asus Prime X399-A motherboard offers Aura Sync RGB lighting, allowing you to customize the lighting aesthetics according to your preferences.
Resources:


 No difficulty


 WHY YOU SHOULD CHOOSE TOOLIFY