Upgrade Your Home Server for Enhanced Performance!
Table of Contents
- Introduction
- The Need for an Upgrade
- Selecting the Right Motherboard
- Choosing the CPU
- ECC Memory for Data Integrity
- Installing the CPU Cooler
- Exploring the Fractal Design Define R6 Case
- Installing the Hard Drives
- Power Supply and Cable Management
- testing and Optimizing the Server
🖥️ Upgrading My Home Server for Better Performance 💪
Is your home server starting to experience performance issues? Are you struggling to keep up with the demands of file syncing and storage? Well, fear not! In this article, I will take you through the journey of upgrading my own home server to overcome these challenges and achieve better performance. From selecting the right components to optimizing the system, I'll share my experience and insights to help you build a powerful and efficient server. So, let's dive in and discover the steps involved in this exciting project.
1. Introduction
One year ago, I built my first-ever home server, and it has been running flawlessly, serving as my storage for files and running applications like Nextcloud and a wiki. However, as time went on, I encountered issues with the Nextcloud sync, especially when it came to syncing my YouTube-related projects. This led to a slowdown in my main gaming PC. Determined to find a solution, I embarked on the journey of upgrading my server to a more powerful and efficient system.
2. The Need for an Upgrade
The initial server served its purpose well, but it became apparent that I needed a more robust solution to handle the demands of my YouTube projects and ensure seamless syncing with Nextcloud. Additionally, I wanted to use my old server as an off-site backup and render server. With these requirements in mind, I set out to find the perfect components to breathe new life into my server.
3. Selecting the Right Motherboard
My initial plan was to use the X570 Phantom Gaming 4 motherboard. However, due to compatibility issues with my chosen cooler, the Noctua NHD15, I had to pivot and opt for an ASRock motherboard instead. While the Phantom Gaming 4 would have been a great choice, the overhang of the NHD15 cooling fan made it impossible to mount a graphics card properly. After some research, I settled on the X570 Taichi, which offered the necessary features and compatibility for my upgrade.
4. Choosing the CPU
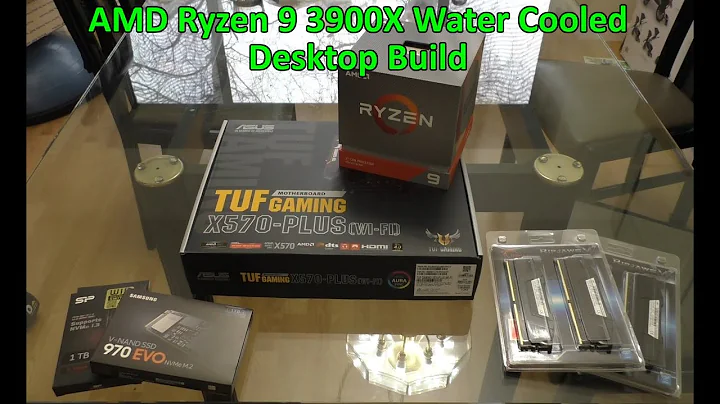
For a more powerful and efficient server, I opted for the Ryzen 7 3700X CPU. With its 8 cores and 16 Threads, this CPU provided the performance boost I needed for my workstation server setup. Applications like Terra and Confluence, which would be running on the server, require significant thread counts, and the Ryzen 7 3700X was up to the task. Additionally, the CPU cooler I selected, the Noctua NHD15, ensured excellent cooling performance.
5. ECC Memory for Data Integrity
To ensure data integrity and smooth operation of my ZFS RAID setup, I chose ECC memory for my server. ECC (Error-Correcting Code) memory detects and corrects errors in memory, which is essential for a reliable and stable storage system. With 32GB of Kingston Premier Server DDR4 ECC memory installed, I felt confident that my data would be protected and my server would operate flawlessly.
6. Installing the CPU Cooler
The Noctua NHD15 CPU cooler, known for its exceptional cooling performance and low noise, was a perfect fit for my upgraded server. With its premium build quality and robust fans, I knew this cooler would keep my CPU running smoothly under heavy load. Using thermal paste from Thermal Grizzly, I carefully installed the cooler, ensuring a secure and efficient connection between the CPU and the cooler.
7. Exploring the Fractal Design Define R6 Case
To house all the upgraded components, I opted for the Fractal Design Define R6 case. Its sleek design, sound-dampening materials, and excellent airflow made it the perfect choice for a silent and efficient server. With room for up to 11 hard drives, this case provided ample storage capacity for my needs. The included fan hub and convenient cable management features made building and organizing the server a breeze.
8. Installing the Hard Drives
With the focus on storage, I installed four 8TB Seagate IronWolf hard drives in a RAIDZ1 configuration, ensuring data redundancy and protection. These drives, designed for 24/7 operation, were perfect for my storage-intensive applications. Additionally, I added a fifth hard drive for the Nextcloud instance to securely store my private files from my gaming PC. With careful placement and airflow management, I ensured that the hard drives remained cool and operational.
9. Power Supply and Cable Management
For a silent and efficient server, I chose the SeaSonic PRIME Fanless TX-700 power supply. With its fanless design and titanium rating for energy efficiency, this power supply provided both silence and performance. It seamlessly integrated into the case, thanks to the removable power supply shroud. With carefully managed cables and the use of Velcro straps, I achieved a clean and organized setup, improving both airflow and aesthetics.
10. Testing and Optimizing the Server
After all the components were installed and the cables were neatly managed, it was time to power on the server and fine-tune its performance. I entered the BIOS to monitor temperatures and adjust voltage settings. By reducing the Vcore voltage and optimizing fan speeds, I was able to achieve lower temperatures and a quieter system. With a power consumption of around 125 watts during heavy disk activity, the server operated efficiently and reliably.
In conclusion, the process of upgrading my home server was both challenging and rewarding. With careful selection of components, proper installation, and optimization, I was able to build a powerful and efficient server that met my storage and performance needs. Whether you're a DIY enthusiast or a professional considering a server upgrade, the steps and insights shared in this article can guide you towards building your own high-performing server. Happy building!
Highlights:
- Upgrading my home server to overcome performance issues
- Selecting the right motherboard for compatibility and performance
- Choosing the Ryzen 7 3700X CPU for increased power and efficiency
- ECC memory for data integrity and reliable storage
- Installing the Noctua NHD15 CPU cooler for exceptional cooling performance
- Exploring the features of the Fractal Design Define R6 case for silent operation
- Installing 8TB Seagate IronWolf hard drives for ample storage capacity
- Powering the server with the SeaSonic PRIME Fanless TX-700 power supply
- Testing and optimizing the server for optimal performance and efficiency
- Achieving a quiet and efficient home server setup
FAQ
Q: Can I use a different CPU cooler for my server upgrade?
A: Yes, you can choose a CPU cooler that fits your specific requirements and preferences. The Noctua NHD15 was my choice for its excellent performance and low noise, but there are other options available on the market.
Q: Is ECC memory necessary for a home server?
A: ECC memory is not necessary for all home server setups, but it provides an added layer of data integrity and protection. If you're using storage-intensive applications like ZFS, ECC memory can help ensure the reliability of your data.
Q: Can I use a different case for my server build?
A: Absolutely! The Fractal Design Define R6 was my choice for its sound-dampening materials and excellent airflow, but there are numerous cases available that can accommodate your server components. Consider your cooling needs, storage requirements, and aesthetic preferences when selecting a case.
Q: What is the benefit of a fanless power supply?
A: A fanless power supply, like the SeaSonic PRIME Fanless TX-700, offers silent operation and increased efficiency. It eliminates potential noise from a spinning fan and reduces the overall power consumption of your server.
Q: How can I optimize my server's performance?
A: Optimizing server performance involves adjusting voltage settings, managing fan speeds, and monitoring temperatures. By fine-tuning these parameters, you can achieve lower temperatures and quieter operation while ensuring optimal performance for your applications.
 WHY YOU SHOULD CHOOSE TOOLIFY


