


Build the Ultimate Workstation/Gaming PC with Ryzen 9 5950X and RTX 3080
Find AI Tools No difficulty
No complicated process
Find ai tools
No difficulty
No complicated process
Find ai tools


Most people like
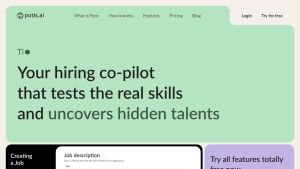
Potis AI

 < 5K
< 5K
 17.89%
 4
4
Clean and fast bulk candidates screening with behavioral interviews and real case assessments.
AI Interview Assistant
AI Recruiting
AD

Faircado
15.6K
 66.97%
4
66.97%
4
AI-powered second-hand shopping assistant.
AI Search Engine
AI Product Description Generator
AD

Merlin AI
1.4M
 16.95%
5
16.95%
5
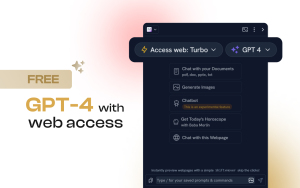
1-click access to AI-powered ChatGPT, GPT-4, Claude2, and Llama 2 for all websites.
AI Chatbot
Large Language Models (LLMs)
AD

Chaindesk AI
27.1K
9.92%
22
Create custom AI chatbots with Chaindesk for streamlined customer support.
AI Chatbot
Large Language Models (LLMs)
No-Code&Low-Code
AI Product Description Generator
AI Reply Assistant
AI Response Generator
AD

Easy-Peasy.AI
874.9K
22.98%
12
Easy-Peasy.AI is an AI tool that helps users generate original content faster and improve writing skills.
AI Blog Writer
AI Content Generator
AI Creative Writing
Copywriting
General Writing
Writing Assistants
AD

Socialdude.ai
5.5K
 62.75%
7
62.75%
7
AI-driven content creation for all social platforms.
AI Ad Creative Assistant
AI Ad Generator
AI Advertising Assistant
AI Content Generator
AI Instagram Assistant
AI Social Media Assistant
AD

AimindCrafter
< 5K
14
Cutting-edge text creation technology.
General Writing
Text to Image
AI Blog Writer
AI Rewriter
AI Content Generator
AI Creative Writing
Writing Assistants
AI Photo & Image Generator
AI Analytics Assistant
Photo & Image Editor
AI Product Description Generator
Copywriting
Text-to-Speech
Large Language Models (LLMs)
AI Ad Creative Assistant
AI Ad Generator
AI Chatbot
AI Illustration Generator
AI Script Writing
Summarizer
Paraphraser
AI Email Writer
AI Advertising Assistant
AI Poem & Poetry Generator
AI Story Writing
AI Lyrics Generator
Essay Writer
AD
Aili
11.1K
 38.23%
2
38.23%
2
Boost Knowledge Acquisition & Minimize AI Subscription Costs
AI Chatbot
AI Reply Assistant
AI Knowledge Base
Large Language Models (LLMs)
Life Assistant
AD

Pen2txt
< 5K
31.34%
4
Effortlessly transform handwritten notes into digital text
Handwriting
Transcription
Transcriber
AD
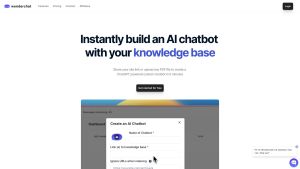
Wonderchat
61K
31%
3
Create custom chatbot with Wonderchat, boost customer response speed by 100% and reduce workload.
AI Chatbot
AI Reply Assistant
Large Language Models (LLMs)
AD

DreamGen: AI role-play & story-writing
247.3K
26.72%
5
Unleash your imagination with DreamGen.
AI Story Writing
AI Character
Prompt
Large Language Models (LLMs)
AI Creative Writing
AD

Llama中文社区
14.5K
 62.5%
2
62.5%
2
Home for Llama models, technologies, and enthusiasts.
Large Language Models (LLMs)
AI Knowledge Base
AI Knowledge Graph
AD
Are you spending too much time looking for ai tools?
- App rating
- 4.9
- AI Tools
- 100k+
- Trusted Users
- 5000+
 WHY YOU SHOULD CHOOSE TOOLIFY
TOOLIFY is the best ai tool source.
Browse More Content
AI News
- How to boost your SQL Coding Efficiency in a Multi-Database Environment
- Unleash Your Potential: Why ITIL Certification is the Smartest Investment for Your Future
- Navigating the Web Unseen: How Dolphin Anty Shields Your Digital Identity
- Human Writing vs. AI Writing: What to Choose for College Education Needs
- Elevate Your Profits By Leveraging Coinrule's AI Trading Advantage
- A Red Carpet-Worthy Arrival At Dubai’s Most Exclusive Hotels And Resorts With Rented Lamborghini
- Design services from WhitePage: a creative approach to solving your problems
- Effortless Editing: Object Removal from Photo Techniques
- Tiktok ads spy tool Review
- Monitoring Machine Learning Models with GPU-Enhanced Cloud Services
GPTS
- Discover Leanbe: Boost Your Customer Engagement and Product Development
- Unlock Your Productivity Potential with LeanBe
- Unleash Your Naval Power! Best Naval Civs in Civilization 5 - Part 7
- Master Algebra: Essential Guide for March SAT Math
- Let God Lead and Watch Your Life Transform | Inspirational Video
- Magewell XI204XE SD/HD Video Capture Card Review
- Discover Nepal's Ultimate Hiking Adventure
- Master the Art of Debugging with Our Step-by-Step Guide
- Maximize Customer Satisfaction with Leanbe's Feedback Tool
- Unleashing the Power of AI: A Closer Look
Stable Video Diffusion
- Transform Your Images with Microsoft's BING and DALL-E 3
- Create Stunning Images with AI for Free!
- Unleash Your Creativity with Microsoft Bing AI Image Creator
- Create Unlimited AI Images for Free!
- Discover the Amazing Microsoft Bing Image Creator
- Create Stunning Images with Microsoft Image Creator
- AI Showdown: Stable Diffusion vs Dall E vs Bing Image Creator
- Create Stunning Images with Free Ai Text to Image Tool
- Unleashing Generative AI: Exploring Opportunities in QE&T
- Create a YouTube Channel with AI: ChatGPT, Bing Image Maker, Canva
Gemini AI
- Google's AI Demo Scandal Sparks Stock Plunge
- Unveiling the Yoga Master: the Life of Tirumalai Krishnamacharya
- Hilarious Encounter: Jimmy's Unforgettable Moment with Robert Irwin
- Google's Incredible Gemini Demo: Unveiling the Future
- Say Goodbye to Under Eye Dark Circles - Simple Makeup Tips
- Discover Your Magical Soul Mate in ASMR Cosplay Role Play
- Boost Kidney Health with these Top Foods
- OpenAI's GEMINI 1.0 Under Scrutiny
- Unveiling the Mind-Blowing Gemini Ultra!
- Shocking AI News: Google's Deception Exposed!
Related Articles


Refresh Articles
