Unleash the Power of Video Editing with Ryzen 9 Upgrade
Table of Contents
- Introduction
- Upgrading the CPU and Motherboard
- Installing the CPU
- Installing the Cooler
- Installing the RAM
- Connecting the CPU Fan and RGB Cables
- Disassembling the Old Computer
- Removing the GPUs
- Removing the Wireless Card
- Disconnecting Electrical Hookups
- Removing the Old Motherboard
- Installing the M.2 SSD
- Installing the I/O Shield
- Installing the Standoffs
- Mounting the New Motherboard
- Connecting Power and USB Headers
- Installing the Wireless Card
- Installing the GPUs and Closing the Case
- Benchmarking the Upgrade
- Cinebench Performance Test
- User Benchmark Test
- Conclusion
- Support Our Channel
Upgrading Your Video Editing PC
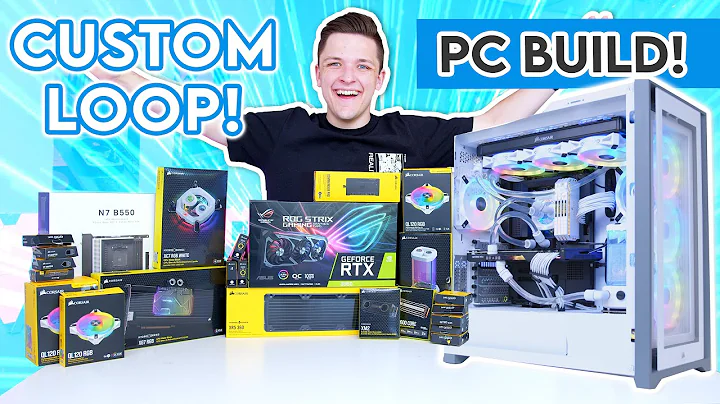
Welcome to A Couple of Monkeys! In this article, we will take you through the process of upgrading a video editing PC. We recently made a big update to our own computer, specifically upgrading the CPU, motherboard, and RAM. We will guide you step by step, providing detailed instructions and insights into our decision-making process. So let's dive in and discover how you can enhance your video editing capabilities!
1. Introduction
Video editing is a resource-intensive task that requires a powerful computer to ensure smooth and efficient workflow. As content creators ourselves, we understand the challenges faced when editing videos on a less capable system. That's why we decided to upgrade our video editing PC to enhance its performance. In this article, we will provide you with a detailed account of our upgrade process, sharing our experiences, and the improvements we observed.
2. Upgrading the CPU and Motherboard
The central processing unit (CPU) is the heart of any computer system, especially when it comes to video editing. Upgrading the CPU will significantly improve the rendering and processing speed of your PC. Alongside the CPU, it is essential to upgrade the motherboard and RAM for optimal performance. Let's see how we accomplished this.
2.1 Installing the CPU
Before diving into the installation process, make sure you have chosen a compatible CPU and motherboard. We opted for the AMD Ryzen 9 3900X and the ASUS B550M-PLUS TUF Gaming motherboard. To install the CPU, follow these steps:
- Gently remove the CPU from its packaging, being cautious not to touch the Pin contacts.
- Locate the CPU socket on the motherboard and lift the retention arm.
- In one corner of the CPU, you'll find a small arrow. Align this arrow with the corresponding corner on the CPU socket.
- Carefully place the CPU into the socket, ensuring it is correctly aligned.
- Lower the retention arm back into place, securing the CPU.
2.2 Installing the Cooler
A reliable CPU cooler is essential for maintaining optimal temperature levels during intensive tasks like video editing. The AMD Ryzen 9 3900X comes with a stock cooler that includes thermal paste pre-applied. Here's how to install it:
- Gently place the cooler on top of the CPU.
- Align the mounting brackets with the corresponding holes on the motherboard.
- Press down on each corner of the cooler until the locking tabs engage.
- Ensure the cooler is firmly and evenly seated on the CPU.
2.3 Installing the RAM
Upgrading RAM is crucial for smooth multitasking and handling large video files. We chose the Corsair Vengeance LPX 16GB RAM kit. Follow these steps to install the RAM:
- Locate the RAM slots on the motherboard, typically color-coded.
- Press down firmly on the RAM module until it clicks into place.
- Install the RAM in the appropriate slots for dual-channel operation.
- Repeat the process for the other RAM modules if applicable.
2.4 Connecting the CPU Fan and RGB Cables
To ensure proper cooling and aesthetics, it is important to connect the CPU fan and RGB cables. Here's what you need to do:
- Locate the CPU fan header on the motherboard.
- Connect the CPU fan cable to the header, ensuring a secure connection.
- If your fan has RGB lighting, connect the RGB cables to the corresponding headers.
- Refer to the motherboard manual for the exact location of these headers.
That concludes the installation of the CPU, cooler, RAM, and necessary cables. We've now laid a solid foundation for an improved video editing experience.
3. Disassembling the Old Computer
Before we can complete the upgrade, we need to disassemble the old computer. This involves removing the unnecessary components and preparing the case for the new motherboard and hardware.
3.1 Removing the GPUs
If you have dedicated graphics cards (GPUs) in your system, it's essential to remove them to access the motherboard easily. Follow these steps to remove the GPUs:
- Open the computer case and locate the GPUs.
- Disconnect any power cables connected to the GPUs.
- Release the retention clips or screws that secure the GPUs in place.
- Gently lift the GPUs out of their slots and set them aside in a safe place.
3.2 Removing the Wireless Card
If you have a wireless card installed, removing it at this stage can provide better access and prevent any accidental damage when handling other components. Here's how to remove the wireless card:
- Locate the wireless card within the motherboard slots.
- Disconnect any antennas or cables connected to the wireless card.
- Release any retention clips or screws holding the wireless card in place.
- Carefully lift the wireless card out of its slot and set it aside.
3.3 Disconnecting Electrical Hookups
To remove the motherboard, you must disconnect all electrical hookups connecting it to various components. Follow these steps:
- Identify all the power cables, data cables, and front panel connectors connected to the motherboard.
- Gently remove each cable by pulling straight out, ensuring not to damage any connectors.
- Use zip ties or clips to manage cables and keep them organized, preventing tangling or interference.
3.4 Removing the Old Motherboard
Now that all the cables are detached, we can proceed with removing the old motherboard. Here's what you need to do:
- Locate and remove any screws securing the motherboard to the case.
- Pay attention to any standoffs or mounting points on the case that align with the motherboard.
- Carefully lift the old motherboard out of the case, taking care not to damage any components.
- Once the motherboard is removed, set it aside or prepare it for replacement.
3.5 Installing the M.2 SSD
If you have an M.2 SSD, this is an excellent opportunity to install it on your new motherboard. Follow these steps:
- Identify the M.2 slots on the motherboard. Refer to the motherboard manual for their locations.
- Choose the appropriate slot for your M.2 SSD, considering factors like available bandwidth and cooling options.
- Gently insert the M.2 SSD into the slot at a slight angle.
- Press down on the SSD until it is firmly seated in the slot.
- If available, attach the heat sink provided with the motherboard to the M.2 SSD to ensure optimal performance and longevity.
3.6 Installing the I/O Shield
Before mounting the new motherboard, it's essential to install the I/O shield to provide proper grounding and protect against Dust and debris. Here's how:
- Locate the I/O shield that came with the motherboard.
- Align the shield with the corresponding cutout on the case.
- Gently press the shield into place until it snaps securely.
3.7 Installing the Standoffs
Standoffs are small raised screws that help support the motherboard and ensure proper alignment with the case. The number and positions of the standoffs may vary depending on your case and motherboard size. Follow these steps to install the standoffs:
- Identify the standoff mounting holes on the case.
- Compare the motherboard's layout with the case's standoff positions.
- Screw the standoffs into the correct mounting holes until tightly secured.
3.8 Mounting the New Motherboard
With the standoffs in place, it's time to install the new motherboard. Follow these steps:
- Carefully position the new motherboard over the standoffs, ensuring it aligns with the I/O shield opening and screw holes.
- Gently lower the motherboard onto the standoffs, ensuring all screw holes line up correctly.
- Insert the mounting screws into the holes and tighten them securely, but avoid overtightening.
3.9 Connecting Power and USB Headers
Now that the motherboard is securely mounted, it's time to connect the power and USB headers. Follow these steps:
- Identify the power connectors, including the main motherboard power and CPU power connectors.
- Connect the appropriate cables from the power supply to their corresponding ports on the motherboard.
- Locate the USB headers on the motherboard and connect the front panel USB cables.
3.10 Installing the Wireless Card
If you removed the wireless card earlier, it's time to reinstall it in its designated slot. Follow these steps:
- Locate the wireless card slot on the motherboard.
- Align the card's connectors with the slot and gently insert it.
- Secure the card in place using the appropriate retention mechanism.
- If needed, reconnect any antennas or cables to the wireless card.
Highlights
- Upgrading your video editing PC can significantly improve performance and productivity.
- CPU, motherboard, and RAM upgrades are crucial for efficient video editing.
- Installing the CPU involves aligning the CPU with the socket and securing it with the retention arm.
- The stock cooler that comes with the CPU should be installed using the mounting brackets and tabs.
- Upgrading the RAM enhances multitasking capabilities and video editing performance.
- Disassembling the old computer helps make way for the new motherboard and hardware.
- Removing GPUs and other components requires careful handling to avoid damage.
- Installing the new motherboard involves mounting the standoffs and securing it with screws.
- Connecting power and USB headers ensures proper functionality.
- Reinstalling the wireless card and other components completes the upgrade process.
FAQ
Q: What are the benefits of upgrading the CPU for video editing?
A: Upgrading the CPU improves rendering speed, multitasking capabilities, and overall video editing performance. It allows for faster processing of large video files and smoother playback during the editing process.
Q: Can I upgrade the CPU without replacing the motherboard?
A: In most cases, upgrading the CPU requires a compatible motherboard. Newer CPUs often use different socket types, making them incompatible with existing motherboards. Therefore, it is recommended to upgrade both the CPU and motherboard for optimal performance.
Q: Will upgrading the RAM improve video editing performance?
A: Yes, upgrading the RAM can significantly enhance video editing performance. It allows for smoother multitasking, faster data transfer, and better handling of large video files. More RAM enables the system to store and access data more efficiently, resulting in improved editing speed and responsiveness.
Q: How can I benchmark the performance of my upgraded video editing PC?
A: There are various benchmarking tools available, such as Cinebench and UserBenchmark, that can assess the performance of your system. These tools evaluate factors like processing speed, rendering capabilities, and overall system performance. Running these tests before and after the upgrade can provide valuable insights into the improvements achieved.
Q: Are there any downsides to upgrading a video editing PC?
A: While upgrading a video editing PC generally brings numerous benefits, there are a few downsides worth considering. Upgrading can be costly, especially if multiple components need to be replaced. Additionally, compatibility issues between new and existing components may arise, requiring additional troubleshooting or replacement parts. It is crucial to research and plan the upgrade carefully to minimize potential drawbacks.
Resources:


 No difficulty


 WHY YOU SHOULD CHOOSE TOOLIFY